

Expanding your garden by cloning your favorite plants can feel like a superpower. It allows you to replicate beautiful blooms or robust fruit trees without the uncertainty of starting from seed. While traditional methods like taking cuttings can be effective, they often come with a high failure rate. This is where modern propagation techniques come in. If you want to successfully clone your plants with a higher success rate and less effort, learning how to use a rooting ball is a game-changer. This simple device makes the process of air layering straightforward and accessible, even for beginners.
Why Use a Rooting Ball?
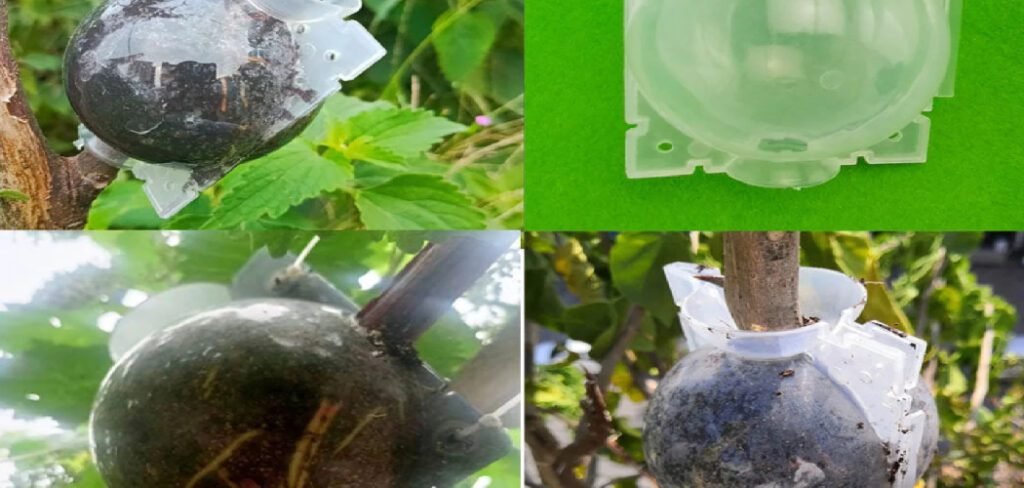
A rooting ball simplifies a propagation method called air layering, an ancient technique for cloning plants. Instead of cutting a stem and placing it in water or soil, air layering encourages roots to grow directly on a branch while it’s still attached to the parent plant. This has several key advantages. The branch continues to receive water and nutrients from the parent, significantly reducing the stress and shock that often cause cuttings to fail.
Using a rooting ball automates this process. The device creates a self-contained, humid environment around a small, wounded section of a branch. This protected space, filled with a moist growing medium, is the perfect incubator for new roots. Once a strong root system develops inside the ball, you simply cut the branch below the new roots and plant your brand-new, mature clone. This method is faster and boasts a much higher success rate than traditional cuttings, making it ideal for propagating woody plants, fruit trees, and rare ornamentals.
8 Step-by-Step Guide on How to Use a Rooting Ball
Step 1: Select a Healthy Stem
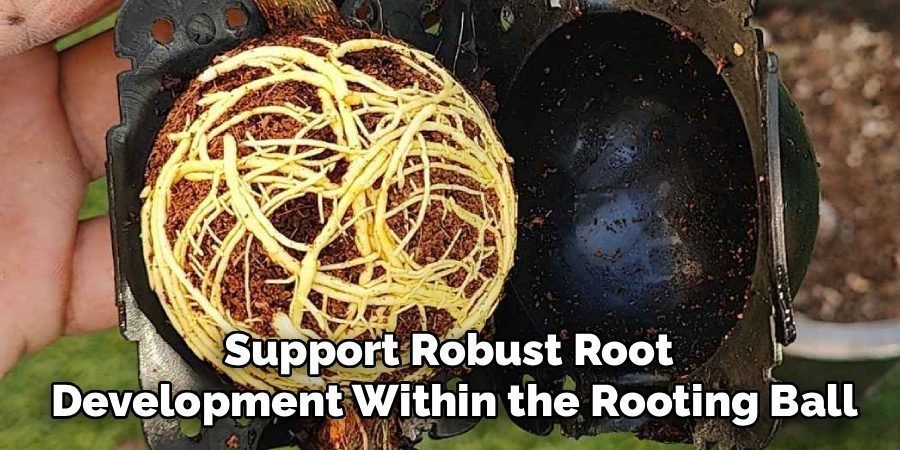
The first step is choosing the right stem on the parent plant. Look for a healthy, straight stem that is roughly the thickness of a pencil. It should be from the current or previous year’s growth, as this wood is still vigorous and more likely to produce roots. Avoid any branches that show signs of disease, pests, or stress, such as yellowing leaves or weak growth. A strong, vibrant stem gives your new plant the best possible start and has enough energy stored to support robust root development within the rooting ball.
Step 2: Prepare the Branch
Once you have selected the perfect stem, you need to prepare it for root growth. Using a clean, sharp knife or pruning shears, carefully remove a 1-inch wide ring of bark from the stem. This process, called girdling, should be done about 12 to 18 inches from the tip of the branch. Scrape away the outer bark and the green cambium layer underneath until you reach the pale, woody core. This action interrupts the flow of nutrients down the stem, causing them to accumulate and encourage root formation at the wound.
Step 3: Apply Rooting Hormone
Applying a rooting hormone is a crucial step that dramatically increases your chances of success. This product, available as a powder, gel, or liquid, contains natural plant hormones that stimulate root development. Using a small brush or a cotton swab, apply the rooting hormone evenly over the entire surface of the exposed wound you created in the previous step. Be sure to cover the top edge of the cut thoroughly, as this is where the new roots will emerge. This single application provides the hormonal signal the plant needs to start growing roots.
Step 4: Prepare the Rooting Ball
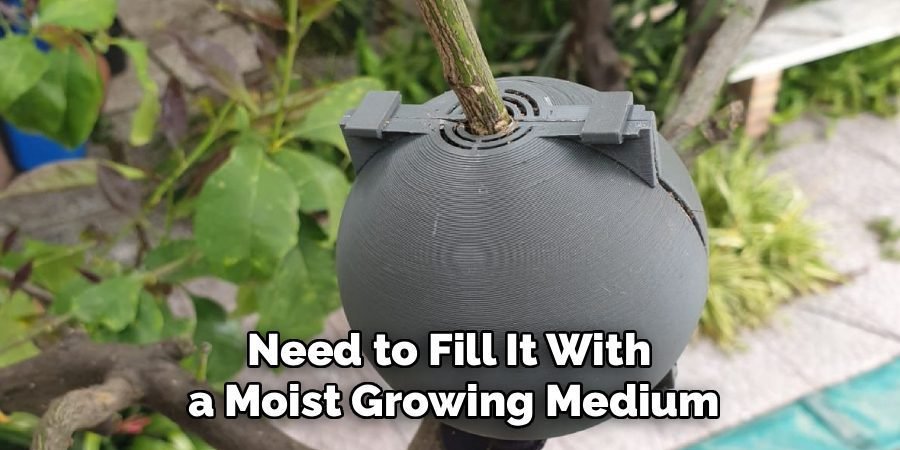
Before attaching the device, you need to fill it with a moist growing medium. Sphagnum moss is the most popular choice because it holds an incredible amount of water while remaining airy, which prevents rot. Soak the moss in water until it is fully saturated, then squeeze out the excess so it is damp but not dripping wet. Pack the moist sphagnum moss firmly into both halves of the rooting ball. Proper moisture levels are key; too dry and roots won’t form, too wet and the stem may rot.
Step 5: Secure the Rooting Ball to the Stem
Now it’s time to attach the device. Open the prepared rooting ball and carefully place it around the wounded section of the stem. Ensure the area where you applied the rooting hormone is centered inside the ball, completely surrounded by the moist sphagnum moss. Most rooting balls come with a built-in clasp or locking mechanism. Close the two halves together firmly until they snap shut, creating a tight seal around the branch. This secure fit is essential for maintaining the humid environment needed for root growth.
Step 6: Lock the Device in Place
With the rooting ball closed, double-check that it is securely fastened. The device should not slide up or down the stem. If your rooting ball feels a bit loose or if you are working in a windy area, you can add extra security. Use zip ties or durable garden twine to wrap around the outside of the ball, cinching it tightly at the top and bottom. This ensures the ball remains sealed and in constant contact with the stem, which is a key part of learning how to use a rooting ball effectively for successful cloning.
Step 7: Wait for Roots to Form
Patience is now your most important tool. The time it takes for roots to develop depends on the plant species, the time of year, and the climate. For most fast-growing plants, you can expect to see a healthy root system within 1 to 3 months. For slower-growing woody plants or trees, it might take up to 6 months. Many rooting balls are made of clear or dark plastic; you can often see the white roots pressing against the inside of the ball. Resist the urge to open the ball to check, as this disrupts the environment.
Step 8: Remove and Plant Your New Clone
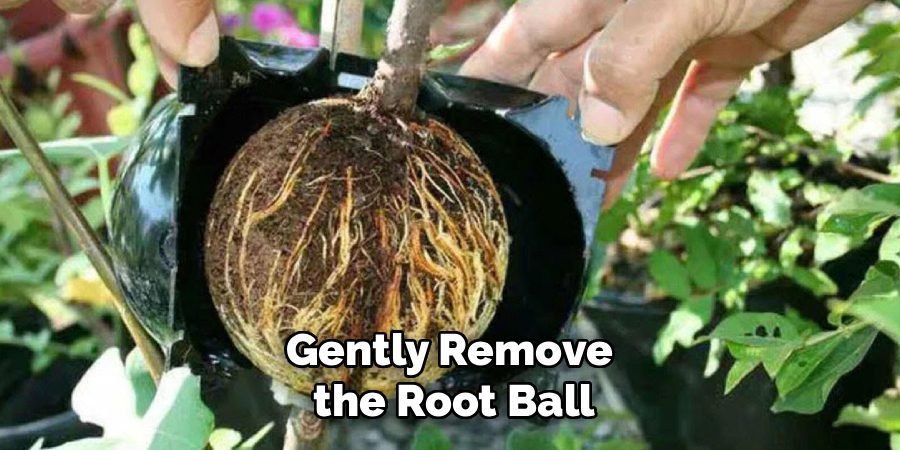
Once the rooting ball is filled with a dense network of healthy, white roots, your new plant is ready for independence. Use a sharp, sterile pair of pruning shears or a saw to cut the branch just below the rooting ball. Carefully open the device and gently remove the root ball, trying to disturb the new roots as little as possible. The sphagnum moss should be held together by the new root system. Your clone is now ready to be planted in a pot or directly into your garden.
Frequently Asked Questions (FAQ)
What Is the Best Time of Year to Use a Rooting Ball?
The ideal time to use a rooting ball is during the spring or early summer. During this period, plants are in their active growth phase, which means they have more energy and hormonal activity dedicated to producing new growth, including roots. Propagating in the spring gives the new clone an entire growing season to establish a strong root system in its new pot or location before the dormancy of winter sets in.
What Plants Work Best With a Rooting Ball?
Rooting balls are especially effective for plants that are difficult to propagate from traditional cuttings. This includes many woody ornamentals like magnolias, camellias, and roses. They are also excellent for cloning fruit trees such as citrus, figs, and apples. Houseplants with woody stems, like the Fiddle Leaf Fig or Rubber Plant, also respond very well to this air layering technique, leading to much higher success rates.
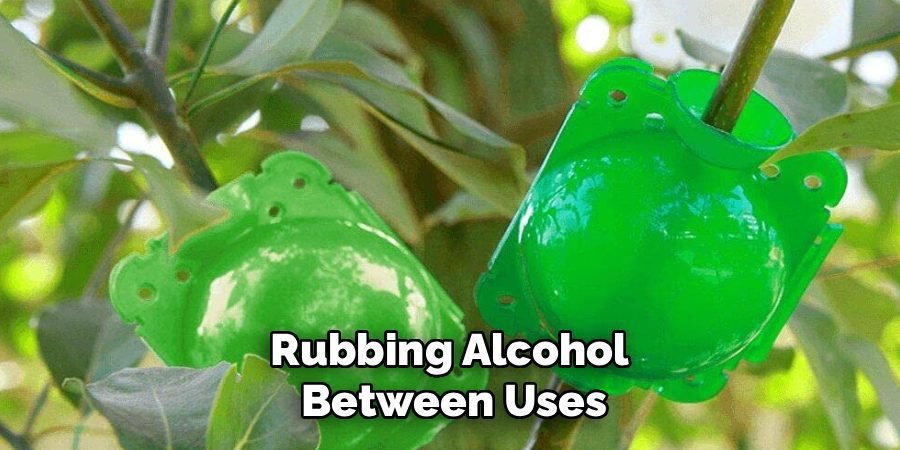
Can I Reuse a Rooting Ball?
Yes, one of the great benefits of rooting balls is that they are reusable. After you have successfully cloned a plant and transplanted it, simply wash the rooting ball thoroughly with soap and water. It is also a good practice to sterilize it with a diluted bleach solution or rubbing alcohol between uses. This prevents the transfer of any potential pathogens or diseases from one plant to another, ensuring each new clone gets a healthy start.
Do I Need to Water the Rooting Ball?
In most cases, you will not need to add more water. The sphagnum moss packed inside is designed to hold enough moisture for the entire rooting process. The sealed design of the ball prevents evaporation, creating a self-sustaining humid environment. However, if you live in a very hot, dry climate or are using a clear rooting ball, you may notice the moss drying out. If this happens, you can use a syringe to inject a small amount of water through the seam.
Why Did My Rooting Ball Fail to Produce Roots?
There are several potential reasons for failure. The most common is that the girdled section of the stem was not prepared correctly; you must remove the bark and cambium layer completely down to the hard wood. Other reasons include using an unhealthy parent plant, propagating at the wrong time of year, or the growing medium being too wet or too dry. Using a rooting hormone is also highly recommended to ensure success, as some plants will not root without that extra stimulus.
Conclusion
Cloning your favorite plants is an incredibly rewarding experience, and the rooting ball makes it accessible to everyone. By following these simple steps, you can bypass the common failures of traditional propagation and achieve a high success rate with minimal effort. This technique opens up a world of possibilities, allowing you to easily multiply your fruit trees, rare shrubs, and beautiful ornamentals. Now that you understand how to use a rooting ball, you are ready to expand your garden and share your favorite plants with friends and family.
About Ravuk Barg
B.Sc. Horticulture Science | Certified Master Gardener
Ravuk Barg has spent more than a decade with his hands in the soil and his head full of questions about why some gardens thrive while others struggle. What started as a single raised bed of tomatoes and basil in a modest backyard has grown into a deep, working knowledge of everything from seed germination and soil amendment to companion planting and seasonal pruning.
Over the years, Ravuk has gardened through drought summers, waterlogged springs, and pest invasions that would make most gardeners hang up their trowels for good. Those hard seasons, he’ll tell you, taught him more than any perfect growing year ever could. He writes from that earned experience—covering vegetable growing, ornamental planting, houseplant care, composting, and garden design with equal confidence and curiosity.
Philosophy & Approach
Ravuk’s approach to gardening is rooted in practicality. He favors organic methods not out of dogma, but because they work long-term—resulting in healthier soil, fewer inputs, and stronger plants. He has a particular fondness for heirloom vegetable varieties (the kind with proper flavor), unruly cottage-style flower beds, and the stubborn houseplants that everyone else gave up on.
The Mission: Give readers the honest, experience-backed advice that helps them actually succeed in their gardens—not just the ideal version, but the real one; weeds, failures, and all.
Education & Credentials
-
B.Sc. in Horticulture Science
-
Greenfield Agricultural University
-
Focus: Plant Physiology, Soil Ecology, and Sustainable Crop Production
-
-
Master Gardener Certification
-
Cooperative Extension Service
-
Focus: 200+ hours of hands-on practical training and community garden work
-
Continuing Education
-
Organic Pest Management
-
Native Plant Landscaping
-
Sustainable Crop Production