

A patchy, brown lawn can be a frustrating sight for any homeowner. Whether it’s from heavy foot traffic, pet spots, drought, or disease, dead patches can make your entire yard look neglected. Fortunately, you don’t have to start from scratch with expensive sod.
Learning how to reseed dead lawn areas is a cost-effective and rewarding way to bring your turf back to life. This guide will walk you through the entire process, from preparing the soil to caring for your new grass seedlings. With a little bit of effort and the right techniques, you can transform those barren spots into a thick, vibrant, and healthy lawn you’ll be proud of. Let’s get started on the path to a greener yard.
Why Reseeding a Dead Lawn is Important
Taking the time to reseed a dead lawn offers benefits that go far beyond just improving its appearance. A thick, healthy lawn is your property’s first line of defense against soil erosion. The dense root systems hold the topsoil in place, preventing it from washing away during heavy rain. Furthermore, bare patches are prime real estate for weeds. By filling in these spots with desirable grass, you create competition and naturally crowd out invasive weeds like crabgrass and dandelions, reducing your need for herbicides.
A revitalized lawn also contributes to a healthier local environment. Grass acts as a natural air filter, trapping dust, dirt, and pollutants. It also cools the surrounding air through a process called transpiration, creating a more comfortable microclimate around your home. Reseeding strengthens the overall resilience of your turf, making it better equipped to handle stress from drought, foot traffic, and pests in the future. It’s an investment in the long-term health and beauty of your outdoor space.
8 Step-by-Step Guide on How to Reseed Dead Lawn Areas
Step 1: Time Your Project Correctly
The success of your seeding project heavily depends on timing. The best time to plant grass seed is during its peak growing season. For cool-season grasses like Kentucky bluegrass, fescue, and ryegrass, this is early fall. The soil is still warm from the summer, which encourages germination, while the cooler air temperatures reduce stress on the young seedlings. Seeding in the fall also gives the new grass several months to establish before the heat of the next summer. For warm-season grasses like Bermuda, Zoysia, and St. Augustine, the ideal time to seed is late spring or early summer, when temperatures are consistently warm.

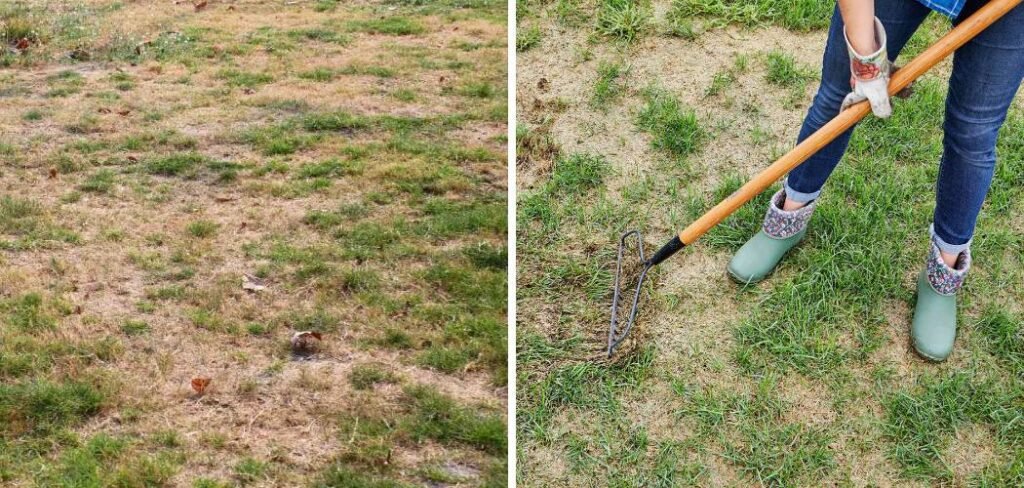
Step 2: Prepare the Area by Removing Debris and Dead Grass
Before you can introduce new seed, you must clear the stage. Start by thoroughly raking the dead patches to remove all the dead grass, thatch, rocks, and other debris. A stiff garden rake or a specialized dethatching rake works well for this task. Your goal is to expose the bare soil underneath. This step is crucial because grass seed needs direct contact with the soil to germinate. A thick layer of dead grass or thatch will prevent seeds from reaching the soil and block sunlight and water, ensuring your efforts fail before they even begin.
Step 3: Loosen and Amend the Soil
Compacted soil is an enemy to new grass seedlings. Hard, dense earth makes it difficult for delicate roots to penetrate and establish themselves. Use a garden weeder, cultivator, or a hard-tined rake to loosen the top two to three inches of soil in the bare spots. This aeration allows roots, water, and nutrients to move freely. After loosening the soil, it’s a great idea to improve its quality. Spreading a half-inch layer of compost or enriched topsoil over the area will provide essential nutrients for the new seedlings, giving them a strong and healthy start.
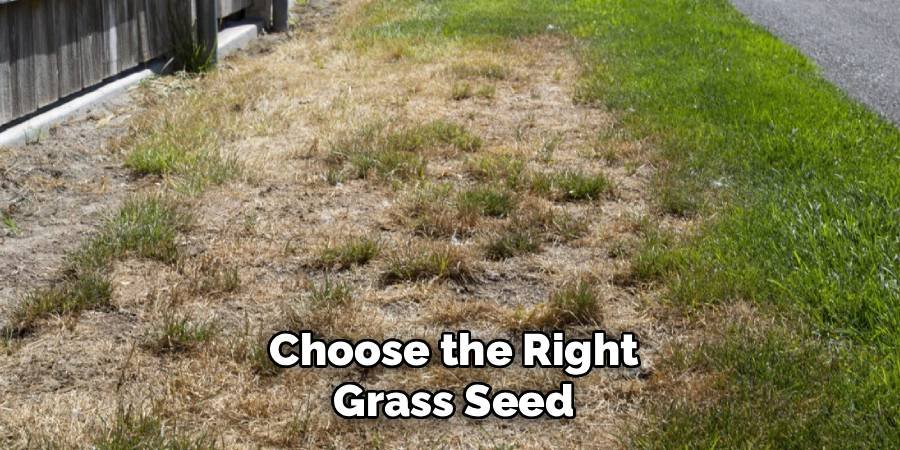
Step 4: Choose the Right Grass Seed
Not all grass seed is created equal. For the best results, you should choose a seed that matches your existing lawn and is well-suited to your local climate and sun exposure. Take a look at the healthy parts of your lawn to identify the grass type. If you’re unsure, you can take a small sample to a local garden center for identification. Consider the conditions of the patch you’re seeding. Is it in a high-traffic area? A shady spot? There are specific seed mixes designed for durability, shade tolerance, and sun exposure. Selecting the correct seed is fundamental to creating a seamless, uniform lawn.
Step 5: How to Reseed Dead Lawn Patches Evenly
Now it’s time to sow the seeds. For small patches, you can effectively spread the seed by hand. For larger areas, using a handheld or broadcast spreader will ensure a more even distribution. Check the seed bag for the recommended application rate, as this can vary significantly between grass types. A common mistake is to apply too much seed, which leads to overcrowding. The seedlings will then compete for resources like water, light, and nutrients, resulting in weak, spindly growth. A light, even coating is all that’s needed for a successful outcome.
Step 6: Gently Rake and Protect the Seeds
After spreading the seed, you need to ensure it makes good contact with the soil. Gently rake the area so that most of the seeds are covered by about a quarter-inch of soil. Be careful not to bury them too deeply, as this can prevent germination. To protect the seeds from being washed away by rain or eaten by birds, cover the area with a very thin layer of straw or a specialized seed-starting mulch. This covering also helps retain soil moisture, which is critical for the germination process. It acts like a protective blanket for your future lawn.
Step 7: Water Your New Seeds Consistently
Water is the single most important factor for germination. The seeded area must be kept consistently moist until the new grass is well-established. This doesn’t mean soaking it, which can wash seeds away. Instead, water lightly one to two times per day, especially if it’s warm and sunny. The goal is to keep the top inch of soil damp like a wrung-out sponge. Continue this watering schedule for the first few weeks. Once the grass reaches about two inches in height, you can gradually reduce watering frequency while increasing the duration to encourage deep root growth.

Step 8: Mow and Maintain Your New Grass
Patience is key when it comes to the first mow. Wait until the new grass seedlings have reached a height of at least three to four inches. Mowing too soon can stress the young plants and pull them out of the soil. When you do mow, set your mower to its highest setting and make sure the blade is sharp. A dull blade will tear the grass rather than cut it, damaging the new growth. Never remove more than one-third of the grass blade height at a time. Proper mowing will encourage the grass to grow thicker and spread, helping it blend in with the rest of your lawn.
Frequently Asked Questions (FAQ)
Can I Just Throw Grass Seed on a Dead Patch?
No, simply throwing seed onto a dead patch is unlikely to work. For seeds to germinate, they require direct contact with the soil. The layer of dead grass, or thatch, will block the seeds from reaching the soil and prevent them from getting the water and sunlight they need. You must first remove the dead grass and loosen the soil to create a proper seedbed for successful growth.
How Long Does It Take for Reseeded Grass to Grow?
The time it takes for new grass to grow depends on the grass type, soil temperature, and moisture levels. Generally, you can expect to see germination within 7 to 21 days.
- Ryegrass: Often germinates quickly, in about 5-10 days.
- Fescues: Typically take 10-14 days.
- Kentucky Bluegrass: Is slower, sometimes taking up to 30 days.
Consistent watering and proper soil preparation will help speed up the process.
What Is the Best Fertilizer for New Grass Seed?
A starter fertilizer is the best choice for new grass seed. These fertilizers are specially formulated with a higher percentage of phosphorus, the nutrient that is essential for promoting strong root development. Nitrogen is also important for green, leafy growth. Apply the starter fertilizer on the same day you plant the seed to provide the seedlings with the nutrients they need for a healthy start. Always follow the application rates on the product label.
Should I Mix Seed with Soil Before Spreading?
While not strictly necessary, mixing your grass seed with some soil or compost before spreading can be beneficial. This method helps you achieve a more even distribution and can improve seed-to-soil contact. It can be especially helpful for filling in small, bare spots by hand. For larger areas, it’s often more efficient to spread the seed first and then lightly rake it into the prepared soil.

When Can I Walk on My Newly Seeded Lawn?
You should avoid walking on the newly seeded area as much as possible until the grass is well-established. The young seedlings are very delicate and can be easily damaged or uprooted by foot traffic. Wait until after you have mowed the new grass at least two to three times before allowing regular foot traffic. This typically takes about four to six weeks from when you first see growth.
Conclusion
Reviving your yard is a manageable and highly satisfying project. By following these steps, you have a clear roadmap for success. From properly timing your project and preparing the soil to choosing the right seed and providing consistent care, each stage is vital for turning brown patches into a seamless green carpet. Don’t be discouraged by a few dead spots; see them as an opportunity for renewal. Now that you have the knowledge of how to reseed dead lawn areas, you are equipped to restore the health and beauty of your turf, creating a lush outdoor space for you and your family to enjoy for years to come.
About Ravuk Barg
B.Sc. Horticulture Science | Certified Master Gardener
Ravuk Barg has spent more than a decade with his hands in the soil and his head full of questions about why some gardens thrive while others struggle. What started as a single raised bed of tomatoes and basil in a modest backyard has grown into a deep, working knowledge of everything from seed germination and soil amendment to companion planting and seasonal pruning.
Over the years, Ravuk has gardened through drought summers, waterlogged springs, and pest invasions that would make most gardeners hang up their trowels for good. Those hard seasons, he’ll tell you, taught him more than any perfect growing year ever could. He writes from that earned experience—covering vegetable growing, ornamental planting, houseplant care, composting, and garden design with equal confidence and curiosity.
Philosophy & Approach
Ravuk’s approach to gardening is rooted in practicality. He favors organic methods not out of dogma, but because they work long-term—resulting in healthier soil, fewer inputs, and stronger plants. He has a particular fondness for heirloom vegetable varieties (the kind with proper flavor), unruly cottage-style flower beds, and the stubborn houseplants that everyone else gave up on.
The Mission: Give readers the honest, experience-backed advice that helps them actually succeed in their gardens—not just the ideal version, but the real one; weeds, failures, and all.
Education & Credentials
-
B.Sc. in Horticulture Science
-
Greenfield Agricultural University
-
Focus: Plant Physiology, Soil Ecology, and Sustainable Crop Production
-
-
Master Gardener Certification
-
Cooperative Extension Service
-
Focus: 200+ hours of hands-on practical training and community garden work
-
Continuing Education
-
Organic Pest Management
-
Native Plant Landscaping
-
Sustainable Crop Production