

Dealing with a lawn that just won’t thrive can be a real headache for any homeowner. If your yard is full of dense, heavy clay soil, you’re likely familiar with issues like poor drainage, compacted earth, and grass that looks thin and patchy. It’s a common challenge, but far from an impossible one. With the right approach and a bit of patience, you can transform your yard.
This guide will walk you through exactly how to improve grass on clay soil, providing straightforward, actionable steps to amend your soil structure, choose the right grass seed, and implement a care routine that encourages deep roots and lush, green growth. Get ready to build a lawn you can be proud of.
Why Improving Clay Soil is Worth the Effort
You might wonder if all the work is truly necessary. Clay soil presents unique challenges that won’t resolve on their own. Its fine particles pack together tightly, squeezing out the air pockets that grass roots need to breathe. This compaction also prevents water from draining properly, leading to waterlogged conditions that can drown your grass and encourage fungal diseases. Conversely, during dry spells, clay can bake into a hard, impenetrable surface that water can’t penetrate, starving the roots. By actively improving your soil, you create a healthier environment for your lawn to establish deep, resilient roots, making it more drought-tolerant, resistant to pests, and beautifully green for years to come.
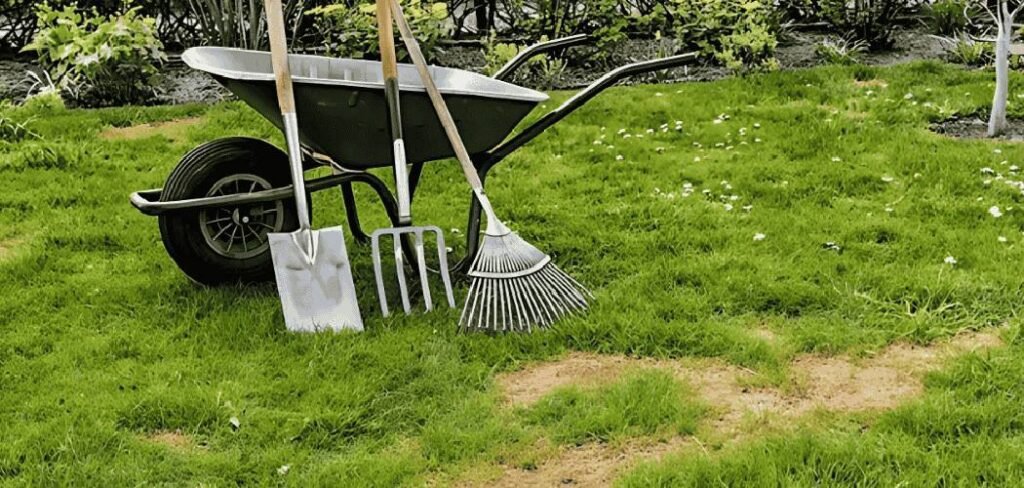
8 Easy Steps Guide on How to Improve Grass on Clay Soil
Step 1: Test Your Soil’s pH and Nutrient Levels
Before making any changes, it’s crucial to understand what you’re working with. A soil test kit will reveal the pH level and identify any nutrient deficiencies. Clay soils are often alkaline, but this isn’t a given. Knowing your soil’s specific profile allows you to add the right amendments in the correct amounts.

You can purchase a simple DIY kit from a garden center or send a sample to your local cooperative extension service for a more detailed analysis. This initial step provides a roadmap for your entire soil improvement project, ensuring you’re addressing the root cause of the problem instead of just guessing.
Step 2: Aerate the Lawn to Reduce Compaction
Compaction is clay soil’s biggest enemy. Core aeration is the process of pulling small plugs of soil out of the lawn, which creates channels for air, water, and nutrients to penetrate the dense ground. This process is essential for relieving the pressure that stifles root growth. You can rent a core aerator for a weekend project or hire a professional lawn care service to do it for you. Plan to aerate in the spring or fall when the grass is actively growing and the soil is moist but not waterlogged. This single action dramatically improves the soil structure and sets the stage for all subsequent treatments.
Step 3: Topdress with High-Quality Organic Matter
After aerating, it’s the perfect time to introduce organic material. Topdressing involves spreading a thin layer (about a quarter to a half-inch) of compost, aged manure, or fine pine bark over the entire lawn. This material will fall into the aeration holes and begin to work its way into the soil. Over time, the organic matter will improve soil texture, boost microbial activity, and enhance drainage. It breaks up the heavy clay particles, creating a richer, loamier soil that is much more hospitable to grass roots. This is not a one-time fix but a long-term strategy for building healthy soil.
Step 4: Choose the Right Grass Seed for Clay Conditions

Not all grass types can handle the demands of clay soil. Choosing a resilient variety is critical for long-term success. Tall fescue is an excellent choice due to its deep root system, which can power through compacted soil and find moisture during dry periods. Perennial ryegrass is another strong contender, known for its quick germination and durability. For warmer climates, Zoysia and Bermuda grass are tough, drought-tolerant options that can perform well in clay. Researching varieties that are specifically recommended for your climate zone will give you the best chance of establishing a lawn that can thrive.
Step 5: Overseed the Lawn to Fill in Bare Patches
Once you’ve chosen the right seed, it’s time to overseed. This process involves spreading new grass seed over your existing lawn to thicken it and fill in any thin or bare spots. The best time to do this is immediately after aerating and topdressing in the fall. The new seeds will have excellent contact with the fresh compost and easy access to the soil through the aeration holes. Be sure to follow the seeding rate recommended on the seed bag. A thicker, denser lawn is more effective at crowding out weeds and is more resilient to stress.
Step 6: Apply a Slow-Release Fertilizer
Clay soil can lock up nutrients, making them unavailable to your grass. Applying a balanced, slow-release fertilizer provides a steady supply of essential nutrients over several months. Look for a fertilizer formulated for new lawns or one that matches the deficiencies identified in your soil test. Applying it after seeding will give the new grass the boost it needs to germinate and establish strong roots before winter. Avoid fast-release, high-nitrogen fertilizers, which can encourage weak, shallow growth that is less tolerant of the challenging conditions in clay soil. This is a key step in figuring out how to improve grass on clay soil effectively.
Step 7: Water Deeply and Infrequently
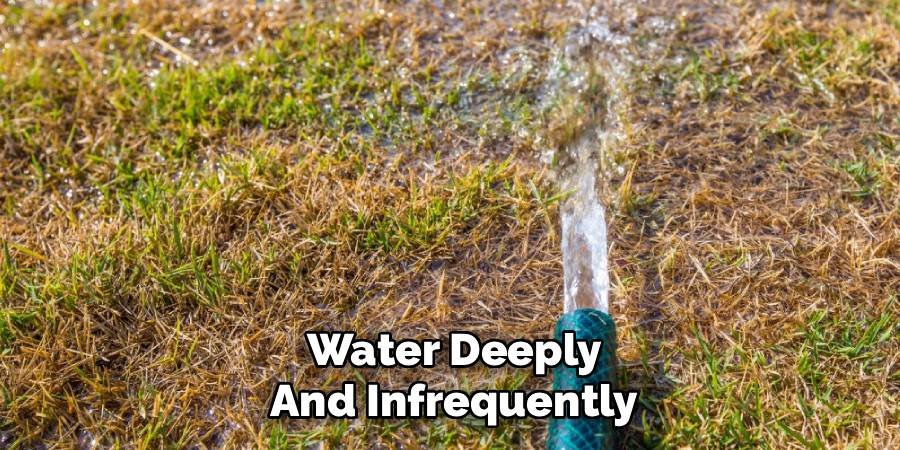
Your watering habits have a massive impact on lawn health, especially in clay. Instead of light, frequent watering, practice deep and infrequent watering. This encourages the grass roots to grow deeper into the soil in search of moisture, making the lawn more drought-tolerant. Water for a longer period, but only once or twice a week, allowing the top few inches of soil to dry out between sessions. This method prevents the surface from becoming a waterlogged swamp while ensuring water penetrates beyond the hard top layer. An inch of water per week, including rainfall, is a good general guideline.
Step 8: Maintain a Higher Mowing Height
Set your mower blades to a higher setting, aiming to keep your grass around 3 to 4 inches tall. Taller grass blades create more shade for the soil, which helps to keep it cool and retain moisture. This reduces the chances of the clay baking into a hard crust during hot, dry weather. Furthermore, a taller blade means a deeper and more extensive root system, which is exactly what you want to encourage in heavy soil. Never remove more than one-third of the grass blade in a single mowing session, as this can stress the plant and make it more vulnerable to pests and disease.
Frequently Asked Questions (FAQ)
What Is the Best Topdressing for Clay Soil?
The best topdressing for clay soil is rich organic matter. High-quality compost is an excellent choice because it is packed with beneficial microbes and nutrients that improve soil structure and fertility. Other great options include:
- Aged manure
- Fine pine bark mulch
- Leaf mold
These materials help break up the dense clay particles, improve aeration, and enhance water drainage over time. Applying a thin layer annually after aeration is a fantastic long-term strategy.
How Often Should I Aerate a Clay Lawn?
For lawns with heavy clay soil, you should plan to aerate at least once a year. If your soil is severely compacted or gets a lot of foot traffic, aerating twice a year—once in the spring and once in the fall—can be highly beneficial. Core aeration is the most effective method, as it physically removes plugs of soil, creating space for air, water, and nutrients to penetrate the root zone. Consistent aeration is key to preventing compaction from recurring.
Can I Just Add Sand to Clay Soil to Improve It?
No, you should not add sand directly to clay soil. This is a common myth that can actually make the problem worse. Mixing sand with fine clay particles can create a substance similar to concrete, resulting in even poorer drainage and a harder soil structure. Instead of sand, focus on incorporating organic matter like compost. Organic materials are the best amendment for breaking up heavy clay and improving its overall texture and health for growing grass.
What Time of Year Is Best for Working on a Clay Lawn?

The best times to work on improving a clay lawn are during the spring and fall. These are the peak growing seasons for cool-season grasses like fescue and ryegrass. Aerating, topdressing, and overseeding during these periods give the lawn the best chance to recover and for new seed to establish itself before the stress of summer heat or winter cold sets in. Avoid major soil work during the peak of summer, as high temperatures can stress the grass.
How Long Does It Take to See Improvements in Clay Soil?
Improving clay soil is a gradual process, not an overnight fix. You may see some initial improvements in your lawn’s color and thickness within the first season after aerating and overseeding. However, significant changes to the soil structure itself can take 2-3 years of consistent annual amendments. Each year you add organic matter, you are building a healthier soil profile. Patience and consistency are your most important tools in this long-term project.
Conclusion
Transforming a struggling lawn on dense clay is a marathon, not a sprint, but the results are well worth the effort. By following a consistent plan of testing your soil, aerating regularly, topdressing with organic matter, and choosing the right grass, you can fundamentally change the ground beneath your feet. Proper watering and mowing techniques will help maintain that progress. While it requires patience, learning how to improve grass on clay soil will empower you to build a resilient, lush, and beautiful lawn that your family can enjoy for years. Stick with it, and you will see your hard work pay off in a healthier, greener yard.
About Ravuk Barg
B.Sc. Horticulture Science | Certified Master Gardener
Ravuk Barg has spent more than a decade with his hands in the soil and his head full of questions about why some gardens thrive while others struggle. What started as a single raised bed of tomatoes and basil in a modest backyard has grown into a deep, working knowledge of everything from seed germination and soil amendment to companion planting and seasonal pruning.
Over the years, Ravuk has gardened through drought summers, waterlogged springs, and pest invasions that would make most gardeners hang up their trowels for good. Those hard seasons, he’ll tell you, taught him more than any perfect growing year ever could. He writes from that earned experience—covering vegetable growing, ornamental planting, houseplant care, composting, and garden design with equal confidence and curiosity.
Philosophy & Approach
Ravuk’s approach to gardening is rooted in practicality. He favors organic methods not out of dogma, but because they work long-term—resulting in healthier soil, fewer inputs, and stronger plants. He has a particular fondness for heirloom vegetable varieties (the kind with proper flavor), unruly cottage-style flower beds, and the stubborn houseplants that everyone else gave up on.
The Mission: Give readers the honest, experience-backed advice that helps them actually succeed in their gardens—not just the ideal version, but the real one; weeds, failures, and all.
Education & Credentials
-
B.Sc. in Horticulture Science
-
Greenfield Agricultural University
-
Focus: Plant Physiology, Soil Ecology, and Sustainable Crop Production
-
-
Master Gardener Certification
-
Cooperative Extension Service
-
Focus: 200+ hours of hands-on practical training and community garden work
-
Continuing Education
-
Organic Pest Management
-
Native Plant Landscaping
-
Sustainable Crop Production