

A new greenhouse is an exciting addition for any gardener, opening up a world of possibilities for growing plants year-round. But before you start filling it with seeds and soil, there’s a critical first step you can’t afford to skip: anchoring it firmly. High winds and stormy weather can turn a beautiful greenhouse into a costly kite. This guide is designed for home gardeners and beginners, providing clear, straightforward instructions on how to secure greenhouse to ground. Following these steps will protect your investment, your plants, and give you peace of mind, ensuring your garden sanctuary remains safe and stable for years to come.
Why Securing Your Greenhouse Is Crucial
Imagine investing time, money, and passion into your perfect greenhouse, only to see it damaged or destroyed by a sudden gust of wind. An unsecured greenhouse is surprisingly lightweight and acts like a large sail, making it extremely vulnerable to being lifted, shifted, or toppled over. The consequences can be devastating, from shattered panes and a bent frame to complete destruction of the structure and the precious plants inside. Proper anchoring provides the stability needed to withstand harsh weather, preventing potential damage to your property and ensuring the safety of anyone near it. By firmly securing your greenhouse, you are making a small but vital investment in its longevity and the success of your gardening efforts.
8 Step-by-Step Guide on How to Secure Greenhouse to Ground
Step 1: Choose the Right Location
Before you even think about anchors, select the best spot for your greenhouse. Look for a level area that is sheltered from strong, prevailing winds. Placing it near a building, fence, or a line of trees can provide a natural windbreak, significantly reducing the force exerted on the structure. Also, consider sunlight exposure, ensuring your chosen spot receives adequate light for your plants. Preparing a flat, stable base is essential. If the ground is uneven, you will need to level it first. This initial placement decision is the first line of defense against weather-related damage.

Step 2: Prepare the Foundation Area
Once you’ve chosen your location, clear the area of all grass, weeds, rocks, and debris. The goal is to create a clean, level surface. For soil or grass installations, you may want to lay down a weed-suppressing membrane to prevent unwanted growth inside your greenhouse. A solid foundation isn’t just about anchoring; it’s about creating a stable footprint. If you are building a more permanent base, such as concrete or paving slabs, ensure it is perfectly level and large enough to support the entire frame of your greenhouse. This preparation ensures your anchors will have a solid medium to grip.
Step 3: Assemble the Greenhouse Base Frame
Most greenhouses come with a metal base or plinth that forms the bottom of the structure. Assemble this base frame first, according to the manufacturer’s instructions. Place it in your prepared location and use a spirit level to ensure it is perfectly flat and square. Check the corners by measuring diagonally from one corner to the opposite one; the measurements should be identical. An unleveled or crooked base will put stress on the entire structure, making it harder to assemble the walls and roof panels correctly and potentially creating weak points that are vulnerable to wind.
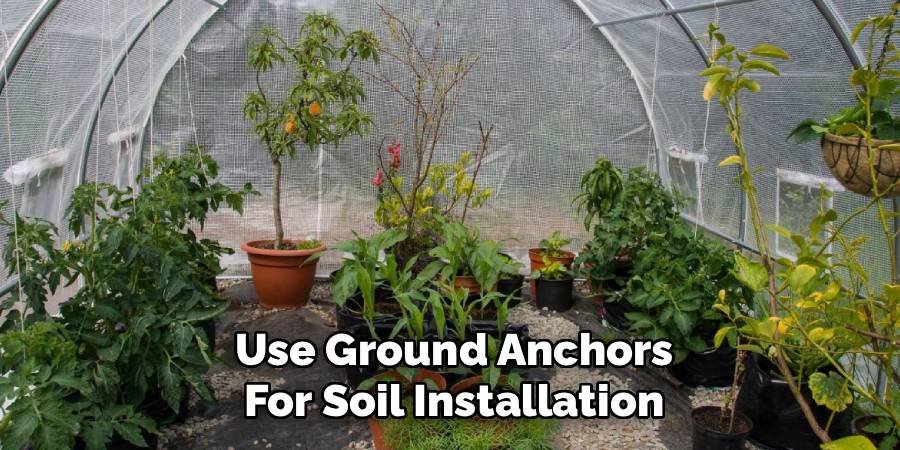
Step 4: Use Ground Anchors for Soil Installation
If your greenhouse is on soil or grass, ground anchors are an effective solution. These are typically long, spiral-shaped stakes that you screw deep into the earth. Position an anchor at each corner of the greenhouse base and at regular intervals along the sides, usually every 4-6 feet. Drive them into the ground until the top is flush with the soil level. Then, use strong galvanized wire or metal brackets to securely fasten the greenhouse frame to each anchor. This method provides excellent resistance against uplift, holding the frame down firmly against strong winds.
Step 5: How to Secure Greenhouse to Ground on a Concrete Base
For greenhouses placed on a concrete slab or patio, expansion bolts (also known as anchor bolts) are the professional standard. First, position the assembled base frame on the concrete. Using a hammer drill with a masonry bit, drill holes through the pre-drilled holes in the greenhouse base and into the concrete below. Make sure the holes are deep enough for the expansion bolts. Insert the bolts into the holes and tighten them. As you tighten the nut, the sleeve at the bottom of the bolt expands, wedging it securely into the concrete and creating an incredibly strong, permanent connection.
Step 6: Securing to Decking or a Wooden Frame
If you are placing your greenhouse on a wooden deck or a custom-built timber frame, you will need to use coach screws or lag bolts. These heavy-duty screws are designed to bite firmly into wood. Position the greenhouse base on the decking and drill pilot holes through the base frame and into the wooden foundation below. This prevents the wood from splitting. Then, drive the coach screws through the frame and into the decking. Use washers with the screws to distribute the pressure evenly and create a stronger hold. Anchor each corner and place additional screws along the sides.
Step 7: Add Internal Weight for Extra Stability
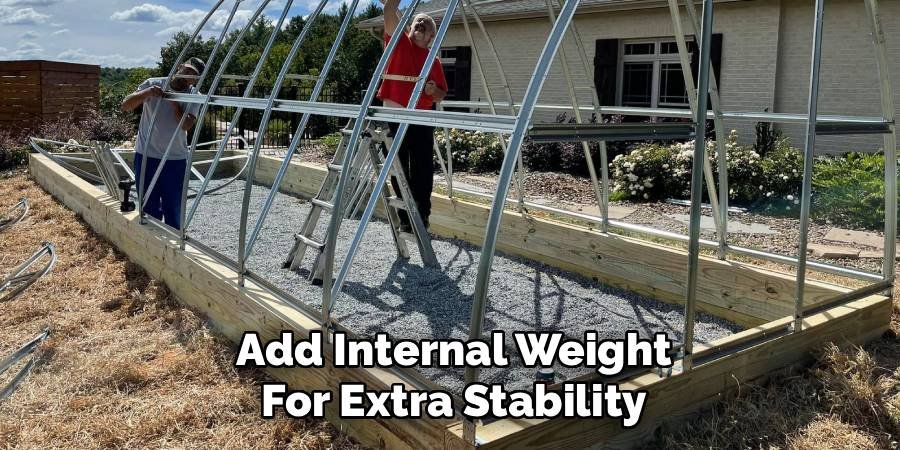
In addition to external anchoring, adding weight inside the greenhouse can dramatically increase its stability. Use heavy materials along the interior perimeter of the base. Large concrete paving slabs, bags of gravel, or raised beds filled with soil are excellent options. This internal ballast adds significant mass to the structure, making it much harder for wind to lift or move it. This technique is especially useful in very windy areas and works in conjunction with any external anchoring method, providing an added layer of security for your peace of mind.
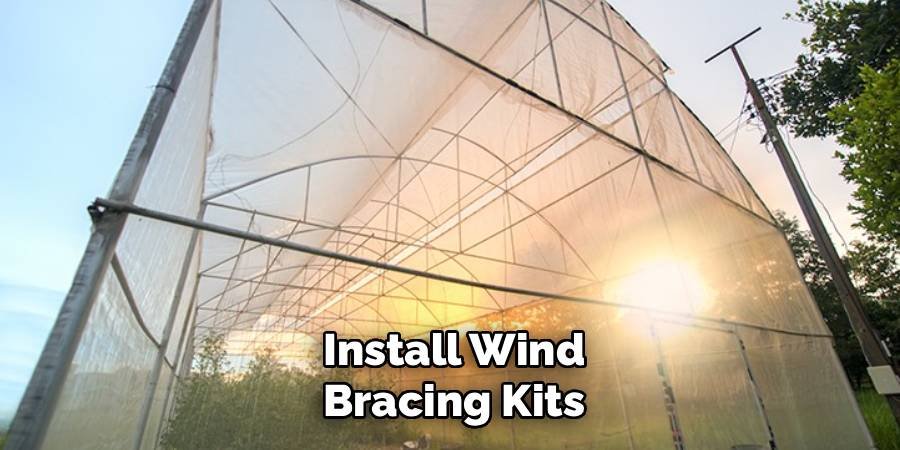
Step 8: Install Wind Bracing Kits
Many greenhouse manufacturers offer optional wind bracing kits, and they are a worthwhile investment, particularly for larger structures or those in exposed locations. These kits typically include diagonal braces that you install in the corners of the greenhouse frame, from the eaves down to the base. This reinforces the structure’s rigidity, preventing the frame from twisting or buckling under lateral wind pressure. Some kits also include roof bracing to strengthen the connection between the roof bars and the frame, further enhancing its overall resilience against severe weather.
Frequently Asked Questions
What Is the Best Base for a Greenhouse?
The best base depends on your budget, permanence, and location. A concrete slab is the most durable and stable option, providing a perfect surface for anchoring. Paving slabs are another excellent choice, offering good stability and drainage. For a more budget-friendly approach, a properly constructed timber frame or simply anchoring directly into firm, level ground can work well, especially for smaller greenhouses in sheltered spots.
How Do You Stop a Greenhouse from Blowing Away?
To prevent a greenhouse from blowing away, you must:
- Anchor it securely: Use the appropriate method for your base (ground anchors for soil, expansion bolts for concrete, coach screws for wood).
- Choose a sheltered location: Use buildings or trees as natural windbreaks.
- Add internal weight: Place heavy paving slabs or bags of soil inside along the base.
- Install bracing: Use corner and roof bracing kits to reinforce the frame’s rigidity.
Can I Put a Greenhouse on Uneven Ground?
It is highly discouraged to place a greenhouse directly on uneven ground. An unleveled base puts stress on the frame, can prevent polycarbonate panels or glass from fitting correctly, and makes the entire structure unstable. Before installation, you must level the area. This can be done by digging out high spots and filling low spots, or by building a level foundation frame from treated timber to sit the greenhouse on.
How Deep Should Greenhouse Anchors Be?
The depth depends on the anchor type and soil condition. For spiral ground anchors, you should aim to drive them at least 1-2 feet into the ground to ensure they have a firm grip in compacted subsoil. In softer or sandier soil, you may need longer anchors to achieve the same level of holding power. For concrete foundations, the expansion bolts should be embedded at least 3-4 inches into the concrete for a secure hold.
Should I Glue My Greenhouse Panels in Place?
Yes, applying a bead of clear, all-weather silicone sealant to the frame channels before inserting polycarbonate panels is a great idea. This serves two purposes: it helps hold the panels firmly in place, preventing them from popping out during high winds, and it seals gaps to improve insulation and stop drafts. It makes the entire structure more cohesive and weather-resistant.
Conclusion
Your greenhouse is a gateway to wonderful gardening adventures, but its journey begins with a solid, secure foundation. Taking the time to properly anchor your structure is not just a recommendation; it is an essential step to protect it from the elements. By choosing a sheltered spot, preparing a level base, and using the correct anchoring hardware for your foundation, you create a stable and resilient haven for your plants. This guide has shown you how to secure greenhouse to ground, giving you the confidence that your investment is safe. Now you can focus on the fun part: making it grow.
About Ravuk Barg
B.Sc. Horticulture Science | Certified Master Gardener
Ravuk Barg has spent more than a decade with his hands in the soil and his head full of questions about why some gardens thrive while others struggle. What started as a single raised bed of tomatoes and basil in a modest backyard has grown into a deep, working knowledge of everything from seed germination and soil amendment to companion planting and seasonal pruning.
Over the years, Ravuk has gardened through drought summers, waterlogged springs, and pest invasions that would make most gardeners hang up their trowels for good. Those hard seasons, he’ll tell you, taught him more than any perfect growing year ever could. He writes from that earned experience—covering vegetable growing, ornamental planting, houseplant care, composting, and garden design with equal confidence and curiosity.
Philosophy & Approach
Ravuk’s approach to gardening is rooted in practicality. He favors organic methods not out of dogma, but because they work long-term—resulting in healthier soil, fewer inputs, and stronger plants. He has a particular fondness for heirloom vegetable varieties (the kind with proper flavor), unruly cottage-style flower beds, and the stubborn houseplants that everyone else gave up on.
The Mission: Give readers the honest, experience-backed advice that helps them actually succeed in their gardens—not just the ideal version, but the real one; weeds, failures, and all.
Education & Credentials
-
B.Sc. in Horticulture Science
-
Greenfield Agricultural University
-
Focus: Plant Physiology, Soil Ecology, and Sustainable Crop Production
-
-
Master Gardener Certification
-
Cooperative Extension Service
-
Focus: 200+ hours of hands-on practical training and community garden work
-
Continuing Education
-
Organic Pest Management
-
Native Plant Landscaping
-
Sustainable Crop Production