

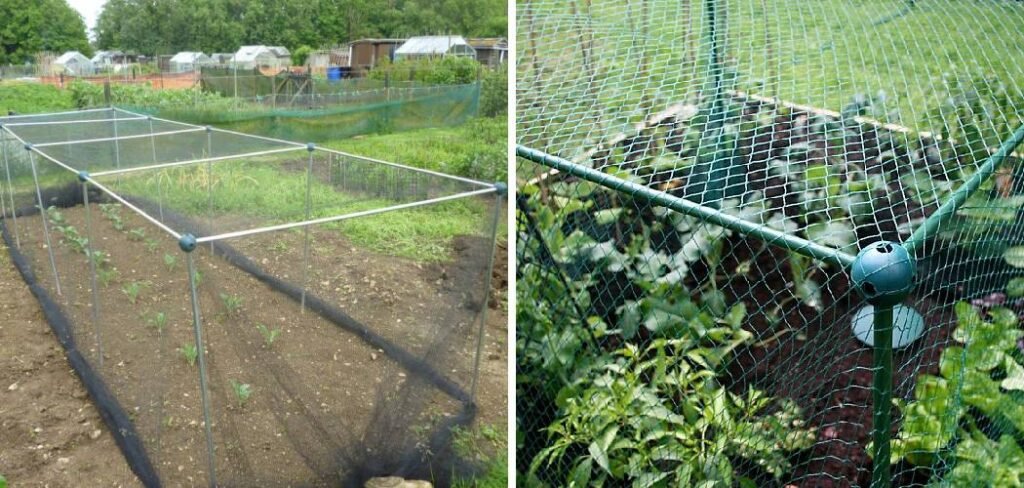
Protecting your precious garden from pests and animals is a top priority for any gardener. Whether it’s birds pecking at your berries, rabbits nibbling your lettuce, or insects laying eggs on your brassicas, the right barrier can make all the difference. A simple and effective solution is a garden netting frame. These structures support protective netting, keeping your plants safe without blocking sunlight or air circulation.
This guide will walk you through the process of how to make garden netting frame, providing a straightforward, budget-friendly project you can complete in an afternoon. Get ready to build a reliable defense for your vegetable patch or flower beds.
Why Protect Your Garden with a Netting Frame?
A garden netting frame is more than just a barrier; it’s an investment in the health and productivity of your plants. Without one, your crops are vulnerable to a wide range of threats. Birds can strip a berry bush in minutes, and deer can decimate a vegetable garden overnight. Even smaller pests like cabbage moths and squash bugs can cause significant damage, leading to reduced yields and unhealthy plants. By creating a physical barrier, a netting frame offers a chemical-free way to manage these pests. It ensures your hard work pays off with a bountiful harvest, allowing your plants to thrive in a protected environment while still receiving the essential elements they need to grow.
8 Step Methods Guide: How To Make Garden Netting Frame
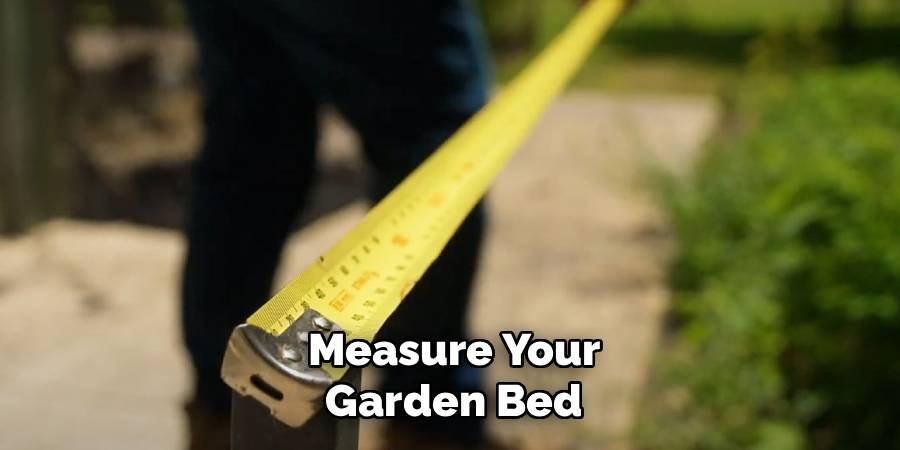
Step 1: Measure Your Garden Bed
Before you can build anything, you need to know the dimensions you’re working with. Use a tape measure to determine the exact length and width of the garden bed you intend to cover. It’s a good idea to add a few extra inches to each measurement to ensure the frame fits comfortably over the area without being too snug. Also, consider the mature height of the plants you are protecting. The frame needs to be tall enough to allow your plants to grow fully without touching the netting. Write down these three measurements—length, width, and desired height—as they will guide all your material cuts.
Step 2: Gather Your Materials and Tools
With your measurements in hand, it’s time to collect your supplies. For a simple and durable frame, you will need PVC pipes. Choose a diameter like 3/4-inch or 1-inch for a good balance of flexibility and strength. You will also need PVC connectors, such as three-way “elbow” or “tee” fittings, to join the pipes. Rebar stakes, cut to about 18-24 inches long, will serve as anchors to secure the frame to the ground. Finally, you’ll need the garden netting itself. For tools, gather a PVC pipe cutter or a handsaw, a mallet or hammer for driving in the stakes, and a tape measure.
Step 3: Cut the PVC Pipes to Size
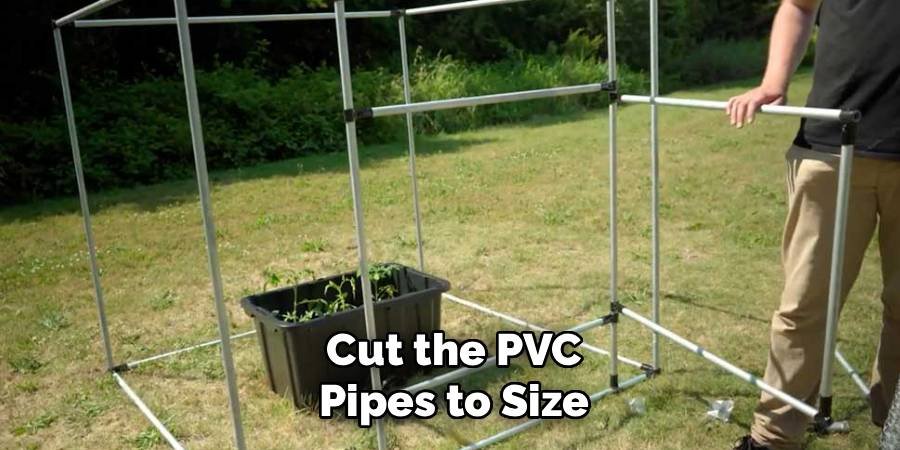
Now, you will begin the construction process. Using your measurements from Step 1, carefully cut the PVC pipes to the required lengths. You will need two long pieces for the top ridge of the frame, corresponding to the length of your garden bed. You will also need several shorter pieces to create the “hoops” or arches that span the width. The number of hoops depends on the length of your bed; a good rule of thumb is to place one every 3 to 4 feet. The length of these hoop pipes will determine the final height of your frame. A longer pipe creates a taller arch.
Step 4: Assemble the Hoops for Your Frame
Once all your pipes are cut, you can start assembling the individual hoops. For each hoop, you will typically need two equal-length PVC pipes and a three-way PVC connector for the top. Connect the two pipes into the sides of the connector, forming an upside-down ‘U’ shape. This component will serve as the arch that spans across the width of your garden bed. If you are building a rectangular frame instead of a hoop house, you would use 90-degree elbow connectors to create sharp corners. Assemble all your hoops before moving on to the next step.
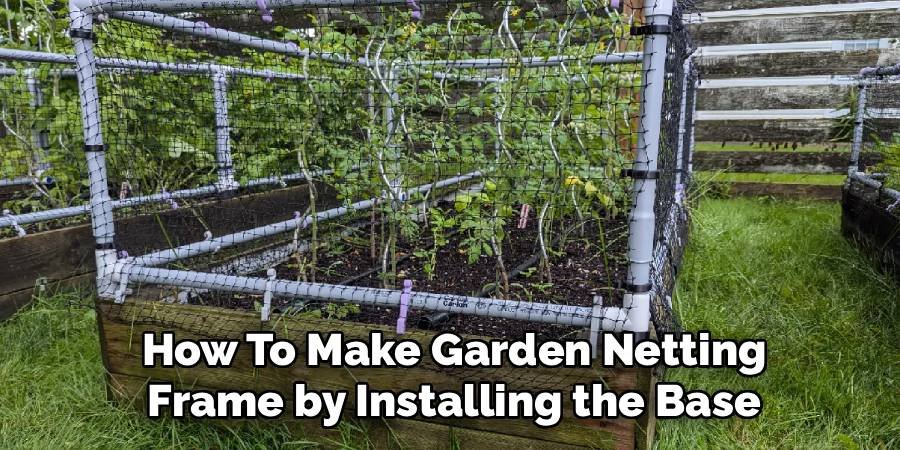
Step 5: How To Make Garden Netting Frame by Installing the Base
The stability of your frame depends on a solid foundation. Begin by driving the rebar stakes into the ground along the long sides of your garden bed. Use a mallet to hammer them about halfway into the soil, leaving 9 to 12 inches exposed above ground. The spacing between the stakes should match the spacing you planned for your hoops, typically every 3 to 4 feet. Ensure the stakes on opposite sides of the bed are directly aligned with each other. This creates the anchor points onto which you will slide your PVC hoops.
Step 6: Erect the Frame Structure
With the rebar stakes firmly in place, you can now erect the main structure. Take one of your pre-assembled PVC hoops and slide each open end over a pair of opposing rebar stakes. The rebar will hold the base of the hoop securely in place. Repeat this process for all your hoops, working your way down the length of the garden bed. As you place each hoop, you will see the frame begin to take shape. This step brings your project to life, transforming your collection of pipes and fittings into a recognizable structure that will soon protect your plants.
Step 7: Add the Ridge Pole for Stability
To connect the hoops and add crucial stability to the structure, you will install a ridge pole. This is the long piece of PVC pipe that runs along the top of the frame. Carefully guide the ridge pole through the top opening of each three-way connector on your hoops. If you used two pieces for a very long bed, connect them in the middle with a straight PVC coupler. This ridge pole ties all the hoops together, preventing them from swaying independently and ensuring the frame is rigid and strong enough to support the netting and withstand wind.
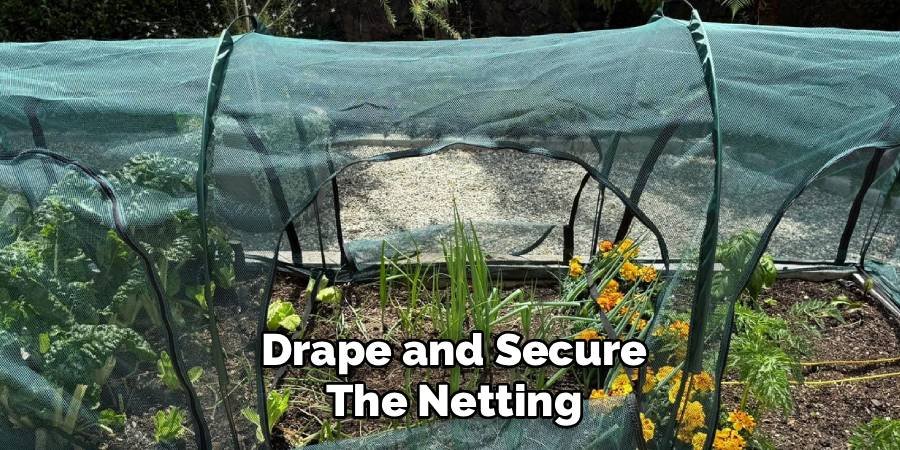
Step 8: Drape and Secure the Netting
The final construction step is to cover the frame with garden netting. Drape the netting loosely over the entire structure, ensuring it reaches the ground on all sides with some extra material to spare. Pull it taut enough to remove any major sagging but not so tight that it strains the PVC frame. Secure the netting to the ground to prevent pests from crawling underneath. You can use garden staples, rocks, or bricks placed along the bottom edge of the net. Make sure there are no gaps for unwanted visitors to sneak through.
Frequently Asked Questions
What Is the Best Material for a Garden Netting Frame?
The best material depends on your budget and needs. PVC pipe is a popular choice because it is affordable, lightweight, easy to cut, and weather-resistant. For a more permanent or aesthetically pleasing option, you could use wood or metal conduits.
- PVC: Ideal for temporary or movable hoop-style frames.
- Wood: Great for building sturdy, raised-bed collars but requires more tools and skill.
- Metal: Extremely durable and long-lasting, but also the most expensive and heaviest option.
How Can I Make My Netting Frame Taller for Large Plants?
To increase the height of your frame, you simply need to use longer pieces of PVC for the sides of your hoops. The length of these pipes directly determines the height of the arch. For very tall plants like tomatoes or pole beans, you might consider a walk-in-style frame. This design uses longer vertical posts connected with fittings at the top, creating a box-like structure that offers maximum vertical growing space. Always account for the plant’s mature height when planning.
Can I Make a Movable Garden Netting Frame?
Yes, you can easily design a movable frame. Instead of anchoring the frame with rebar stakes hammered into the ground, you can build a freestanding base. One simple method is to create a rectangular base out of PVC pipes or wood that sits on the ground around your garden bed. The upright hoops or posts can then be attached directly to this base using the appropriate PVC fittings (like four-way tees) or wood screws. This allows you to lift and move the entire cover as needed.
What Kind of Netting Should I Use?
The type of netting you choose depends on the pests you want to exclude. For birds and larger animals like rabbits or deer, a net with a 1-inch mesh is usually sufficient. To protect against smaller insects like cabbage moths or flea beetles, you will need a finer insect barrier netting, often with a mesh size of 0.8mm to 1.35mm. Always check that the netting still allows for adequate sunlight, water, and air to reach your plants.
How Do I Access My Plants Once the Netting Is On?
Accessing your plants is an important consideration. For smaller frames, you can often just lift one side of the netting. For larger structures, you can build in a simple door. One easy way is to leave one end of the netting unattached and weigh it down with a brick or a piece of wood. When you need to get inside, you can just lift the weighted flap. Another option is to cut a vertical slit in the netting and attach magnets or clips to keep it closed.
Conclusion
Building a protective cover for your garden is a rewarding project that pays dividends in healthy plants and abundant harvests. By following these steps, you can create a custom-fit structure that guards your crops against pests large and small. The process is straightforward, requires minimal tools, and can be adapted to fit any garden size or shape. Now that you have a clear plan on how to make garden netting frame, you have the power to protect your hard work. Take an afternoon to build this simple yet effective defense, and enjoy a season of stress-free gardening.
About Ravuk Barg
B.Sc. Horticulture Science | Certified Master Gardener
Ravuk Barg has spent more than a decade with his hands in the soil and his head full of questions about why some gardens thrive while others struggle. What started as a single raised bed of tomatoes and basil in a modest backyard has grown into a deep, working knowledge of everything from seed germination and soil amendment to companion planting and seasonal pruning.
Over the years, Ravuk has gardened through drought summers, waterlogged springs, and pest invasions that would make most gardeners hang up their trowels for good. Those hard seasons, he’ll tell you, taught him more than any perfect growing year ever could. He writes from that earned experience—covering vegetable growing, ornamental planting, houseplant care, composting, and garden design with equal confidence and curiosity.
Philosophy & Approach
Ravuk’s approach to gardening is rooted in practicality. He favors organic methods not out of dogma, but because they work long-term—resulting in healthier soil, fewer inputs, and stronger plants. He has a particular fondness for heirloom vegetable varieties (the kind with proper flavor), unruly cottage-style flower beds, and the stubborn houseplants that everyone else gave up on.
The Mission: Give readers the honest, experience-backed advice that helps them actually succeed in their gardens—not just the ideal version, but the real one; weeds, failures, and all.
Education & Credentials
-
B.Sc. in Horticulture Science
-
Greenfield Agricultural University
-
Focus: Plant Physiology, Soil Ecology, and Sustainable Crop Production
-
-
Master Gardener Certification
-
Cooperative Extension Service
-
Focus: 200+ hours of hands-on practical training and community garden work
-
Continuing Education
-
Organic Pest Management
-
Native Plant Landscaping
-
Sustainable Crop Production