

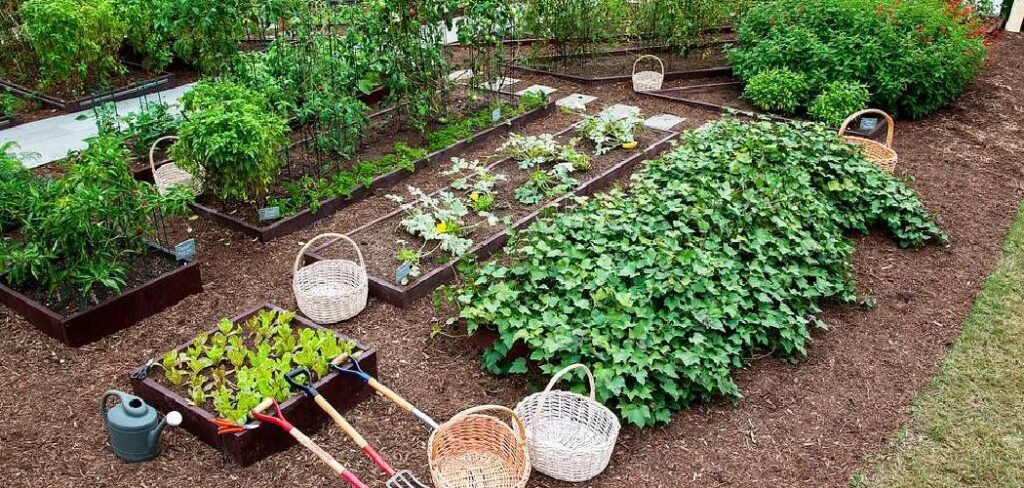
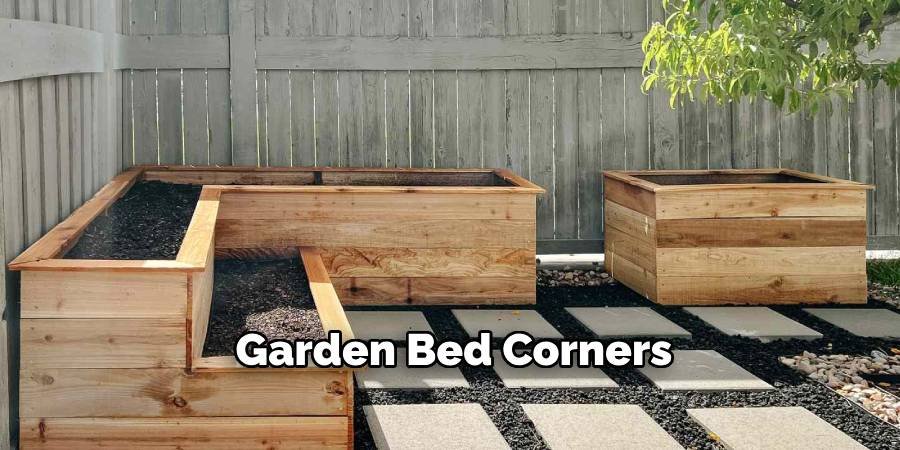
Building raised garden beds is a great way to grow healthy plants and vegetables in your backyard. One of the most essential parts of making a raised garden bed is creating strong corners. Good corners keep your garden bed together and make it last for many years. In this guide, you will learn how to make raised garden bed corners that are strong, easy to build, and perfect for any garden. Many people want to start a garden but don’t know how to properly build a bed frame. The corners are the most essential part because they hold everything together. When you create strong angles, your raised garden bed won’t collapse when filled with soil and water.
Why Corner Construction Matters for Raised Garden Beds
The corners of your raised garden bed are like the foundations of a house. They need to be strong and beautifully constructed. Good corners help keep your garden bed in the right shape, even when it’s filled with heavy soil. They ensure that water doesn’t run off the sides.
When corners are not made correctly, several problems can occur. The sides of your garden bed can bend outward. The wood can split or crack. The entire structure can collapse after a few months. This is why learning how to properly build raised garden bed corners is so essential. Sturdy corners make your garden beds look friendly and professional. When friends and neighbors see your garden, they will think you are a skilled builder. Beautiful garden beds can add value to your home.
Materials You Need for Garden Bed Corners
Before you start building, you need to gather the right materials. Here are the basic things you need:
Wood Materials:
- Cedar, pine, or composite wood boards
- Corner brackets made of metal or plastic
- Wood screws (2.5 to 3 inches long)
- Corner posts (2×2 or 4×4 inches)
Tools Required:
- Drill with a screwdriver bit
- Tape for measuring
- A pencil for marking
- Level for straightening angles
- Saw for cutting wood if needed
Hardware Options:
- L-shaped metal brackets
- Corner clamps
- Wood glue for extra strength
- Galvanized screws that won’t rust
Cedar wood is the best choice because it naturally resists rot and insects. Pine wood is inexpensive but requires processing to last. Composite materials are more expensive but last longer.
Different Types of Corner Joints for Raised Beds
There are several ways to create raised garden bed corners. Each method has its pros and cons. Here are the most popular types:
Butt Joint Corners: This is the easiest way to make corners. You place one board against the edge of another and screw them together. This is easy for beginners, but not the strongest option.
Overlapped Corners: In this method, you lengthen a board so that it goes around the corner. This creates a stronger joint than a butt joint. The extra wood provides more surface area for the screws.
Corner Bracket Method: You use metal or plastic brackets to attach the boards at the corners. This is very strong and looks professional. The brackets do most of the work of holding the corners together.
Mortise and Tenon Joints: This is an advanced woodworking technique. You can cut slots in one board that fit perfectly into tabs cut in another board. It is powerful but requires more skill and tools.
For most beginners, corner brackets or overlapping corners work best. These are strong enough for garden beds and not too tricky to make.
7 Step-by-Step Guide on How to Make Raised Garden Bed Corners
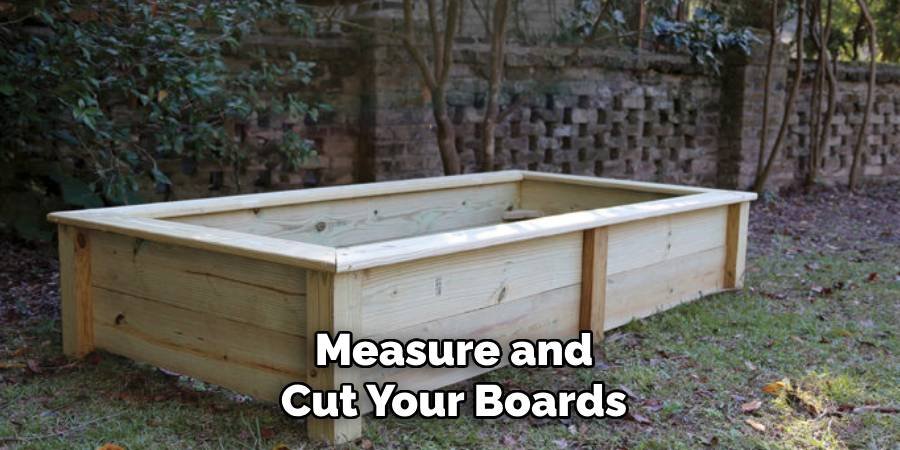
Step 1: Measure and Cut Your Boards
First, decide how big your garden bed will be. Most people make beds that are 4 feet wide and 8 feet long. Cut your boards to the correct length. You will need two boards for each side of the rectangle. Mark each board with a pencil so you know which edge goes where. This will help you avoid mistakes when you start fitting the corners together.
Step 2: Choose the Right Corner Brackets
Go to your local hardware store and look for corner brackets made for outdoor use. The best ones are made of galvanized steel because they won’t rust. Make sure the brackets are large enough for your board. Some brackets are on the inside of the corner, while others are on the outside. The inside brackets look nicer, but the outside brackets are easier to install.
Step 3: Position the Brackets Correctly
Place the first two boards on a flat surface so that they form an angle. The boards should meet at a perfect 90-degree angle. Use a carpenter’s square or level to check this. Hold the bracket where the two boards meet. The bracket should sit flat against both boards. Mark with a pencil where the screw holes will go.
Step 4: Drill Pilot Holes
Before you install the screws, drill small pilot holes where you marked them. This will prevent the wood from splitting when you drive the screws in. The pilot holes should be slightly smaller than your screws. Make sure your drill bit is straight when drilling. Crooked holes can cause screws to go in at the wrong angle.
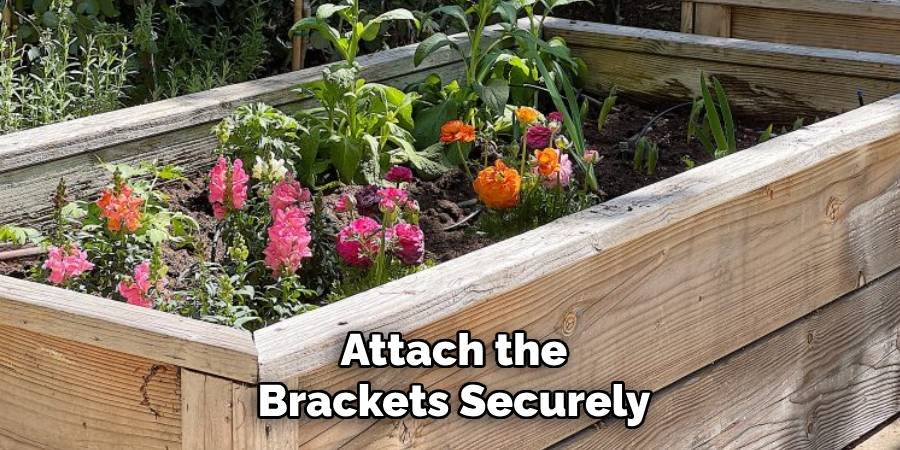
Step 5: Attach the Brackets Securely
Now it’s time to attach the brackets with screws. Use screws that are long enough to penetrate the wood through the brackets, but not so long that they come out the other side. Tighten the screws firmly, but do not overtighten. Overtightening can cause the threads to come loose or the wood to crack. The bracket should be flush with the wood so that there are no gaps.
Step 6: Test the Corner Strength
After each bracket is attached, check how tight the angle is. Try gently bending or twisting the joint. A good angle should feel tight and not move at all. If the corner seems loose, check to make sure all the screws are tight. You may need to add more screws or use longer screws.
Step 7: Repeat for All Four Corners
Follow the same process for each corner of your garden bed. Take your time and make sure each corner is perfect before moving on to the next corner. Once the four corners are made, put the entire frame together. Check that it forms a perfect rectangle and sits flat on the ground.
Advanced Corner Techniques
Once you are comfortable with the basic angles, you may want to try more advanced methods. These techniques create very strong joints that can last for many years.
Using Corner Posts: You can create corners by using vertical posts at each corner of your garden bed. Cut 4×4 posts that are longer than your boards. Attach the boards to the sides of these posts with screws.
This method is powerful because the stakes go deep into the ground. It looks professional and also works well for tall garden beds.
Dado Joint Corners: This woodworking technique involves cutting gaps in boards that fit together like puzzle pieces. You need a special saw blade to cut the gaps, but the result is powerful and looks great.
Reinforced Bracket Systems: Some companies make special bracket systems that are designed just for raised garden beds. These brackets are more substantial than regular corner brackets and often include features like adjustable angles.
Common Mistakes to Avoid
Learning how to create raised garden bed corners also means knowing what not to do. Here are some mistakes that many beginners make:
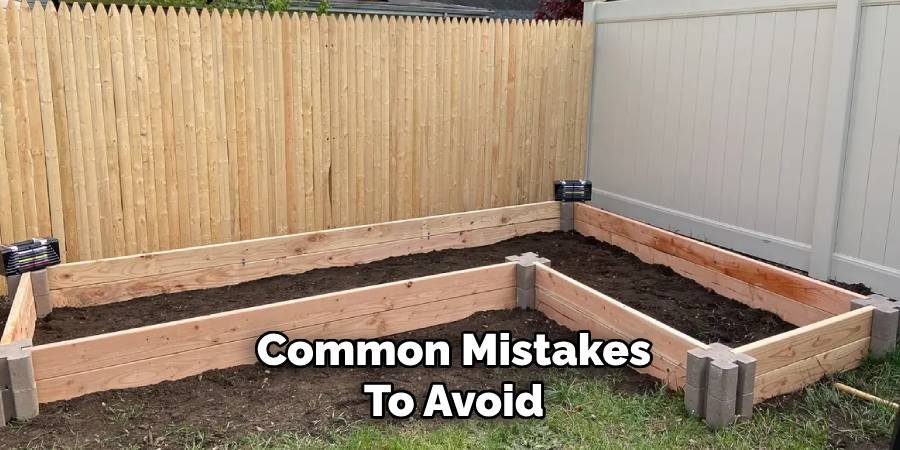
Not Making Square Corners: If your corners are not exactly 90 degrees, your garden bed will look crooked and may not sit together properly. Always use a square to check your corners.
Using the Wrong Screws: Screws that are too short won’t hold well. Screws that are too long may come out through the other side of the wood. Use screws that are at least 1.5 times the thickness of your board and that will go through the other side.
Forgetting Pilot Holes: Screwing into wood without a pilot hole often results in the wood breaking. This is especially true with hardwoods like oak or when screwing into the ends of boards.
Not Checking for Level: Garden beds need to be level so that all the water doesn’t go to one corner. Use a level to make sure your corners are at the same height.
Rushing the Process: It takes time to get good angles right. Don’t try to rush through the work, or you may make mistakes that will be difficult to fix later.
Maintenance Tips for Garden Bed Corners
After you finish creating the corners of your raised garden bed, you need to take care of them so that they last a long time.
Regular Inspections: Check your corners every few months, especially after heavy rain or winter weather. Look for loose screws, cracked wood, or bent brackets.
Tightening Hardware: Screws can loosen over time as the wood expands and contracts with weather changes. If you find any loose screws during inspection, tighten them.
Protecting from Moisture: Even treated wood can rot if left wet for too long. Make sure water drains away from corners and doesn’t pool at the base of your garden bed.
Replacing Worn Parts: If the brackets start to rust or the wood starts to rot, replace these parts immediately. It’s much easier to repair one corner than to rebuild the entire garden bed.
Seasonal Care: Before winter, check that everything is tight and secure. Heavy snowfall or ice can put extra stress on corner joints.
Conclusion
Learning how to make raised garden bed corners is an essential skill for any gardener who wants to build their beds. Strong, well-made corners ensure that your garden bed will last for many years and provide an excellent place for your plants to grow. The key things to remember are: choose the right materials for your climate and budget, measure carefully before cutting or drilling, use the right tools and techniques for the corner method you select, and don’t rush the construction process.
Whether you use simple brackets, overlapping joints, or corner posts, the most important thing is to make sure each corner is square, even, and securely fastened.
With practice, creating raised garden bed corners becomes easy and enjoyable. Start with simple methods and move on to more advanced techniques as your confidence grows. Soon, you will be creating professional-looking garden beds that will be the envy of those around you and provide years of gardening pleasure.
About Ravuk Barg
B.Sc. Horticulture Science | Certified Master Gardener
Ravuk Barg has spent more than a decade with his hands in the soil and his head full of questions about why some gardens thrive while others struggle. What started as a single raised bed of tomatoes and basil in a modest backyard has grown into a deep, working knowledge of everything from seed germination and soil amendment to companion planting and seasonal pruning.
Over the years, Ravuk has gardened through drought summers, waterlogged springs, and pest invasions that would make most gardeners hang up their trowels for good. Those hard seasons, he’ll tell you, taught him more than any perfect growing year ever could. He writes from that earned experience—covering vegetable growing, ornamental planting, houseplant care, composting, and garden design with equal confidence and curiosity.
Philosophy & Approach
Ravuk’s approach to gardening is rooted in practicality. He favors organic methods not out of dogma, but because they work long-term—resulting in healthier soil, fewer inputs, and stronger plants. He has a particular fondness for heirloom vegetable varieties (the kind with proper flavor), unruly cottage-style flower beds, and the stubborn houseplants that everyone else gave up on.
The Mission: Give readers the honest, experience-backed advice that helps them actually succeed in their gardens—not just the ideal version, but the real one; weeds, failures, and all.
Education & Credentials
-
B.Sc. in Horticulture Science
-
Greenfield Agricultural University
-
Focus: Plant Physiology, Soil Ecology, and Sustainable Crop Production
-
-
Master Gardener Certification
-
Cooperative Extension Service
-
Focus: 200+ hours of hands-on practical training and community garden work
-
Continuing Education
-
Organic Pest Management
-
Native Plant Landscaping
-
Sustainable Crop Production