

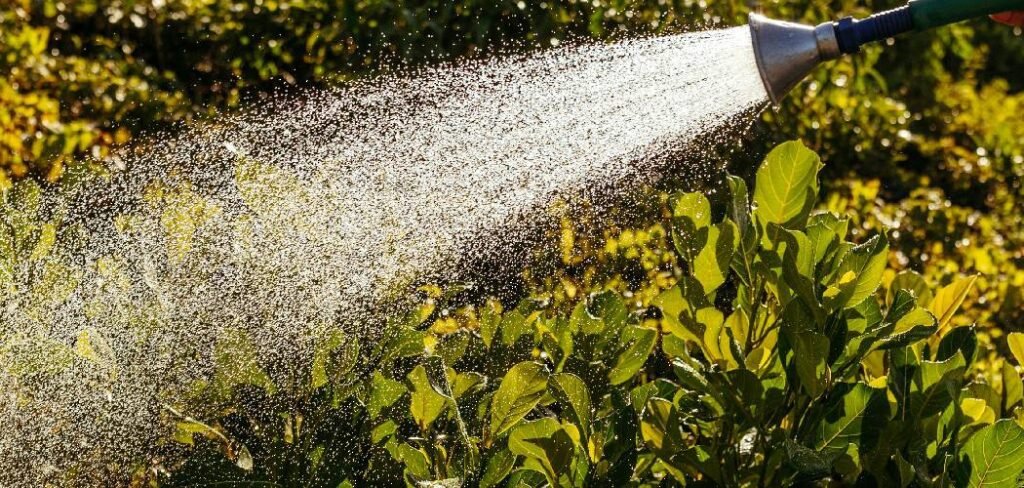
A lush, productive vegetable garden is a rewarding goal for any home gardener. One of the secrets to achieving this is efficient and effective watering. This is where a soaker hose comes in. Unlike traditional sprinklers that lose a lot of water to evaporation and runoff, soaker hoses deliver water directly to the soil at the base of your plants.
This targeted approach conserves water, reduces weed growth, and helps prevent common fungal diseases.Learning how to use soaker hose in vegetable garden setups is a simple yet powerful step toward healthier plants and a more abundant harvest. This guide will walk you through everything you need to know, from planning your layout to maintaining your system for years of reliable use.
Why a Soaker Hose is Your Garden’s Best Friend
Water is the lifeblood of your vegetable garden, but how you deliver it matters immensely. Soaker hoses are a form of drip irrigation, made from porous materials like recycled rubber, that “weep” water slowly and evenly along their entire length. This method is far superior to overhead watering for several key reasons.
It minimizes water waste by applying moisture directly to the root zone, where plants need it most. By keeping foliage dry, you significantly lower the risk of diseases like powdery mildew and blight. Furthermore, because the areas between rows remain dry, weed growth is naturally suppressed. This makes a soaker hose an eco-friendly, efficient, and low-maintenance solution for any gardener.
8 Step-by-Step Guide: How to Use Soaker Hose in Vegetable Garden
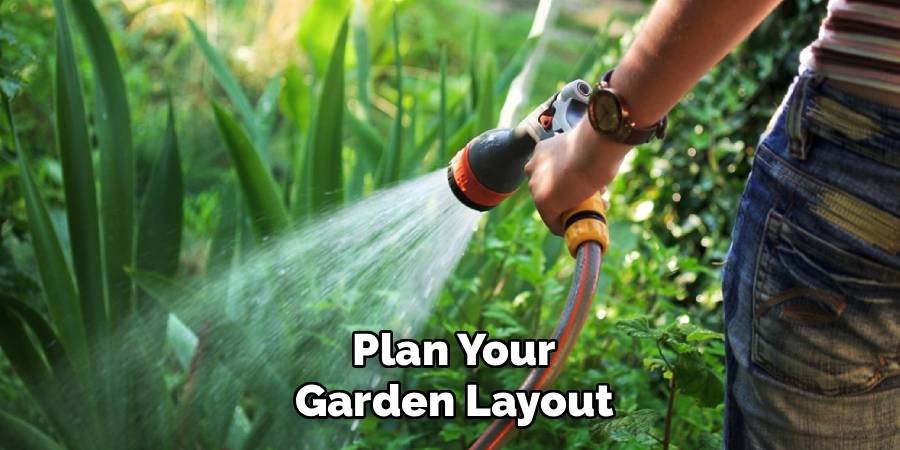
Step 1: Plan Your Garden Layout
Before you lay down any hoses, take a moment to sketch your vegetable garden. Measure the length of each row and the distance between them. This plan will help you determine the total length of soaker hose you need, as well as the number of connectors, end caps, and feeder hoses required. Group plants with similar water needs together to make your irrigation system more effective. For example, thirsty plants like tomatoes and cucumbers should be on a separate line from more drought-tolerant herbs like rosemary. A clear plan prevents costly mistakes and ensures every plant gets the right amount of water.
Step 2: Choose the Right Soaker Hose and Fittings
Not all soaker hoses are created equal. They come in various diameters (typically 1/4-inch, 1/2-inch, or 5/8-inch) and materials. For most vegetable gardens, a 1/2-inch or 5/8-inch hose made from recycled rubber is a durable and effective choice. You will also need non-porous leader hoses to connect your soaker hose to the spigot, as you don’t want to water patios or pathways. Gather essential fittings like female and male connectors to attach hoses, “T” splitters to branch lines, and end caps to build pressure. A pressure regulator is also a wise investment, as soaker hoses operate best at low pressure (around 10 PSI).
Step 3: Prepare the Garden Bed
Proper bed preparation ensures your soaker hose works efficiently. Start by clearing the area of any weeds, rocks, or sharp debris that could puncture the hose. It is also beneficial to amend your soil with compost or other organic matter. This not only provides nutrients but also improves the soil’s structure, helping it retain moisture delivered by the hose. Level the soil surface as much as possible. A relatively flat surface allows water to seep in evenly, preventing it from pooling in low spots or running off from high spots, which would lead to inconsistent watering for your vegetable plants.
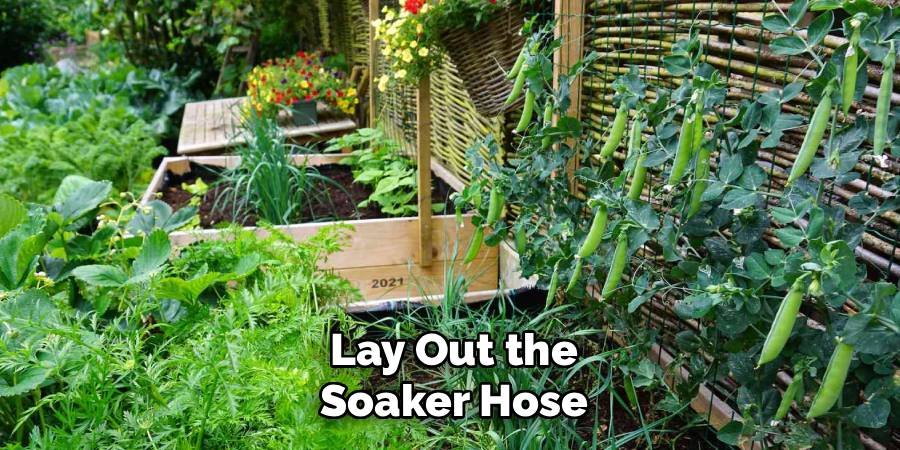
Step 4: Lay Out the Soaker Hose
With your garden prepped, it’s time to position the hose. Following your layout plan, snake the hose through your garden rows. For straight rows of vegetables like carrots or beans, run a single line of hose about one to two inches from the base of the plants. For larger, thirstier plants like zucchini or pumpkins, you can loop the hose around the base of each plant to provide more concentrated watering. Make sure the hose lies flat on the soil and avoid any kinks or sharp bends that could restrict water flow. Use garden staples or “U” pins every few feet to secure the hose in place.
Step 5: Connect to the Water Source
Connecting your system is straightforward. Attach a backflow preventer directly to your outdoor spigot to stop garden water from siphoning back into your home’s water supply. Next, connect a water timer, which will allow you to automate your watering schedule. After the timer, attach the pressure regulator; this is a critical component that protects your soaker hose from bursting under high pressure. Finally, connect your non-porous leader hose to the regulator and run it to the start of your soaker hose line in the garden bed. Secure all connections tightly to prevent leaks.
Step 6: Test Your Soaker Hose System
Before burying the hose with mulch, you must test the system. Turn on the water at a low flow rate and walk the length of the hose. Look for any leaks at the connection points and ensure water is weeping evenly along the entire hose. You should see the soil slowly darkening as it becomes moist, not spraying water into the air. Let it run for about 20-30 minutes and then check the soil. Dig down a few inches to see how deeply the water has penetrated. This initial test helps you adjust the flow rate and running time for optimal performance.
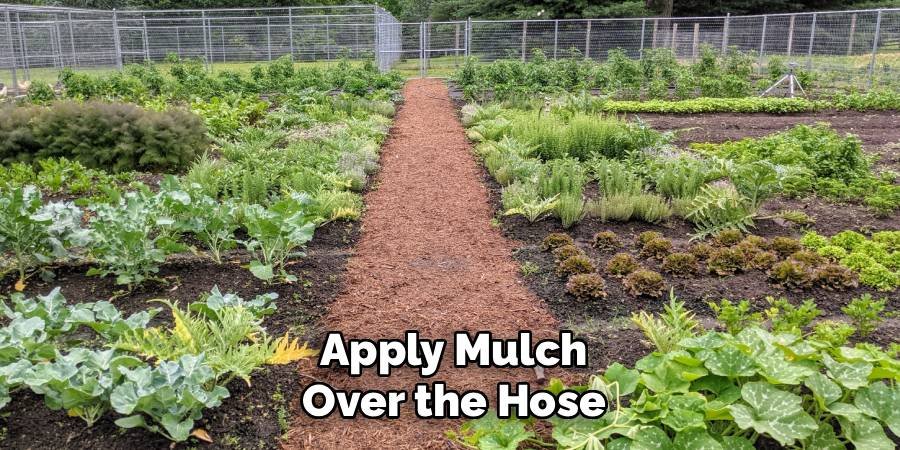
Step 7: Apply Mulch Over the Hose
Once you have confirmed the system is working correctly, cover the soaker hose with a two-to-three-inch layer of organic mulch, such as straw, wood chips, or shredded leaves. This step is crucial for mastering how to use soaker hose in vegetable garden watering. The mulch layer serves several purposes: it reduces water evaporation from the soil surface, keeps the soil cool, suppresses weed growth, and protects the hose from UV degradation. Be careful not to bury the hose too deep, and leave a small area around the base of each plant stem free of mulch to prevent rot.
Step 8: Determine the Right Watering Schedule
The final step is to figure out how long and how often to run your system. This depends on your soil type, climate, and the specific needs of your vegetables. A good starting point is to water two or three times a week for about 30-45 minutes per session. The goal is to water deeply and infrequently to encourage strong root development. Check the soil moisture regularly by digging down 4-6 inches with a trowel. If the soil is dry, you need to water longer or more often. If it’s soggy, reduce the watering time. Adjust as needed throughout the growing season.
Frequently Asked Questions (FAQ)
How Long Should I Run My Soaker Hose for a Vegetable Garden?
The ideal run time depends on your soil type, weather, and plant needs. A good starting point is 30 to 60 minutes, two to three times per week. For sandy soils that drain quickly, you may need shorter, more frequent watering. For heavy clay soils that retain moisture, longer but less frequent sessions are better. The best way to know for sure is to check the soil. After a watering session, dig 4-6 inches deep to see if the root zone is moist. Adjust the duration based on your findings.
Can You Connect Multiple Soaker Hoses Together?
Yes, you can connect multiple soaker hoses, but it’s best to keep the total length under 100 feet per line from the spigot. Water pressure diminishes over distance, and exceeding this length can result in uneven watering, where plants closer to the spigot get too much water and those at the end get too little. If you need to cover a larger area, use a “T” or “Y” splitter at the source to create separate, shorter lines.
Should Soaker Hoses Be on Top of or Under Mulch?
Soaker hoses should always be placed under a 2-3 inch layer of mulch. Placing the hose on top of the soil and covering it with mulch offers several key benefits:

- It reduces water loss from evaporation.
- It protects the hose material from sunlight, extending its lifespan.
- It helps suppress weeds more effectively.
- It keeps the water focused on the soil and root zone.
Do Soaker Hoses Work on a Slope?
Soaker hoses can work on a gentle slope, but you need to plan the layout carefully. Always run the hose across the slope (along the contour), not up and down it. If you run the hose downhill, gravity and water pressure will cause most of the water to exit at the lowest point, leaving the upper parts of the garden dry. Running it horizontally across the slope helps ensure more even water distribution.
How Do I Store My Soaker Hose for Winter?
Proper winter storage is essential to protect your soaker hose. Before the first hard frost, disconnect the entire system from the spigot. Drain all water from the hoses by holding one end up and letting the water run out the other. It’s important to get all the water out, as any trapped water can freeze and expand, causing cracks. Once drained, coil the hoses loosely and store them in a garage, shed, or basement where they will be protected from freezing temperatures and sunlight.
Conclusion
Switching to a soaker hose system is one of the best upgrades you can make for your vegetable garden. It not only simplifies your watering routine but also promotes healthier plants, conserves a precious resource, and reduces your weeding chores. By following the steps outlined above—from planning your layout and choosing the right equipment to testing your system and applying mulch—you can create an efficient and effective irrigation network. Embracing this method of how to use soaker hose in vegetable garden care will reward you with a more resilient garden and a more bountiful harvest season after season.
About Ravuk Barg
B.Sc. Horticulture Science | Certified Master Gardener
Ravuk Barg has spent more than a decade with his hands in the soil and his head full of questions about why some gardens thrive while others struggle. What started as a single raised bed of tomatoes and basil in a modest backyard has grown into a deep, working knowledge of everything from seed germination and soil amendment to companion planting and seasonal pruning.
Over the years, Ravuk has gardened through drought summers, waterlogged springs, and pest invasions that would make most gardeners hang up their trowels for good. Those hard seasons, he’ll tell you, taught him more than any perfect growing year ever could. He writes from that earned experience—covering vegetable growing, ornamental planting, houseplant care, composting, and garden design with equal confidence and curiosity.
Philosophy & Approach
Ravuk’s approach to gardening is rooted in practicality. He favors organic methods not out of dogma, but because they work long-term—resulting in healthier soil, fewer inputs, and stronger plants. He has a particular fondness for heirloom vegetable varieties (the kind with proper flavor), unruly cottage-style flower beds, and the stubborn houseplants that everyone else gave up on.
The Mission: Give readers the honest, experience-backed advice that helps them actually succeed in their gardens—not just the ideal version, but the real one; weeds, failures, and all.
Education & Credentials
-
B.Sc. in Horticulture Science
-
Greenfield Agricultural University
-
Focus: Plant Physiology, Soil Ecology, and Sustainable Crop Production
-
-
Master Gardener Certification
-
Cooperative Extension Service
-
Focus: 200+ hours of hands-on practical training and community garden work
-
Continuing Education
-
Organic Pest Management
-
Native Plant Landscaping
-
Sustainable Crop Production