

Creating landscaping beds is one of the best ways to make your yard look amazing. If you want to know how to create landscaping beds that look great and will last a long time, you’ve come to the right place. Garden beds add beauty to your home and can even increase its value. Many people think creating landscaping beds is a daunting task.
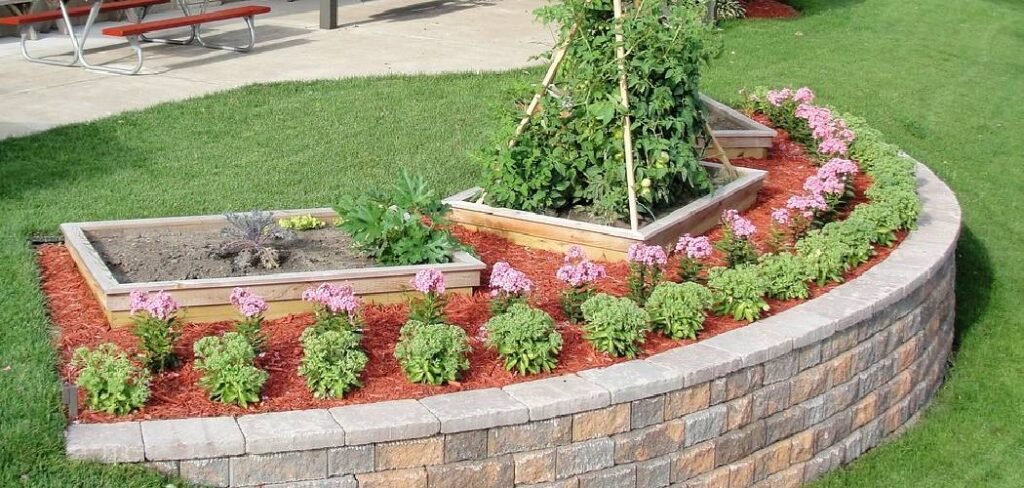
But it’s easy when you know the right steps. You don’t have to be an expert gardener. With a few basic tools and a plan, anyone can create beautiful flower beds. In this guide, we’ll show you exactly how to make landscaping beds from start to finish. We’ll cover everything from your design plan to planting your first flowers. By the end, you’ll have all the knowledge to create stunning garden beds.
What Are Landscaping Beds?
Landscaping beds are special areas in your yard where you plant flowers, shrubs, or other plants. These beds are separate from your regular lawn. They have their soil, borders, and design. Garden beds come in a variety of shapes and sizes. Some are round, while others are long and narrow.
You can make them curved or straight. The choice is yours, depending on your yard and your preferences. These beds serve many purposes. They add color to your yard, create focal points, and can even hide unsightly areas. They also give you a place to grow your favorite plants and flowers.
Benefits of Making Your Landscaping Beds
There are many great benefits to creating your landscaping beds. First, it saves you money. Hiring someone else is much more expensive than doing it yourself. Second, you get exactly what you want. When you create your beds, you choose the size, shape, and plants. No one knows your yard better than you.
Third, it’s great exercise and fun. Working in the garden helps you stay active. Many people find it relaxing and enjoyable. Fourth, it increases the value of your property. Beautiful landscaping beds add more value to your home. They make your home more attractive to visitors.
Tools and Materials You’ll Need
To create great landscaping beds, you need the right tools. Here’s what you should get:
Basic Tools:
- A shovel or a spade for digging
- Garden rake for smoothing the soil
- A tape measure for checking size
- Garden pipe for marking bends
- A wheelchair for moving dirt
- Work gloves to protect your hands
Materials You’ll Need:
- Mulch to cover the soil
- Ribbed materials such as rocks or plastic
- Manure or good soil
- Plants or seeds
- Fertilizer to feed the plants
You may already have some of these tools. If not, you can buy them from a garden store. You can also borrow tools from friends or neighbors.
8 Step-by-Step Guide: How to Make Landscaping Beds
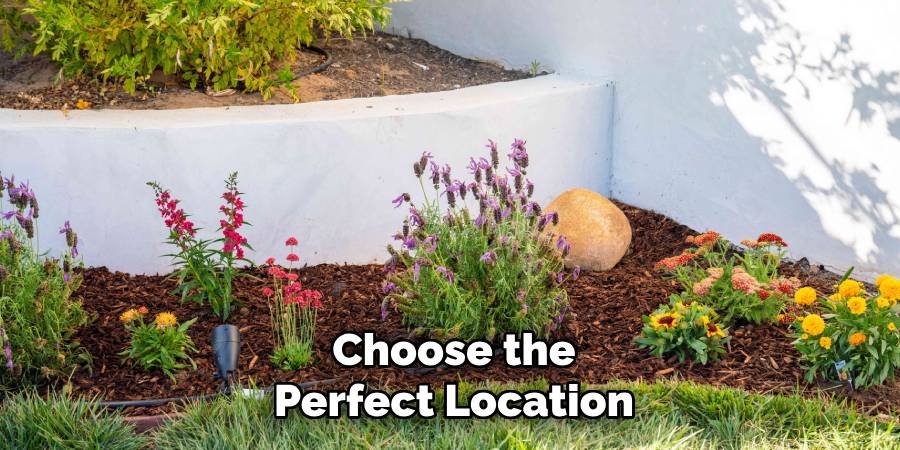
Step 1: Choose the Perfect Location
The first step in creating a landscaped bed is choosing the right location. Look for areas that get the right amount of sun for your plants. Walk around your yard at different times of the day. Notice which areas get morning sun, which areas get afternoon sun, or which areas get shade all day. This information will help you choose the right plants later.
Also, think about access to water. You will need to water your plants, so beds near a water source are easy to maintain. Places that naturally collect water can also work well. Consider the view from your home. You want to see your beautiful bed from inside your home. Windows and patios are great reference points.
Step 2: Design Your Bed Shape and Size
Now is the time to determine the shape and size of your bed. If you are new to landscaping, start with simple shapes. Rectangles and ovals are easy to make and look great. Use a garden hose to create the outline of a curved bed. Place the pipe in the ground in the shape you like. Step back and look at it from different angles.
Move the pipe until you like the shape. For straight edges, use stakes and rope. This helps you create clean, straight lines. Measure to make sure both sides are even. Be sure to keep the beds at a comfortable width. You should be able to reach the middle from both sides. Most beds work best at a width of 3 to 4 feet.
Step 3: Mark and Outline Your Beds
Once you are satisfied with the shape, it is time to mark it permanently. Use spray paint or flour to mark the outline on the grass. If you are using a hose to mark a curve, mark it along with your marking material. For a straight line, use your stakes and rope as a guide. Double-check your measurements before moving on to the next step. It is much easier to change the outline now than it is to start digging. Take pictures of your marked bed from different angles. This will help you remember the design when the marks fade.
Step 4: Remove Grass and Weeds
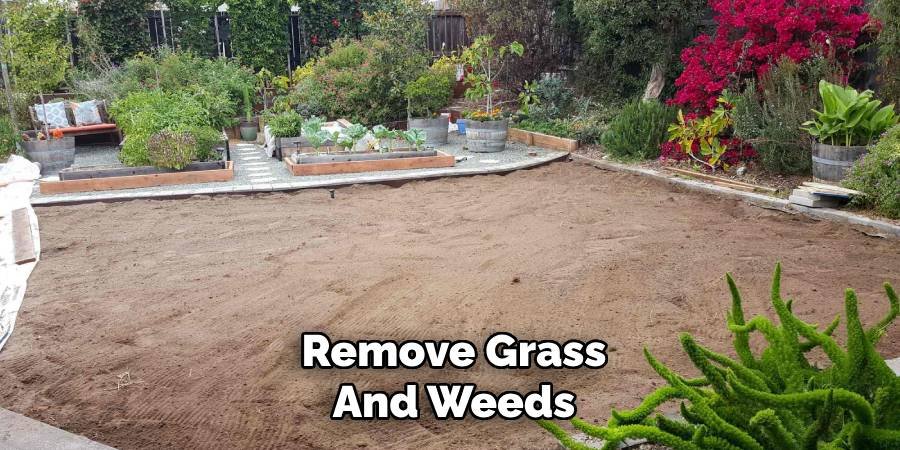
This step is difficult but very important. You need to remove all the grass and weeds from your bed area. Start by cutting the grass short with a lawn mower. This makes the next steps easier. Use a sharp spade to cut along the marked line. Cut straight across, about 3 inches deep. This creates a clean edge. Now, remove the grass into pieces. Slide your spade under the grass and lift it. Try to pull out the roots as well. You can use this grass to fill in any gaps in your lawn. Pull out any weeds you find. Pull out the entire root, or they will grow back. A weed remover makes this job easier.
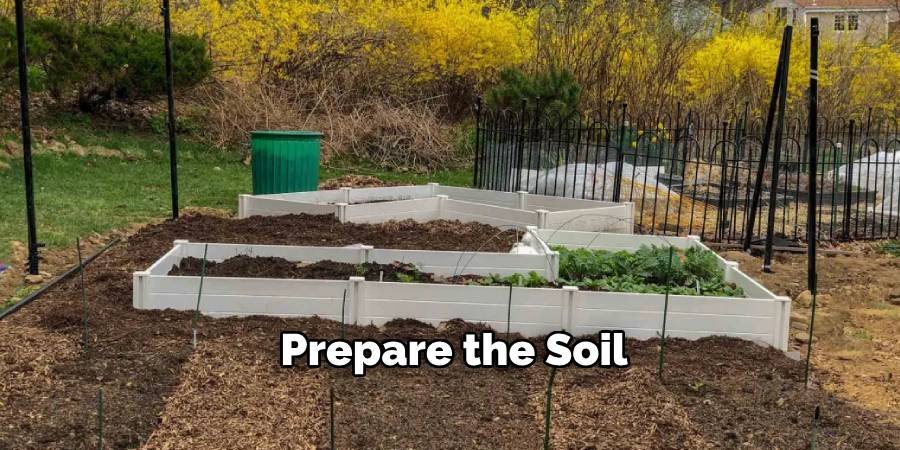
Step 5: Prepare the Soil
Good soil is the secret to healthy plants. Most garden beds require some soil improvement to create a good landscaping bed. Dig the soil in your bed area about 8 to 12 inches deep. Break up any hard soil with your shovel or rake. Add compost or good garden soil to improve your existing soil. Mix in about 2 to 4 inches of new soil with what you have. Remove any rocks, sticks, or debris you find. These things can damage plant roots or make your bed look messy. Test your soil if possible. Most plants prefer soil that is not too acidic or too basic. Garden stores sell simple soil testing kits.
Step 6: Install Edging
Edging gives your bed a clean, professional look. It also prevents weeds from growing in your flower bed. You can use a variety of materials to create an edging. Plastic edging is inexpensive and easy to install. It looks more like stone or brick, but it costs more. To create a plastic edging, dig a small trench along the edge of your bed. The trench should be as deep as your edging material. Place the edging in the trench, leaving about a half-inch of soil above the ground. This prevents weeds from growing. To create a stone edging, dig a shallow trench and place stones alongside it. Make sure they are level and stable.
Step 7: Add Soil and Amendments
Now it’s time to add the final layer of soil. This is where your plants will grow, so prepare it well. Add 2 to 4 inches of good-quality garden soil or compost to your bed. Spread it evenly with your rake. Gently mix the new soil into the soil below. Don’t overmix, or your hard work will be wasted. The finished layer of soil should be slightly higher than the surrounding soil. This helps with drainage and looks better. Water lightly to help the soil settle. Don’t saturate it, just keep it moist.
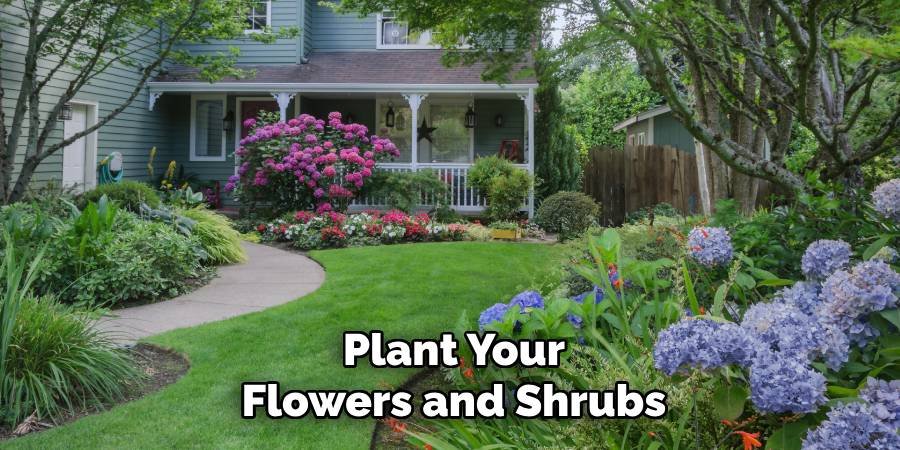
Step 8: Plant Your Flowers and Shrubs
Finally, time for the fun part – planting! Choose plants that match your sun conditions and climate. Start with larger plants, such as shrubs. These are the backbone of your bed design. Space them according to their mature size. Dig a hole for each plant that is twice as wide as the root ball. Make it the same depth as the pot the plant came in. Gently remove the plants from the pot. If the roots are tangled at the bottom, loosen them with your fingers. Place each plant in its hole and fill it in around it with soil. Water each plant immediately after planting. Add smaller flowers and plants last. Follow the same planting process for each.
Common Mistakes to Avoid
Learning how to create a landscape bed means knowing what not to do. Here are some common mistakes that can ruin your hard work. Don’t plant plants too close together. Plants need room to grow. Crowded plants get sick easily and don’t look good either. Avoid planting the wrong plants for your conditions. Sun-loving plants won’t grow well in shade. Shade-loving plants will burn in full sun. Don’t skip the soil preparation step.
No matter how much you water or fertilize, poor soil will produce unhealthy plants. Avoid creating a bed that’s too wide. If you can’t comfortably reach the middle, your bed is too wide. This makes maintenance more difficult. If you’re on a tight budget, don’t plant everything at once. Start with a few main plants and add more over time.
Conclusion
Learning how to make landscaping beds transforms your yard into a beautiful outdoor space. With proper planning, the right tools, and these step-by-step instructions, anyone can create stunning garden beds. Remember that good landscaping beds start with careful planning and proper soil preparation. Choose the right location, prepare your soil well, and select plants that are suited to your growing conditions.
Don’t rush the process – taking your time with each step leads to better results. Your new landscaping beds will provide years of enjoyment and increase the value of your home. Start with a simple design and expand your skills over time. With regular maintenance and seasonal care, your beds will become the highlight of your yard. Whether you plant colorful flowers or elegant shrubs, these beds will make your property stand out from the surrounding area.
About Ravuk Barg
B.Sc. Horticulture Science | Certified Master Gardener
Ravuk Barg has spent more than a decade with his hands in the soil and his head full of questions about why some gardens thrive while others struggle. What started as a single raised bed of tomatoes and basil in a modest backyard has grown into a deep, working knowledge of everything from seed germination and soil amendment to companion planting and seasonal pruning.
Over the years, Ravuk has gardened through drought summers, waterlogged springs, and pest invasions that would make most gardeners hang up their trowels for good. Those hard seasons, he’ll tell you, taught him more than any perfect growing year ever could. He writes from that earned experience—covering vegetable growing, ornamental planting, houseplant care, composting, and garden design with equal confidence and curiosity.
Philosophy & Approach
Ravuk’s approach to gardening is rooted in practicality. He favors organic methods not out of dogma, but because they work long-term—resulting in healthier soil, fewer inputs, and stronger plants. He has a particular fondness for heirloom vegetable varieties (the kind with proper flavor), unruly cottage-style flower beds, and the stubborn houseplants that everyone else gave up on.
The Mission: Give readers the honest, experience-backed advice that helps them actually succeed in their gardens—not just the ideal version, but the real one; weeds, failures, and all.
Education & Credentials
-
B.Sc. in Horticulture Science
-
Greenfield Agricultural University
-
Focus: Plant Physiology, Soil Ecology, and Sustainable Crop Production
-
-
Master Gardener Certification
-
Cooperative Extension Service
-
Focus: 200+ hours of hands-on practical training and community garden work
-
Continuing Education
-
Organic Pest Management
-
Native Plant Landscaping
-
Sustainable Crop Production