

Weeds don’t wait for a convenient time to take over your lawn, garden beds, or driveway cracks. If you’ve picked up a bottle of Eraser herbicide, you’re already ahead of the problem. But using a concentrated glyphosate-based product the right way takes a little preparation.

Knowing how to mix eraser weed killer correctly is the difference between a clean, effective application and wasted product — or worse, damage to the plants you actually want to keep. This guide walks you through everything you need, from gathering your equipment to spraying with confidence, so your first application goes smoothly and safely.
Why Learning to Mix Eraser Weed Killer Matters
Eraser is a broad-spectrum, post-emergent herbicide that targets the root system of weeds and grasses. That power is exactly why mixing it correctly matters. Too little concentrate and you may see weeds bounce back within days. Too much and you risk harming nearby desirable plants, wasting product, and creating runoff that can affect the surrounding environment.
For outdoor beginners and first-time users especially, understanding dilution ratios, label directions, and safe handling habits builds a foundation you’ll carry into every future application. Getting comfortable with the process now means fewer mistakes, better results, and a yard or outdoor space you’re proud of. Think of this as building a practical skill, not just finishing a chore.
Tools and Materials You’ll Need
Before you mix anything, gather everything you need so the process stays organized and safe. You’ll need a clean plastic or stainless-steel sprayer — either a hand pump sprayer or a backpack sprayer depending on how large your treatment area is. Have a graduated measuring cup or syringe on hand so you can measure the concentrate accurately. You’ll also need a clean water source, since water quality can affect how well the herbicide performs.
Personal protective equipment is non-negotiable: wear chemical-resistant gloves, safety glasses or goggles, and long sleeves before you handle the concentrate. A face mask is a smart addition if you’re mixing in an enclosed space. Finally, keep a pen and a piece of tape nearby to label your sprayer — especially useful if you take a break mid-job or share equipment with someone else.
Step-by-Step Guide on Mixing Eraser Weed Killer
Step 1 – Read the Product Label Before You Do Anything Else
The product label is your most important tool. Before you open the bottle, read it completely. It tells you the correct dilution ratio for your specific weed type, the appropriate water volume, and any restrictions on where and when you can apply.

Eraser concentrate is typically used at rates ranging from roughly one to five ounces per gallon of water, but those rates change depending on whether you’re treating stubborn perennial weeds, annual grasses, or preparing a site for new planting. Never assume one ratio works for every situation. The label is a legal document, and following it protects both you and the environment.
Step 2 – Put On Your Protective Gear
Before you touch the concentrate, suit up. Pull on your chemical-resistant gloves first, then your safety glasses. Wear long sleeves and long pants to minimize skin contact. If you’re mixing indoors or in a garage, make sure there’s good ventilation — open doors and windows so fumes don’t build up.

Herbicide concentrates like glyphosate can irritate your eyes, skin, and respiratory tract if you’re exposed without protection. Taking thirty seconds to gear up properly is one of the easiest things you can do to protect yourself. Don’t skip this step even if you’re only mixing a small batch.
Step 3 – Inspect and Clean Your Sprayer
A dirty sprayer can cause real problems. Residue from a previous product — even just a fertilizer or a different herbicide — can reduce effectiveness or cause unexpected damage to plants. Rinse your sprayer tank thoroughly with clean water before you begin. Check the nozzle for clogs or wear, and make sure all seals and connections are tight.

A small leak in the hose or pump handle can expose you to the spray during application. If you’re using a new sprayer straight out of the box, a quick rinse is still a good habit. Starting clean sets you up for a consistent, accurate mix.
Step 4 – Measure Your Water First
Here’s a detail that many first-timers miss: always add water to your sprayer tank before you add the concentrate. This is standard practice in herbicide mixing and helps prevent foaming, splashing, and uneven distribution. Fill your sprayer tank with about half the total water volume you plan to use.

If your target mix is one gallon, add roughly half a gallon of water first. Use the cleanest water available — hard water with high mineral content can sometimes reduce glyphosate’s effectiveness, so soft or moderately hard tap water is your best option when possible. Check your label for any specific guidance on water quality requirements.
Step 5 – Measure the Concentrate Carefully
Now it’s time to measure your Eraser concentrate. Use your graduated measuring cup or syringe for accuracy — eyeballing it can throw off your dilution ratio significantly. Check the label one more time to confirm the rate for your specific application. Pour the measured concentrate slowly into the tank, keeping the bottle close to the water surface to avoid splashing.
If any concentrate contacts your gloves or clothing, rinse it off immediately. This is the most critical part of learning how to mix eraser weed killer properly, and a careful, steady hand here pays off in the finished spray.
Step 6 – Add the Remaining Water and Mix Gently
After the concentrate is in the tank, add the rest of your water slowly. This order — water first, concentrate second, more water last — ensures even distribution without creating heavy foam. Once all the water is in, close the tank lid securely and swirl or gently agitate the sprayer to mix the solution.

Most hand sprayers don’t require vigorous shaking. A slow rotation is enough to blend the mixture. If you’re using a backpack sprayer with an agitation feature, give it a brief run before you head outside. A well-blended solution delivers consistent herbicide coverage across your entire treatment area.
Step 7 – Test and Adjust Your Sprayer Nozzle
Before you walk out to your yard, take a moment to test the spray pattern on pavement or a non-target area. A flat fan nozzle gives you broad, even coverage for treating large weed patches. A cone nozzle works better for targeted spot treatments near garden beds or hardscape edges.
Adjust the nozzle tip or flow control to match your application needs. Knowing how to mix eraser weed killer is only part of the job — getting the right spray pattern ensures you apply it accurately and avoid unnecessary drift onto nearby plants, turf, or water features.
Step 8 – Apply Carefully and Clean Up After
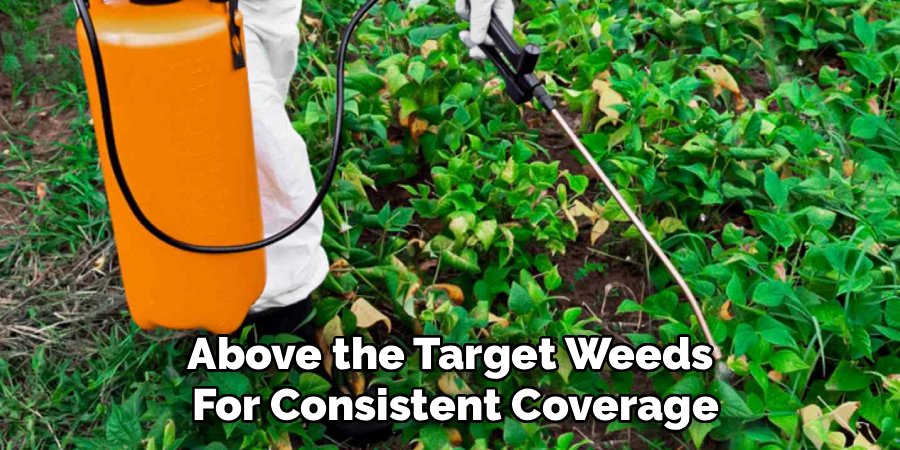
Apply the herbicide in calm conditions. Wind speeds above five miles per hour increase the chance of spray drift, which can harm desirable plants and grass nearby. Walk at a steady pace and hold the wand about twelve to eighteen inches above the target weeds for consistent coverage.
After you finish, rinse the sprayer tank and wand with clean water, and dispose of rinse water according to your local guidelines. Wash your hands and exposed skin thoroughly even if you wore gloves. Keep people and pets away from the treated area until the spray has fully dried — usually one to two hours depending on temperature and humidity.
Common Mistakes When Mixing Eraser Weed Killer
One of the most frequent errors beginners make is ignoring the label and guessing at the dilution ratio. More concentrate does not mean faster or better results. Overdosing can leave residue in the soil, harm surrounding plants, and create unintended bare patches in your lawn. Always measure precisely.
Another common mistake is adding the concentrate to an empty, dry tank before the water. This leads to foaming and uneven mixing, which results in a solution that delivers inconsistent herbicide levels across your spray area. Following the correct order — water first, concentrate second — takes just a few extra seconds and makes a real difference.
Skipping personal protective equipment is also surprisingly common, especially for small applications. Even a brief exposure to glyphosate concentrate can irritate your skin or eyes. Wearing your gloves and glasses every time builds a safe habit that prevents cumulative exposure over a season.
Applying on a windy day is another mistake that leads to poor results and potential plant damage. Spray drift carries the herbicide far beyond your intended zone, which can injure nearby ornamentals or desirable grasses.
Finally, many beginners forget to clean their sprayer after use. Residue left in the tank can degrade nozzle seals, clog the pump, and contaminate future mixes. A quick rinse after every use keeps your equipment in good condition for the next application.
Expert Tips
Timing your application in the early morning or late afternoon gets you the best results. Cooler temperatures reduce evaporation, and weeds absorb herbicide more efficiently when they’re not stressed by midday heat. Aim to spray when no rain is expected for at least twenty-four hours, since rainfall shortly after application can wash away the product before it’s absorbed.
If you’re treating a large area, mix only what you expect to use in a single session. Leftover diluted herbicide degrades over time and loses potency if stored in the sprayer tank. Freshly mixed solution always performs better.
For stubborn perennial weeds with deep root systems, a second application two to three weeks later is often more effective than using a higher concentration in one pass. Patience and proper technique beat brute-force overdosing every time.
Frequently Asked Questions
How much Eraser concentrate should I use per gallon of water?
The mixing rate depends on the type of weeds you’re treating and the specific Eraser product you have. General rates typically fall between one and five ounces per gallon, but you should always check your specific product label for the exact dilution ratio. Using too little reduces effectiveness, while using too much wastes product and may harm nearby plants. When in doubt, start at the lower end of the label’s recommended range.
Can I mix Eraser in any type of sprayer?
Yes, most standard garden sprayers work well, including hand pump sprayers and backpack sprayers. Avoid using metal sprayers that may corrode when exposed to herbicide concentrates over time. Plastic or stainless-steel tanks are the better choice. Always clean the sprayer thoroughly before use, especially if it was previously used for fertilizers or other chemicals, to prevent contamination that could affect the mixture’s performance.
Is it safe to use Eraser near garden beds or trees?
Eraser is a non-selective herbicide, which means it can damage or kill any plant it contacts, including trees, shrubs, and ornamentals. Apply it carefully and only to target weeds. Use a low-pressure, targeted spray pattern, and avoid applying on windy days. If you’re working near valued plants, consider using a cardboard shield or a spot-application nozzle to protect them from accidental contact.
How long should I wait before people and pets can return to the treated area?
Most labels recommend keeping people and pets away from the treated area until the spray has completely dried. This typically takes one to two hours under normal temperature and humidity conditions. On cool or humid days, drying time may be longer. Once dry, the treated surface is generally safe. If you’re unsure, check your specific product label for the re-entry interval listed for your application type.
What should I do if I accidentally get Eraser on my skin or eyes?
Remove contaminated clothing immediately and rinse the affected skin with plenty of water for at least fifteen to twenty minutes. If it contacts your eyes, flush them thoroughly with clean water and seek medical attention. Keep the product label nearby during use because it contains first aid instructions and emergency contact information. Wearing gloves and safety glasses during mixing and application is the simplest way to avoid skin and eye contact in the first place.
Conclusion
Mixing herbicide doesn’t have to feel complicated or intimidating. Once you know the steps, the process becomes straightforward and almost routine. You’ve learned how to mix eraser weed killer from start to finish — from reading the label and gearing up, to measuring concentrate accurately, mixing in the right order, and applying with care. The key takeaways are simple: always follow the label, measure precisely, wear your protective gear, and apply in calm, dry conditions.
Weeds are persistent, but so are good habits. The skills you’ve built here will serve you every time you reach for that sprayer. Your yard deserves consistent care, and now you have the knowledge to give it that. Go mix with confidence, apply responsibly, and enjoy the results of a job done right.