

Everyone loves seeing colorful birds splashing around in the backyard, bringing a sense of peace and nature right to your window. You do not need to spend a fortune at a garden center to get this look, as you can create a stunning water feature using simple terracotta planters.
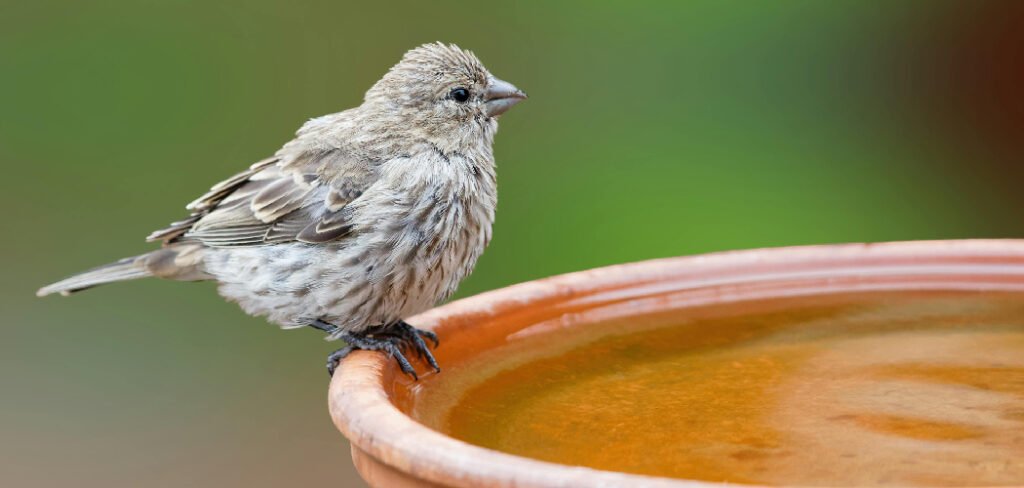
This project is perfect for beginners and adds a wonderful personal touch to your outdoor space. In this guide, we will show you exactly how to make a bird bath from clay pots using inexpensive materials found at any hardware store. Get ready to transform your garden into a welcoming haven for your feathered friends.
Why Build a Clay Pot Bird Bath
Terracotta pots are a classic staple in gardening for good reason because they are affordable, readily available, and offer a natural aesthetic that blends seamlessly with greenery. Using them for a vertical structure creates a sturdy base that can withstand wind and weather when properly assembled.
Unlike plastic alternatives, clay has a weight and texture that feels permanent and high-quality. This DIY project allows for complete customization, meaning you can paint the pots to match your patio furniture or leave them natural for a rustic look. It is also an excellent way to repurpose old planters that might be sitting in your shed gathering dust. By building your own, you save money while creating a unique piece of art that supports local wildlife health.
8 Step-by-Step Guide on How to Make a Bird Bath from Clay Pots
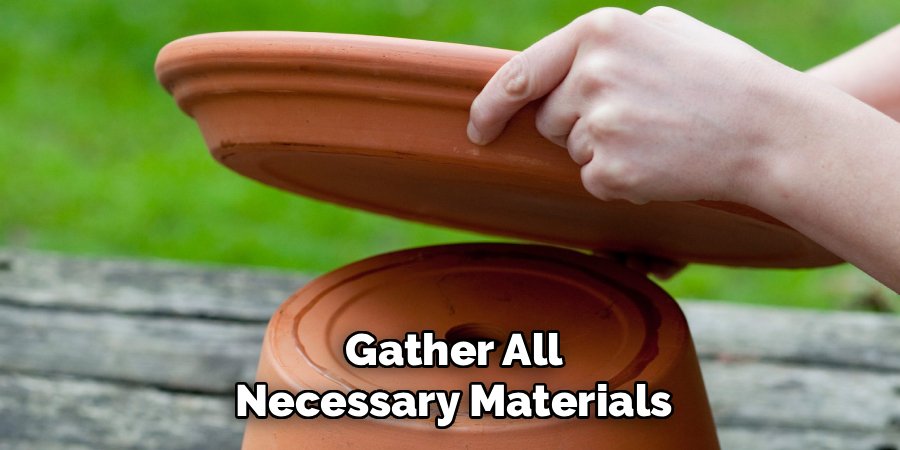
Step 1: Gather All Necessary Materials
Start by collecting everything you need so the construction process goes smoothly without interruption. You will need three terracotta pots of graduating sizes to create a tiered effect. Typically, a 12-inch, 10-inch, and 8-inch pot work best for stability and height.
You also need a large clay saucer, usually 14 to 16 inches wide, which will serve as the water basin. For assembly, purchase a high-quality, waterproof construction adhesive or industrial-strength glue. If you plan to decorate, grab outdoor acrylic paints, brushes, and a clear waterproof sealer. Having these items ready on a drop cloth will make the construction process much more enjoyable and efficient.
Step 2: Clean and Prepare the Surface
New pots often have price stickers or dust, while old pots might have dirt and mineral deposits. It is vital to scrub every inch of the terracotta before applying any glue or paint. Use a stiff brush and a mixture of warm water and white vinegar to remove stubborn grime or white calcium buildup.
Rinse the pots and the saucer thoroughly with a garden hose to ensure no residue remains. Allow them to dry completely in the sun for several hours or overnight. Moisture trapped inside the clay can prevent the adhesive from bonding correctly and cause paint to bubble later. A dry, clean surface ensures a long-lasting garden feature.
Step 3: Apply a Base Coat of Primer
Terracotta is extremely porous and will soak up paint quickly if not primed first. Applying a primer helps your topcoat colors look vibrant and ensures better long-term adhesion. Use a spray primer or a brush-on multi-surface primer designed specifically for outdoor use.
Cover the exterior of the pots and the top and bottom of the saucer completely. You do not need to paint the inside of the pots since they will be hidden, but you should paint the rim. Let the primer dry according to the manufacturer’s instructions. This step is the foundation of your design and helps weatherize the clay against the elements.
Step 4: Decorate With Creative Designs
This is the fun part where you get to express your unique style. You can paint the pots in solid bright colors, create geometric patterns, or paint flowers to match your current garden blooms. If you want a specific look, you can use stencils or painter’s tape to create crisp, professional lines.
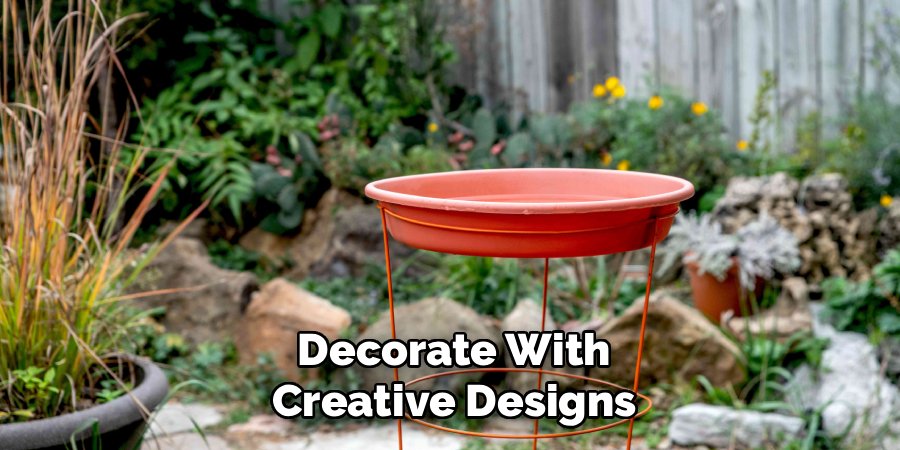
Remember that the pots will be stacked upside down, so orient your designs accordingly if you are painting specific images. Take your time and apply multiple thin coats rather than one thick coat to avoid drips. Let the paint dry completely between layers to ensure a professional and smooth finish that will impress your neighbors.
Step 5: Seal the Pots and Saucer
Protection is crucial for outdoor decor to survive the changing seasons. Once your paint is fully dry, you must apply a clear, waterproof sealant to every painted surface. This protects the paint from fading in the harsh sun and peeling due to heavy rain. Pay special attention to the inside of the saucer where the water will sit. You need multiple coats of a non-toxic, water-based polyurethane or a specific clay pot sealer here to make it watertight. If you skip this, the water will seep through the clay and potentially ruin your hard work. Ensure the sealer is safe for wildlife so the birds remain healthy while using the bath.
Step 6: Assemble the Tower Base
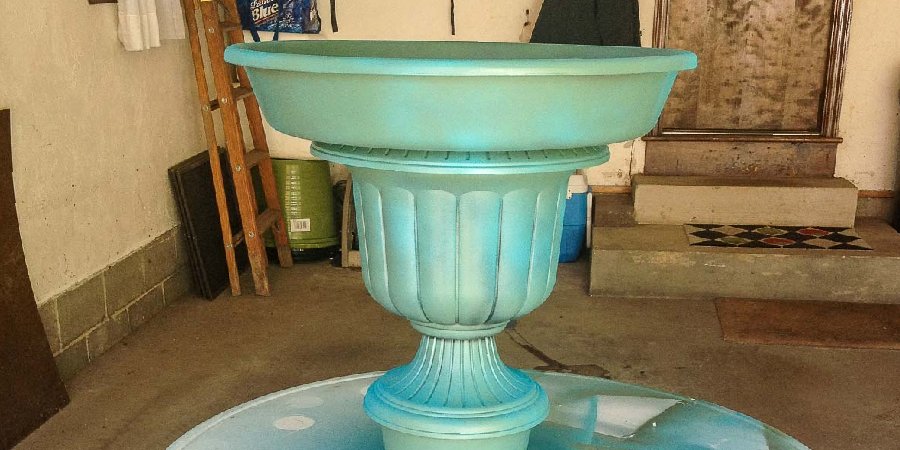
Now you will build the vertical structure. Place the largest pot upside down on a flat, level surface. Apply a generous ring of heavy-duty construction adhesive around the bottom rim of this pot. Take the medium-sized pot and place it upside down on top of the large pot. Press down firmly to spread the glue and check that it is centered. Repeat this process with the smallest pot, gluing it upside down on top of the medium one. This stacking method provides the height and stability needed when learning how to make a bird bath from clay pots for your yard.
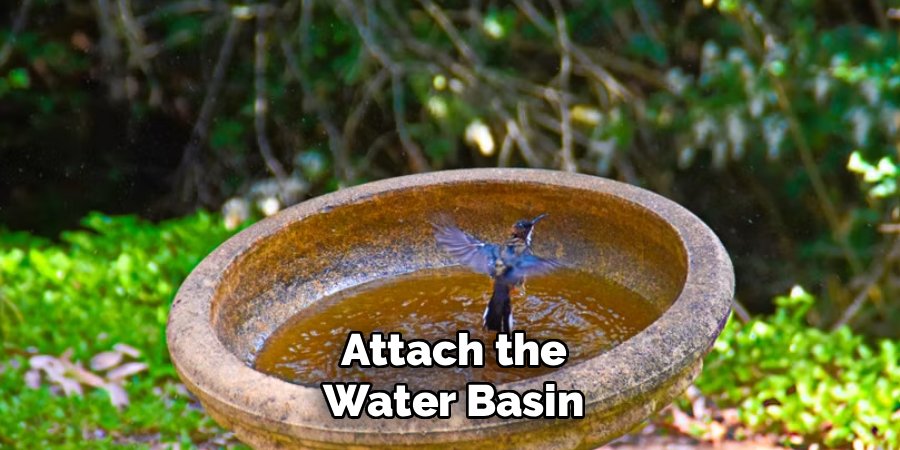
Step 7: Attach the Water Basin
The final structural step involves securing the large saucer to the tower. Apply a thick, continuous bead of adhesive to the bottom of the smallest pot, which is now at the very top of your stack. Carefully place the large saucer right-side up onto the glue. It is essential to center the saucer perfectly so the weight of the water is distributed specifically and evenly. If it is off-center, the bird bath might tip over during high winds or when larger birds land on the rim. Press down gently and wipe away any excess glue that might have squeezed out before it hardens.
Step 8: Allow for Proper Curing Time
Patience is the most difficult part of this project but is absolutely necessary for durability. Although the glue might feel tacky or set within an hour, it usually takes at least 24 to 48 hours to cure completely. Moving the structure too soon can break the bond and compromise the stability. Move the bird bath to a sheltered area like a garage or covered porch while it dries. This protects it from unexpected rain or debris while the adhesive reaches maximum strength. A fully cured bond ensures that your new garden creation remains safe and sturdy for years to come.
Position and Fill Your Creation
Once the adhesive is rock hard, move your bird bath to its permanent location in the garden. Choose a spot that is level and visible from your window so you can enjoy the view. Place a flat paving stone under the base if you are putting it on grass to prevent tipping. Fill the saucer with fresh, clean water. You can add a few decorative stones in the water to give bees and smaller insects a place to land. Now you have successfully finished the project on how to make a bird bath from clay pots and are ready to watch the birds arrive.
Frequently Asked Questions (FAQ)
What Is The Best Glue To Use?
For this project, you need an adhesive that is waterproof and can withstand temperature changes. Standard craft glue or hot glue will not hold up outdoors. Look for:
- Marine-grade epoxy.
- Heavy-duty construction adhesive (like Liquid Nails or E6000).
- Silicone adhesive designed for outdoor masonry.
Ensure the label specifically states it bonds to terracotta or ceramic and is weather-resistant for the best long-term results.
How Do I Keep The Water Clean?
Stagnant water can attract mosquitoes and grow algae, so maintenance is key. You should empty the old water and refill the basin with fresh water every two to three days. Scrub the basin with a stiff brush and a weak vinegar solution once a week to prevent algae buildup. Placing the bath in a shaded area helps keep the water cooler and slows down algae growth, keeping the environment healthy for visiting wildlife.
Will The Pots Crack In Freezing Weather?
Terracotta is porous and absorbs moisture naturally. If that moisture freezes, it expands and can crack the pots. If you live in a climate with freezing winters, it is highly recommended to empty the bird bath and store it in a garage or shed during the coldest months. If moving it is not possible, cover it securely with a heavy-duty waterproof tarp to keep moisture out of the clay pores until spring arrives.
Can I Use Plastic Pots Instead Of Clay?
Yes, you can use plastic planters if you prefer a lighter-weight option. However, plastic does not bond as easily with all glues, so you must choose an adhesive specifically designed for plastics. You will also need to weigh down the bottom pot with stones or sand before gluing the stack together. Without this extra weight, a plastic tower is very light and will easily blow over in a strong wind.
How High Should The Bird Bath Be?
The ideal height depends on the birds you want to attract and the safety of the location. Generally, a height of 24 to 30 inches is perfect. This is high enough to keep birds safe from predators like cats but low enough for you to easily clean and refill the basin. Using a 12-inch, 10-inch, and 8-inch pot stack usually achieves this optimal height perfectly when the saucer is added on top.
Conclusion
Creating a custom water feature for your backyard is a rewarding experience that benefits both you and the local ecosystem. By repurposing simple planters, you have built a sturdy and attractive focal point that adds color and life to your garden. Remember to keep the water fresh and the structure clean to ensure your feathered visitors keep coming back. We hope this guide on how to make a bird bath from clay pots inspires you to get creative. Grab your supplies this weekend and enjoy the beauty of nature right outside your home.
About Ravuk Barg
B.Sc. Horticulture Science | Certified Master Gardener
Ravuk Barg has spent more than a decade with his hands in the soil and his head full of questions about why some gardens thrive while others struggle. What started as a single raised bed of tomatoes and basil in a modest backyard has grown into a deep, working knowledge of everything from seed germination and soil amendment to companion planting and seasonal pruning.
Over the years, Ravuk has gardened through drought summers, waterlogged springs, and pest invasions that would make most gardeners hang up their trowels for good. Those hard seasons, he’ll tell you, taught him more than any perfect growing year ever could. He writes from that earned experience—covering vegetable growing, ornamental planting, houseplant care, composting, and garden design with equal confidence and curiosity.
Philosophy & Approach
Ravuk’s approach to gardening is rooted in practicality. He favors organic methods not out of dogma, but because they work long-term—resulting in healthier soil, fewer inputs, and stronger plants. He has a particular fondness for heirloom vegetable varieties (the kind with proper flavor), unruly cottage-style flower beds, and the stubborn houseplants that everyone else gave up on.
The Mission: Give readers the honest, experience-backed advice that helps them actually succeed in their gardens—not just the ideal version, but the real one; weeds, failures, and all.
Education & Credentials
-
B.Sc. in Horticulture Science
-
Greenfield Agricultural University
-
Focus: Plant Physiology, Soil Ecology, and Sustainable Crop Production
-
-
Master Gardener Certification
-
Cooperative Extension Service
-
Focus: 200+ hours of hands-on practical training and community garden work
-
Continuing Education
-
Organic Pest Management
-
Native Plant Landscaping
-
Sustainable Crop Production