

Feeding your plants can feel like a complicated chore, with so many different fertilizers and schedules to track. Many gardeners, especially beginners, wonder if there’s an easier way to ensure their plants get the steady nutrition they need to flourish. This is where controlled-release fertilizers come in, and Osmocote is a leading name in the field. Its unique resin-coated granules are designed to release nutrients slowly over time, mimicking natural feeding cycles. This guide will walk you through exactly how to use Osmocote, simplifying the process so you can feed your plants with confidence and enjoy a season of lush, healthy growth.

Why Choose a Slow-Release Fertilizer?
Understanding the “why” behind Osmocote makes the “how” much more effective. Unlike quick-release liquid or granular fertilizers that deliver a sudden rush of nutrients, Osmocote works with temperature and moisture to feed your plants gradually. Each little sphere, or prill, contains a core of essential nutrients—nitrogen, phosphorus, and potassium (NPK), plus other micronutrients. A special polymer resin coating regulates the release of these nutrients. When the soil is warm and moist (when plants are actively growing), the prills release more food.
This smart-release technology prevents overfeeding, reduces nutrient runoff into the environment, and eliminates the need for weekly fertilizing. It’s a set-it-and-forget-it solution for busy gardeners.
8 Step-by-Step Guide on How to Use Osmocote
Step 1: Choose the Right Osmocote Formula
Before you begin, select the Osmocote product that best matches your plants’ needs. The brand offers several formulas, such as “Flower & Vegetable” or “Plus Outdoor & Indoor.” The primary difference lies in their nutrient balance (the NPK ratio) and the longevity of the release, which can range from four to six months. Read the packaging to find the one tailored for what you’re growing, whether it’s vibrant annuals, productive vegetables, or lush houseplants. Making the right choice upfront is the first step toward successful feeding.

Step 2: Read the Label for Application Rates
Once you have your product, carefully read the directions on the package. The label provides specific application rates based on the type of plant and the size of its container or garden bed. These instructions are crucial for preventing both underfeeding and overfeeding. The rates are usually given in simple measurements like tablespoons per pot size or pounds per square foot. Don’t be tempted to add “a little extra for good measure,” as the formula is precisely balanced to deliver the right amount of nutrition over its lifespan.
Step 3: Gather Your Simple Tools
You won’t need much to apply Osmocote, which is part of its appeal. Gather a small trowel or cultivator, a measuring spoon or the scoop that often comes inside the package, and a pair of gardening gloves. If you are fertilizing a larger garden bed, you might also want a small bucket to pre-measure the fertilizer for easier distribution. Having these tools ready will make the application process smooth and efficient, allowing you to move from plant to plant with ease.
Step 4: Prepare the Soil or Potting Mix
For best results, Osmocote should be mixed into the soil where roots can access the nutrients. If you are potting a new plant, you can mix the granules directly into your potting mix before filling the container. For established plants in pots or in the ground, use your trowel to gently create a few small holes, about 1-2 inches deep, around the base of the plant near the dripline (the area under the outermost leaves). This prevents the fertilizer from sitting on the surface and ensures it gets down into the root zone.
Step 5: How to Use Osmocote When Planting
Applying Osmocote during planting is the most effective method. After preparing your potting mix as described in the previous step, add the recommended amount of fertilizer and blend it in thoroughly. This ensures the granules are evenly distributed throughout the soil. As the plant’s roots grow and spread, they will come into contact with the prills, giving them access to a consistent food source from day one. This technique establishes a strong foundation for healthy growth throughout the entire season without any further effort.
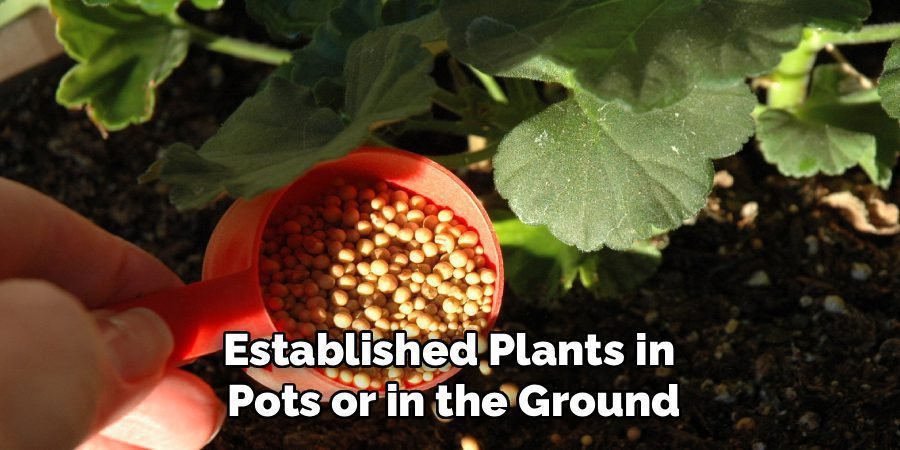
Step 6: Apply to Established In-Ground Plants
For plants already growing in your garden beds, the process is slightly different. First, measure the correct amount of fertilizer based on the plant’s size or the square footage of the area. Sprinkle the granules evenly on the soil surface around the base of the plant, extending out to its dripline. Avoid letting the granules bunch up against the stem or crown. Using your trowel or cultivator, gently work the prills into the top 1-3 inches of soil. This helps activate the coating and protects the granules.
Step 7: How to Use Osmocote for Potted Plants
Feeding established potted plants is just as simple. Measure the correct dose based on the container’s diameter. You can either sprinkle the granules evenly over the soil surface or poke several shallow holes into the soil with a pencil or your finger and pour the granules inside. The second method is often preferred for houseplants, as it tucks the prills out of sight and ensures better soil contact. Gently work the fertilizer into the top inch of soil if you sprinkled it on top.
Step 8: Water Thoroughly After Application
This final step is critical for activating the fertilizer. After you have applied Osmocote and worked it into the soil, water your plant thoroughly. Water helps settle the soil around the prills and initiates the nutrient-release process. The polymer coating on the granules begins to absorb the water, which allows the nutrients inside to slowly start dissolving and passing through the resin into the root zone. From this point on, every time you water, the process will continue, providing steady nourishment.

Frequently Asked Questions (FAQ)
Can You Use Too Much Osmocote?
Yes, it is possible to use too much Osmocote. While it’s a slow-release fertilizer and less likely to cause sudden fertilizer burn than liquid feeds, over-application can still harm your plants. An excessive amount of fertilizer can lead to a buildup of salts in the soil, which can damage roots and inhibit water uptake. This may cause symptoms like yellowing leaves or stunted growth. Always follow the package directions for application rates based on pot size or garden area to ensure safe and effective feeding.
How Often Should You Apply Osmocote?
The application frequency depends on the specific Osmocote product you are using. Most formulas are designed to last for a full growing season, typically between four and six months. For annual flowers, vegetables, and new plantings, one application in the spring is usually sufficient. For perennials and shrubs, a single application in early spring as new growth appears is ideal. Always check the product label, as it will state the fertilizer’s release duration. There is no need to reapply before that time is up.
Does Osmocote Go Bad?
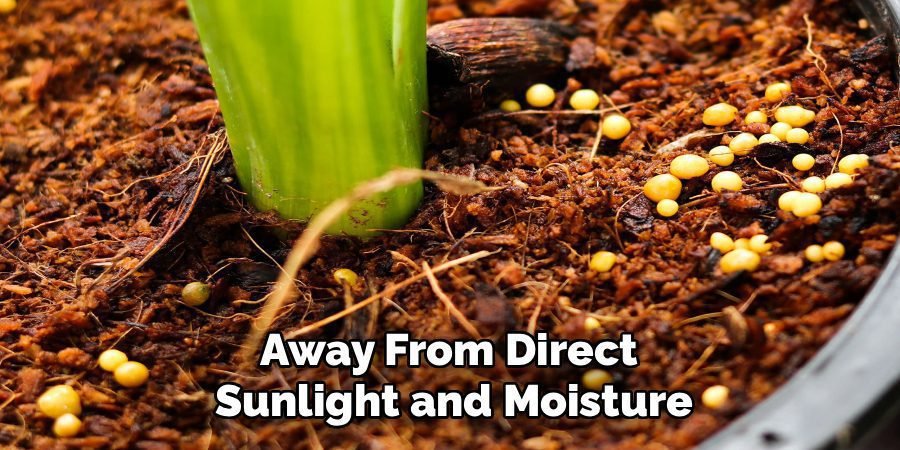
If stored correctly, Osmocote has a very long shelf life and does not “go bad” or expire. To maintain its effectiveness, you should store it in a cool, dry place, away from direct sunlight and moisture. Ensure the container is sealed tightly after each use. If the granules get wet, they may clump together and begin releasing nutrients prematurely, which can reduce their effectiveness when you eventually apply them to your plants. As long as the prills are dry and loose, they are ready to use.
Is Osmocote Safe for All Plants?
Osmocote is safe and effective for a wide variety of plants, including indoor houseplants, outdoor container plants, annuals, perennials, vegetables, and shrubs. However, it’s important to choose the right formula for your specific plant type. For example, a formula for acid-loving plants like azaleas will have a different nutrient profile than one for vegetables. Some very sensitive plants, like orchids or succulents, may require a more specialized fertilizer, so it’s always wise to research your specific plant’s needs.
Can I Mix Osmocote With Water?
No, you should not mix Osmocote granules with water to create a liquid fertilizer. Osmocote is designed as a slow-release, soil-applied fertilizer. The special resin coating on each granule is engineered to release nutrients gradually when it comes into contact with moisture in the soil. Dissolving it in water would damage the coating and release all the nutrients at once, defeating the purpose of its controlled-release technology and potentially harming your plants with an overdose of fertilizer. Apply it directly to the soil as instructed.
Conclusion
Mastering how to use Osmocote is a simple yet powerful way to elevate your gardening. By following these straightforward steps—choosing the right formula, measuring correctly, and incorporating it into the soil—you provide your plants with the consistent, long-term nutrition they need to thrive. This smart fertilizer takes the guesswork out of feeding, giving you more time to enjoy the beauty of your garden. Give it a try this season and watch as your flowers bloom more vibrantly, your vegetables produce a bigger harvest, and your houseplants grow lusher than ever before.
About Ravuk Barg
B.Sc. Horticulture Science | Certified Master Gardener
Ravuk Barg has spent more than a decade with his hands in the soil and his head full of questions about why some gardens thrive while others struggle. What started as a single raised bed of tomatoes and basil in a modest backyard has grown into a deep, working knowledge of everything from seed germination and soil amendment to companion planting and seasonal pruning.
Over the years, Ravuk has gardened through drought summers, waterlogged springs, and pest invasions that would make most gardeners hang up their trowels for good. Those hard seasons, he’ll tell you, taught him more than any perfect growing year ever could. He writes from that earned experience—covering vegetable growing, ornamental planting, houseplant care, composting, and garden design with equal confidence and curiosity.
Philosophy & Approach
Ravuk’s approach to gardening is rooted in practicality. He favors organic methods not out of dogma, but because they work long-term—resulting in healthier soil, fewer inputs, and stronger plants. He has a particular fondness for heirloom vegetable varieties (the kind with proper flavor), unruly cottage-style flower beds, and the stubborn houseplants that everyone else gave up on.
The Mission: Give readers the honest, experience-backed advice that helps them actually succeed in their gardens—not just the ideal version, but the real one; weeds, failures, and all.
Education & Credentials
-
B.Sc. in Horticulture Science
-
Greenfield Agricultural University
-
Focus: Plant Physiology, Soil Ecology, and Sustainable Crop Production
-
-
Master Gardener Certification
-
Cooperative Extension Service
-
Focus: 200+ hours of hands-on practical training and community garden work
-
Continuing Education
-
Organic Pest Management
-
Native Plant Landscaping
-
Sustainable Crop Production