

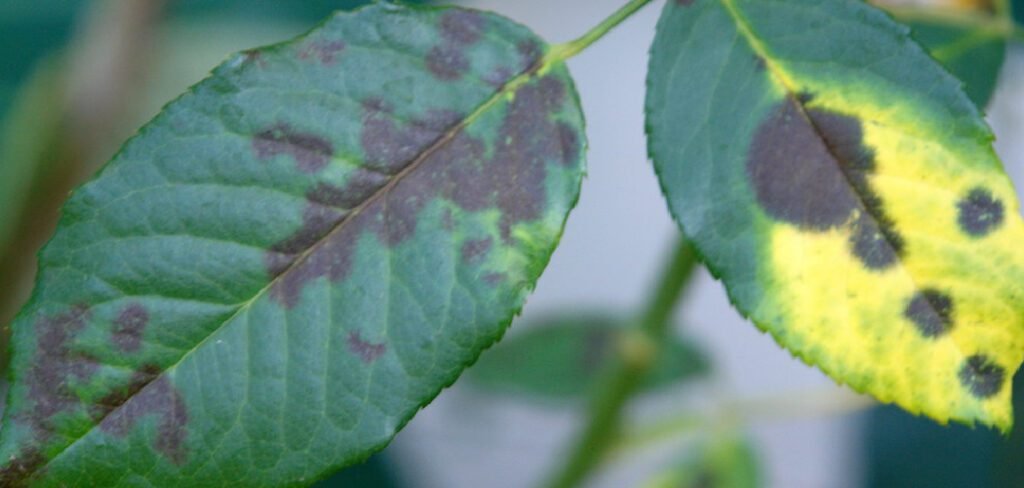
Discovering black leaves on your beloved houseplants can be alarming. You might worry that your plant is dying, but don’t panic. Blackening foliage is a common issue that often signals an underlying problem, not a death sentence for your plant. These dark spots or entirely black leaves are a cry for help, indicating issues ranging from simple watering mistakes to more serious fungal infections. Understanding the root cause is the first step toward a solution. This guide will walk you through exactly how to fix black leaves on plants, helping you diagnose the problem and nurse your green friend back to vibrant health with confidence.
Why Fixing Black Leaves Matters
Addressing black leaves promptly is crucial for your plant’s overall health and longevity. Those dark areas are more than just cosmetic blemishes; they are indicators of distress. Ignoring them can allow the underlying issue, whether it’s a fungal disease, pest infestation, or environmental stress, to spread. This can weaken the plant, stunt its growth, and eventually lead to its demise. By taking swift action, you not only save the affected leaves but also protect the entire plant from further damage. Learning to identify and resolve these problems early will make you a more confident and successful plant parent, ensuring your indoor garden continues to thrive.
8 Step-by-Step Guide on How to Fix Black Leaves on Plants
Step 1: Isolate the Affected Plant
The first and most critical action is to move the affected plant away from any other houseplants you own. Many causes of black leaves, particularly fungal diseases like sooty mold or bacterial infections, are highly contagious. Isolation prevents the potential spread to your healthy plants, containing the issue before it becomes a widespread problem. Find a separate room or a space with ample distance. This quarantine period also gives you a controlled environment to observe the plant closely and treat it without risking the health of your entire collection.
Step 2: Carefully Inspect the Leaves and Stems
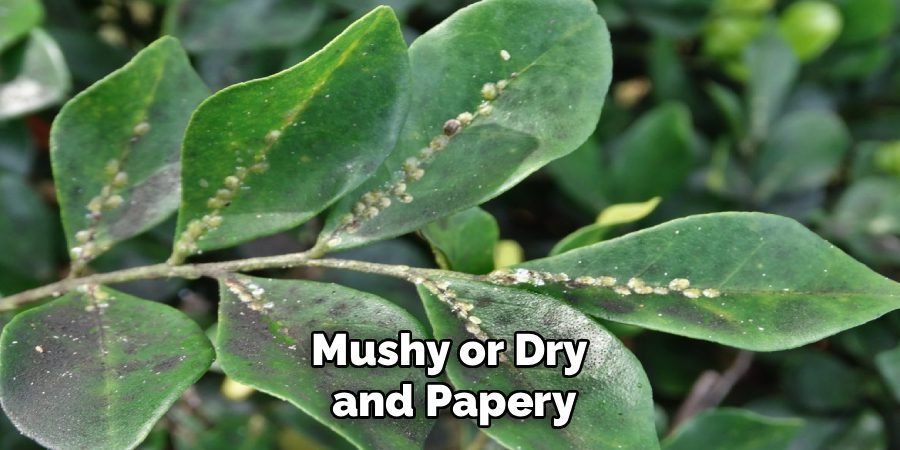
Put on your detective hat and examine your plant from top to bottom. Look closely at the black spots. Are they mushy and wet, or dry and crispy? Are they concentrated at the tips, along the edges, or scattered randomly? Check the undersides of the leaves and the stems for any signs of pests like aphids, mealybugs, or spider mites. These pests can secrete a substance called honeydew, which leads to sooty mold, a fungus that appears as a black coating on the leaves. A thorough inspection is vital for accurate diagnosis.
Step 3: Prune Away Damaged Foliage
Using a pair of clean, sharp pruning shears or scissors, carefully remove all leaves and stems that show signs of blackening. Pruning serves two purposes: it removes the diseased parts of the plant, preventing the issue from spreading further, and it improves air circulation around the remaining healthy foliage. Be sure to cut back to a healthy part of the stem. After pruning, disinfect your tools with rubbing alcohol or a bleach solution to avoid transferring any potential pathogens to other plants during future use.
Step 4: Evaluate Your Watering Routine
Overwatering is one of the most common culprits behind black leaves. When roots sit in soggy soil, they can’t access oxygen and begin to rot, a condition known as root rot. This damage prevents the roots from delivering water and nutrients, causing leaves to turn yellow and then black, often starting at the tips. Check the soil moisture by sticking your finger two inches deep. If it feels wet, you are likely watering too frequently. Allow the soil to dry out significantly between waterings to give the roots a chance to breathe and recover.
Step 5: Assess for Root Rot
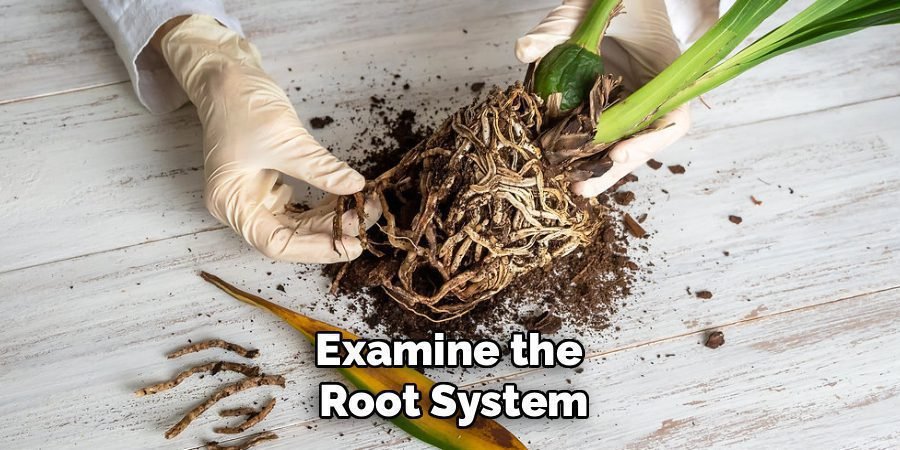
If you suspect overwatering, you may need to check the roots directly. Gently slide the plant out of its pot and examine the root system. Healthy roots are typically firm and white or light-colored. Rotted roots will be black or brown, feel mushy to the touch, and may have a foul odor. If you find root rot, you must act quickly. This is a key step in how to fix black leaves on plants caused by poor drainage. Trim away all the mushy, dark roots with sterile shears, leaving only the healthy sections.
Step 6: Repot with Fresh, Well-Draining Soil
After trimming away rotted roots, it’s essential to repot the plant in fresh, sterile potting mix. Do not reuse the old soil, as it can harbor the fungus or bacteria that caused the rot. Choose a pot with adequate drainage holes at the bottom to prevent water from pooling in the future. Using a well-draining soil mix, perhaps one amended with perlite or pumice, will promote better aeration and reduce the risk of overwatering. This fresh start gives the recovering root system the best possible environment to heal and grow.
Step 7: Improve Air Circulation and Humidity
Poor airflow can create a damp environment where fungal diseases thrive. To combat this, ensure your plant is not overcrowded with other plants. You can also run a small fan in the room for a few hours each day to keep the air moving gently. Conversely, some black leaf tips, especially crispy ones, can be caused by excessively low humidity. If you live in a dry climate, consider placing your plant on a pebble tray with water or using a humidifier to provide the moisture it needs to flourish.
Step 8: Apply a Fungicide if Necessary
If your inspection revealed a fungal issue like powdery mildew or sooty mold, pruning and improving conditions may not be enough. In these cases, a fungicide can be an effective treatment. For a gentle approach, start with a natural option like a neem oil spray, which can treat the fungus and deter pests. For more stubborn infections, you may need a commercial copper-based or sulfur-based fungicide. Always follow the product’s instructions carefully, ensuring you coat all surfaces of the leaves and stems for effective treatment.
Frequently Asked Questions (FAQ)
Can Black Leaves Turn Green Again?
Unfortunately, once a portion of a leaf has turned black, it will not revert to being green. The black areas consist of dead plant tissue, and the damage is permanent. The best course of action is to prune away the affected leaves. This not only improves the plant’s appearance but also redirects its energy toward producing new, healthy growth. Removing the dead foliage helps prevent the spread of any potential disease and allows for better air circulation around the rest of the plant.
How Can I Prevent Black Leaves in the Future?
Prevention is always better than cure. To avoid black leaves, focus on providing proper care. Develop a consistent watering schedule based on your plant’s specific needs, ensuring the soil dries out adequately between waterings. Use pots with good drainage and a well-aerated potting mix. Ensure your plant receives the right amount of light and maintain good air circulation. Regularly inspecting your plants for early signs of pests or disease will also help you catch and resolve issues before they become severe.
Is Sooty Mold Harmful to My Plant?
Sooty mold itself does not directly feed on or infect the plant tissue. Instead, this dark fungus grows on the sticky “honeydew” secreted by pests like aphids, scale, or mealybugs. While it is not directly parasitic, it can be harmful. A thick coating of sooty mold can block sunlight from reaching the leaves, which interferes with photosynthesis. This can weaken the plant over time and lead to stunted growth. To get rid of sooty mold, you must first eliminate the pests that are producing the honeydew.
What Is the Difference Between Black Spots from Sunburn and Fungal Disease?
Sunburn spots, or scorch, typically appear as dry, crispy, and brown or black patches on the parts of the leaves most exposed to direct, intense sunlight. They will not feel mushy or wet. Fungal spots, on the other hand, often start small and may have a yellow halo around them. They can feel either wet and mushy or dry and papery, and they can appear anywhere on the leaf, not just in sun-exposed areas. Fungal spots also tend to spread and multiply over time, while sunburn damage is static.
Should I Fertilize a Plant with Black Leaves?
It is generally not a good idea to fertilize a plant that is already stressed and showing symptoms like black leaves. Fertilizer promotes new growth, and forcing a sick plant to push out leaves can deplete its limited energy reserves, which it needs to fight off disease or recover from root rot. Wait until you have identified and addressed the underlying problem and the plant shows signs of recovery, such as new, healthy growth. At that point, you can resume a gentle fertilizing routine.
Conclusion
Seeing black leaves on your plants can be disheartening, but it is a solvable problem. By following the steps outlined above—from isolating the plant and inspecting it closely to correcting your watering habits and repotting if needed—you can effectively address the root cause of the issue. Remember that patience is key; it will take time for your plant to recover and produce new, healthy growth. Now that you have a clear understanding of how to fix black leaves on plants, you are well-equipped to tackle this common gardening challenge and keep your indoor jungle looking its best.
About Ravuk Barg
B.Sc. Horticulture Science | Certified Master Gardener
Ravuk Barg has spent more than a decade with his hands in the soil and his head full of questions about why some gardens thrive while others struggle. What started as a single raised bed of tomatoes and basil in a modest backyard has grown into a deep, working knowledge of everything from seed germination and soil amendment to companion planting and seasonal pruning.
Over the years, Ravuk has gardened through drought summers, waterlogged springs, and pest invasions that would make most gardeners hang up their trowels for good. Those hard seasons, he’ll tell you, taught him more than any perfect growing year ever could. He writes from that earned experience—covering vegetable growing, ornamental planting, houseplant care, composting, and garden design with equal confidence and curiosity.
Philosophy & Approach
Ravuk’s approach to gardening is rooted in practicality. He favors organic methods not out of dogma, but because they work long-term—resulting in healthier soil, fewer inputs, and stronger plants. He has a particular fondness for heirloom vegetable varieties (the kind with proper flavor), unruly cottage-style flower beds, and the stubborn houseplants that everyone else gave up on.
The Mission: Give readers the honest, experience-backed advice that helps them actually succeed in their gardens—not just the ideal version, but the real one; weeds, failures, and all.
Education & Credentials
-
B.Sc. in Horticulture Science
-
Greenfield Agricultural University
-
Focus: Plant Physiology, Soil Ecology, and Sustainable Crop Production
-
-
Master Gardener Certification
-
Cooperative Extension Service
-
Focus: 200+ hours of hands-on practical training and community garden work
-
Continuing Education
-
Organic Pest Management
-
Native Plant Landscaping
-
Sustainable Crop Production