

Composting is a fantastic way to reduce household waste and create nutrient-rich soil for your garden. However, many beginners are discouraged by a common problem: a smelly compost bin. A properly managed compost pile should smell earthy and pleasant, like a forest floor after rain. If your bin emits foul odors, it’s a sign that something is amiss in the decomposition process. The good news is that these issues are almost always fixable with a few simple adjustments.
This guide will walk you through exactly how to keep compost bin from smelling, turning your composting experience from a stinky struggle into a satisfying success. We’ll explore the science behind the smells and provide actionable steps to ensure your compost remains fresh and odor-free.
Why a Smell-Free Compost Bin Matters
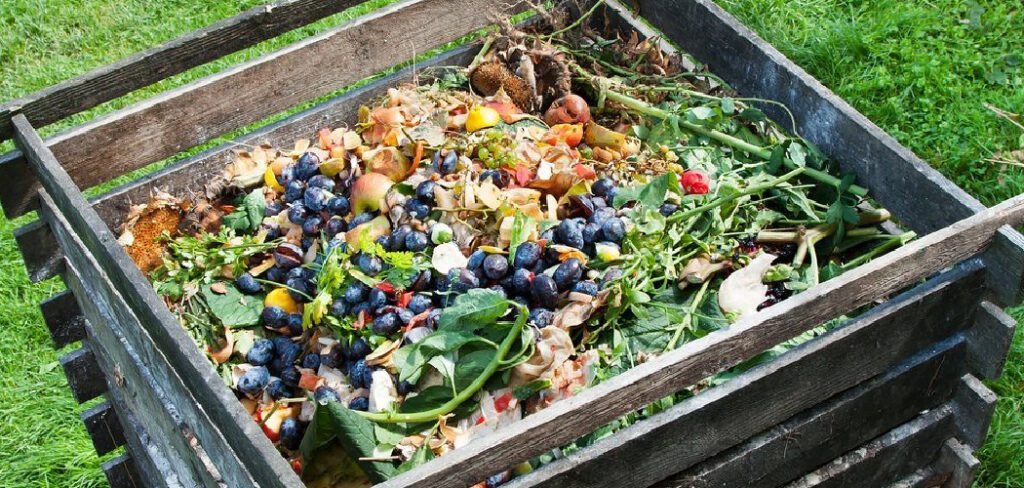
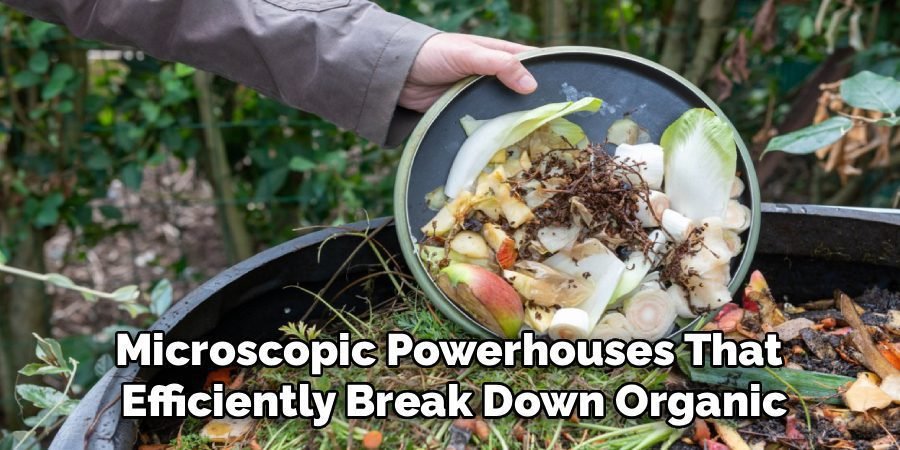
A foul-smelling compost bin is more than just a nuisance; it’s an indicator that your compost pile is unhealthy. The unpleasant odor, often resembling rotten eggs or ammonia, signals an anaerobic environment. This means there isn’t enough oxygen for the beneficial aerobic bacteria—the microscopic powerhouses that efficiently break down organic matter—to thrive. Instead, anaerobic microbes take over, producing smelly byproducts like hydrogen sulfide and methane.
This not only offends your nose and potentially your neighbors’ but also slows down the entire composting process significantly. A well-balanced, odor-free bin decomposes waste faster, attracts fewer pests, and produces higher-quality finished compost for your garden.
8 Step Methods Guide on How to Keep Compost Bin From Smelling
Step 1: Get the Right Carbon-to-Nitrogen Ratio
The secret to a healthy, odor-free compost pile lies in balancing “green” and “brown” materials. Greens are nitrogen-rich items like fruit and vegetable scraps, coffee grounds, and fresh grass clippings. Browns are carbon-rich materials such as dried leaves, cardboard, sawdust, and twigs. An ideal compost pile has a carbon-to-nitrogen ratio of about 30:1. A common mistake is adding too many nitrogen-heavy kitchen scraps without enough carbon.
This imbalance leads to excess nitrogen, which creates ammonia gas—a primary source of bad smells. To fix this, simply layer your materials. For every bucket of green material you add, cover it with two to three buckets of brown material.
Step 2: Ensure Proper Aeration
Oxygen is a critical component for the aerobic bacteria that decompose waste without producing foul odors. A compacted, dense compost pile lacks air pockets, creating the anaerobic conditions that cause smells. To prevent this, you need to aerate your compost regularly. You can do this by turning the pile with a pitchfork or a specialized compost aerator tool at least once every one to two weeks. This action mixes the materials, distributes moisture, and, most importantly, introduces fresh oxygen into the center of the pile. If you use an enclosed tumbler-style bin, giving it five to ten full rotations every few days will achieve the same effect.

Step 3: Manage Moisture Levels Carefully
Your compost pile should be moist, but not soaking wet. The ideal moisture level is often compared to that of a wrung-out sponge. Too little moisture will stall the decomposition process entirely, while too much water will fill the air pockets, cutting off the oxygen supply and leading to a slimy, smelly mess. If your bin is uncovered and exposed to heavy rain, it can quickly become waterlogged. Conversely, in a hot, dry climate, it might dry out.
Check the moisture by grabbing a handful of compost. If you can squeeze out more than a drop or two of water, it’s too wet. Add more dry, brown materials like shredded paper or sawdust to absorb the excess moisture. If it feels dry and crumbly, add a small amount of water.
Step 4: Chop Up Large Materials
The size of the materials you add to your compost bin directly impacts the speed of decomposition. Large items, like whole potatoes or thick broccoli stalks, take a very long time to break down. While they sit there, they can become pockets of anaerobic decay, contributing to bad smells. To accelerate the process and prevent odors, chop or shred larger food scraps and yard waste before adding them to the bin. Smaller pieces have more surface area, giving the beneficial microbes more space to work their magic. This simple action helps maintain a more consistent and faster decomposition rate throughout the entire pile.
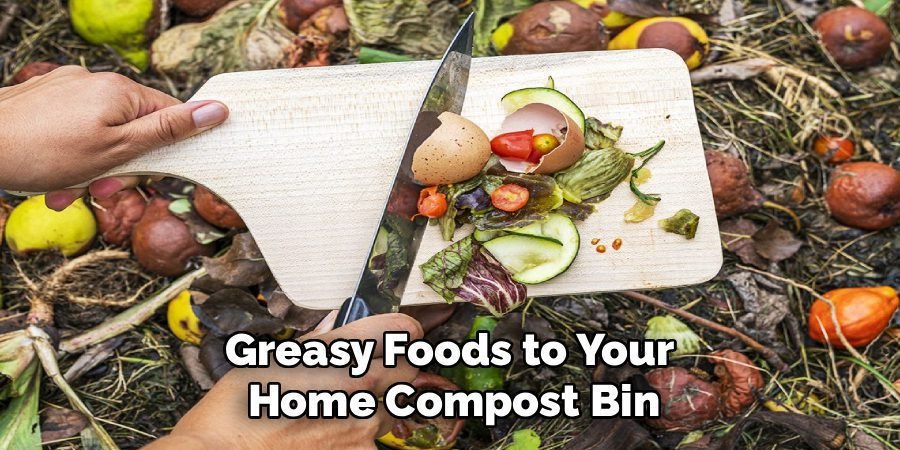
Step 5: Avoid Adding Problematic Foods
While most kitchen scraps are great for compost, some items are guaranteed to cause problems, including strong odors and pests. Never add meat, fish, bones, dairy products, or oily and greasy foods to your home compost bin. These materials decompose slowly and are notorious for producing rancid smells as they rot. They are also magnets for pests like rodents and raccoons. Stick to plant-based materials to keep your compost pile clean and pleasant. This is a crucial step in understanding how to keep a compost bin from smelling and maintaining a healthy ecosystem.
Step 6: Bury Food Scraps Deeply
When you add new kitchen scraps (green materials) to your compost pile, don’t just leave them on the surface. Exposed food waste is a direct invitation for flies and other pests, and it can release odors directly into the air. A better practice is to dig a small hole in the center of your compost pile, deposit the new scraps, and then cover them completely with a layer of existing compost or fresh brown materials. This “burying” technique contains potential smells, deters pests, and helps the new materials heat up and decompose more quickly by placing them in the most active part of the pile.
Step 7: Use a Compost Activator if Needed
Sometimes a compost pile needs a little boost to get going, especially if it has become stagnant and smelly. Compost activators, also known as starters or accelerators, can help. These products contain a concentrated dose of nitrogen and beneficial microorganisms that kick-start the decomposition process. While not always necessary for a well-managed pile, an activator can be a useful tool for correcting an imbalanced or slow-moving system. Adding a layer of finished compost, rich soil, or manure can also serve as a natural activator, introducing a healthy population of microbes to a new batch.
Step 8: Ensure Your Bin Has Proper Drainage
Good drainage is non-negotiable for a healthy compost bin. If water cannot escape, the bottom of your pile will become a saturated, anaerobic swamp. This is one of the most common causes of a foul-smelling compost bin. If you are using a commercial bin, make sure the drainage holes at the bottom are not clogged with soil or debris. If you built your own bin, ensure it has plenty of openings or is placed directly on open soil to allow excess water to drain away freely. Elevating the bin slightly on bricks or wooden blocks can also improve airflow and drainage underneath.

Frequently Asked Questions (FAQ)
What Should I Do if My Compost Bin Already Smells Bad?
If your bin already stinks, the most immediate solution is to aerate it thoroughly and add a generous amount of brown materials. Turn the pile with a pitchfork to introduce oxygen. Then, mix in dry leaves, shredded cardboard, or sawdust. This will help absorb excess moisture and restore the carbon-nitrogen balance. The smell should begin to dissipate within a day or two as the aerobic bacteria take over again.
Can I Put Citrus Peels and Onions in My Compost?
Yes, you can compost citrus peels, onions, and garlic, but do so in moderation. These items are quite acidic and can take longer to break down than other vegetable scraps. Some people worry they will harm worms and microbes, but in a large, well-managed pile, they are perfectly fine. To help them decompose faster, chop them into smaller pieces before adding them to the bin.
Is It Normal for My Compost to Attract Flies?
A few flies are normal, but a swarm indicates a problem. Flies are attracted to exposed food waste. To prevent them, always bury your kitchen scraps under a layer of brown materials or finished compost. Keeping the lid on your bin secure will also help. If you have a persistent problem with fruit flies, ensure your pile is not too wet and that you are maintaining a proper carbon-to-nitrogen balance.
How Do I Know When My Compost Is Ready?
Finished compost, or humus, is dark, rich, and crumbly. It should have a pleasant, earthy smell, similar to soil from a forest floor. You should no longer be able to identify the original materials you put in, such as vegetable peels or leaves. The entire process can take anywhere from two months to a year, depending on your composting method and how actively you manage the pile.
Should I Add Water to My Compost Bin?
You should only add water if the pile is too dry. A healthy compost pile needs to be consistently moist. To check, grab a handful of the material. It should feel like a damp, wrung-out sponge. If it feels dry and dusty, it needs water. Add water slowly with a hose or watering can, turning the pile as you go to distribute the moisture evenly. Avoid making it soggy.
Conclusion
Creating and maintaining a compost pile doesn’t have to be a smelly endeavor. By understanding the basic principles of composting, you can easily cultivate a system that is both efficient and odor-free. The key is balance: a good mix of green and brown materials, the right amount of moisture, and plenty of oxygen. By following the steps outlined above—from managing your carbon-to-nitrogen ratio to ensuring proper aeration and drainage—you are well-equipped to troubleshoot any issues that arise.
You now have the knowledge for how to keep compost bin from smelling, so you can focus on the rewarding process of turning your waste into black gold for your garden.
About Ravuk Barg
B.Sc. Horticulture Science | Certified Master Gardener
Ravuk Barg has spent more than a decade with his hands in the soil and his head full of questions about why some gardens thrive while others struggle. What started as a single raised bed of tomatoes and basil in a modest backyard has grown into a deep, working knowledge of everything from seed germination and soil amendment to companion planting and seasonal pruning.
Over the years, Ravuk has gardened through drought summers, waterlogged springs, and pest invasions that would make most gardeners hang up their trowels for good. Those hard seasons, he’ll tell you, taught him more than any perfect growing year ever could. He writes from that earned experience—covering vegetable growing, ornamental planting, houseplant care, composting, and garden design with equal confidence and curiosity.
Philosophy & Approach
Ravuk’s approach to gardening is rooted in practicality. He favors organic methods not out of dogma, but because they work long-term—resulting in healthier soil, fewer inputs, and stronger plants. He has a particular fondness for heirloom vegetable varieties (the kind with proper flavor), unruly cottage-style flower beds, and the stubborn houseplants that everyone else gave up on.
The Mission: Give readers the honest, experience-backed advice that helps them actually succeed in their gardens—not just the ideal version, but the real one; weeds, failures, and all.
Education & Credentials
-
B.Sc. in Horticulture Science
-
Greenfield Agricultural University
-
Focus: Plant Physiology, Soil Ecology, and Sustainable Crop Production
-
-
Master Gardener Certification
-
Cooperative Extension Service
-
Focus: 200+ hours of hands-on practical training and community garden work
-
Continuing Education
-
Organic Pest Management
-
Native Plant Landscaping
-
Sustainable Crop Production