

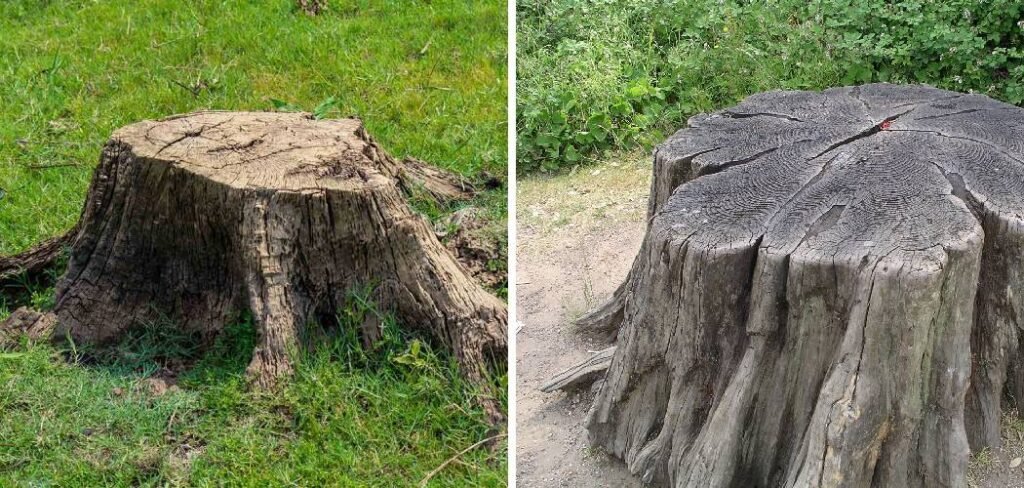
Removing a tree can leave a significant and unsightly bare patch on your lawn. The process often involves heavy equipment, stump grinding, and soil disruption, which can compact the ground and leave it unsuitable for new grass growth.
While it might seem like a daunting task, learning how to repair lawn after tree removal is entirely achievable for any homeowner. This guide will walk you through the entire process, from preparing the soil to seeding and nurturing your new patch of grass. With a bit of patience and the right techniques, you can transform that barren spot into a seamless, lush part of your yard, making it look as though the tree was never there.
Why Lawn Repair After Tree Removal is Crucial
After a tree is removed, you’re often left with more than just an empty space. The area is typically filled with wood chips from stump grinding, has highly compacted soil from machinery, and may have altered soil pH. Simply throwing grass seed over this spot is a recipe for failure. Proper repair is essential to decompact the soil, remove debris that hinders growth, amend the soil with necessary nutrients, and create a level surface that matches the rest of your lawn. Taking these steps ensures that new grass has the healthy foundation it needs to establish strong roots, grow thick, and blend perfectly with your existing turf.
9 Step-by-Step Guide on How to Repair Lawn After Tree Removal
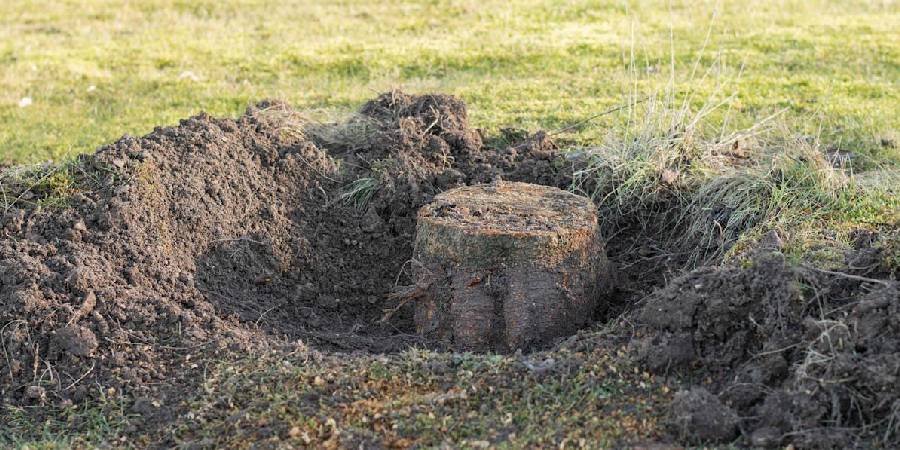
Step 1: Clear All Debris and Wood Chips
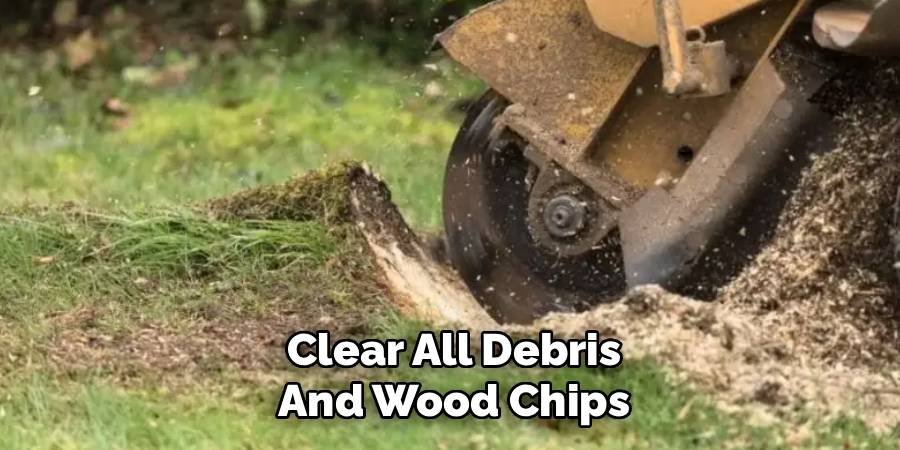
The first crucial step is to thoroughly clear the area. Stump grinding leaves behind a large volume of wood chips and sawdust mixed with soil. You must remove as much of this material as possible. Use a rake and shovel to clear the surface debris. Then, dig down at least six to twelve inches to remove the bulk of the buried wood chips. This debris is high in carbon and will rob the soil of nitrogen as it decomposes, starving your new grass seed of the essential nutrients it needs to germinate and thrive.
Step 2: Break Up and Till the Compacted Soil
Heavy equipment used during tree removal severely compacts the soil, making it difficult for grass roots to penetrate. You need to loosen this dense earth. For smaller areas, a sturdy garden fork or a mattock can be used to break up the top 8-10 inches of soil. For larger patches, renting a rototiller is a more efficient option. Tilling aerates the soil, improves drainage, and creates a soft, workable bed for the new seed. Ensure you break up any large clumps of dirt to create a uniform, crumbly texture across the entire repair area.
Step 3: Test and Amend the Soil
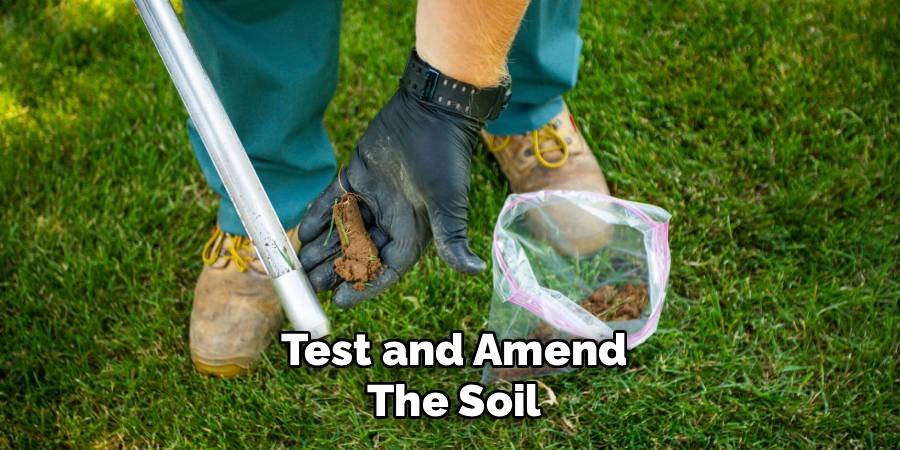
Now that the soil is loosened, it’s time to improve its quality. Tree roots, especially from certain species like pines, can alter the soil’s pH over many years. It’s wise to perform a simple soil test to check the pH and nutrient levels. You can buy a kit from any garden center. Lawns typically prefer a pH between 6.0 and 7.0. Based on the test results, you can amend the soil. If it’s too acidic, add lime. If it’s too alkaline, add sulfur or peat moss. This step ensures your new grass has the ideal environment to grow.
Step 4: Add Topsoil and Compost
The soil left after stump grinding is often poor in quality. To give your new grass the best start, you need to enrich it. Mix a generous amount of high-quality compost into the tilled soil. Compost adds vital organic matter and nutrients that feed the grass and improve soil structure. After mixing in the compost, spread a two-to-three-inch layer of fresh topsoil over the entire area. This provides a nutrient-rich, clean seedbed that is free of the decomposition issues associated with leftover wood debris. This is a critical part of how to repair lawn after tree removal successfully.
Step 5: Level and Grade the Area
Your goal is to create a repair that blends seamlessly with the surrounding lawn. Use a landscape rake to spread the new topsoil evenly, breaking up any remaining clumps. The soil level should initially be slightly higher than the existing lawn, as it will settle over time. Check the grade from multiple angles to ensure there are no low spots where water can pool or high spots that will be scalped by the mower. Gently tamp down the soil with the back of the rake or by walking on it to lightly firm the surface.
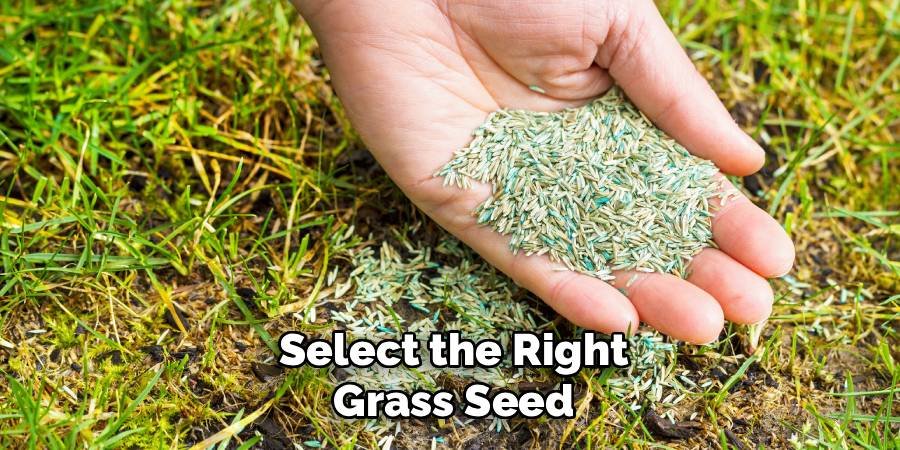
Step 6: Select the Right Grass Seed
Choosing the right grass seed is essential for a seamless patch. Your best bet is to use the same type of grass that is already growing in your lawn. If you’re unsure what type you have, take a small sample to a local nursery for identification. Common choices include Kentucky bluegrass, fescue, and ryegrass. Consider a sun/shade mix if the area’s light conditions have changed with the tree’s removal. Buying high-quality seed will result in better germination rates and a more resilient lawn patch.
Step 7: Spread the Seed and Starter Fertilizer
With the ground prepared, it’s time to sow. Spread the grass seed evenly over the prepared topsoil, following the coverage rate recommended on the seed package. Using a hand-held broadcast spreader will give you the most even distribution. After seeding, apply a starter fertilizer. These fertilizers are specially formulated with a higher phosphorus content, which is crucial for promoting strong root development in new seedlings. Lightly rake the seed and fertilizer into the top quarter-inch of soil to ensure good seed-to-soil contact.
Step 8: Cover the Seed and Begin Watering
To protect the seeds from birds and prevent them from drying out, cover the area with a thin layer of straw, peat moss, or a commercial seed-starting mulch. This covering helps retain moisture, which is vital for germination. Immediately after covering, water the area gently but thoroughly with a fine spray nozzle. You want to moisten the soil without washing the seeds away. Proper watering is perhaps the most important part of the process from here on out.
Step 9: Maintain Consistent Moisture
New grass seeds need constant moisture to germinate. For the first two to three weeks, you must water the area lightly once or twice a day. The goal is to keep the top inch of soil consistently damp, like a wrung-out sponge, but never waterlogged. Avoid letting the soil dry out completely, as this can kill the delicate seedlings before they have a chance to establish. Once the grass reaches a height of about one inch, you can reduce watering frequency but increase the duration to encourage deeper root growth.
Frequently Asked Questions (FAQ)
How Long Does It Take for Grass to Grow After a Tree Is Removed?
The timeline depends on the grass type, climate, and time of year. Generally, you can expect to see germination within 7 to 21 days. It will take about 6 to 8 weeks for the new grass to become established enough for light foot traffic. For the patch to fully mature and blend seamlessly with the rest of your lawn, it can take a full growing season. Patience is key.
Can I Just Plant Grass Over the Wood Chips from Stump Grinding?
No, this is a common mistake. As wood chips and sawdust decompose, they use up the nitrogen in the soil. This process, called nitrogen immobilization, robs the new grass seedlings of a nutrient that is essential for green, leafy growth. Your grass will likely be yellow, patchy, and weak if it grows at all. It is critical to remove as much of the grinding debris as possible before planting.
What Is the Best Time of Year to Repair My Lawn?
The best time to plant new grass is during its peak growing season.
- For cool-season grasses (like Kentucky bluegrass, fescue, and ryegrass), early fall is the ideal time. The soil is still warm from the summer, and the cooler air temperatures reduce stress on the seedlings.
- For warm-season grasses (like Bermuda, Zoysia, and St. Augustine), late spring is the best time to plant.
Do I Need to Do Anything About the Old Tree Roots?
The main stump and major roots should have been ground out during the removal process. However, smaller roots will remain in the soil. These will naturally decompose over several years. They generally won’t interfere with new grass growth, but you may occasionally see mushrooms pop up as the wood breaks down. These are harmless and can simply be mowed over or removed by hand.
When Can I Mow the New Grass for the First Time?
Wait until the new grass reaches a height of about 3 to 4 inches before its first mow. This allows the seedlings to develop a strong enough root system to withstand the stress of mowing. For the first few mows, set your mower to its highest setting and use a sharp blade to ensure a clean cut, which prevents tearing the young grass blades.
Conclusion
Restoring a lawn after tree removal is a project that rewards careful preparation and consistent care. By clearing debris, tilling the soil, adding vital nutrients, and choosing the right seed, you set the stage for success. Following these steps ensures your new patch of grass will not only grow but thrive, creating a lush, uniform appearance that erases any trace of the former tree. While it requires effort, knowing how to repair lawn after tree removal empowers you to reclaim your yard and enjoy a beautiful, healthy landscape for years to come.
About Ravuk Barg
B.Sc. Horticulture Science | Certified Master Gardener
Ravuk Barg has spent more than a decade with his hands in the soil and his head full of questions about why some gardens thrive while others struggle. What started as a single raised bed of tomatoes and basil in a modest backyard has grown into a deep, working knowledge of everything from seed germination and soil amendment to companion planting and seasonal pruning.
Over the years, Ravuk has gardened through drought summers, waterlogged springs, and pest invasions that would make most gardeners hang up their trowels for good. Those hard seasons, he’ll tell you, taught him more than any perfect growing year ever could. He writes from that earned experience—covering vegetable growing, ornamental planting, houseplant care, composting, and garden design with equal confidence and curiosity.
Philosophy & Approach
Ravuk’s approach to gardening is rooted in practicality. He favors organic methods not out of dogma, but because they work long-term—resulting in healthier soil, fewer inputs, and stronger plants. He has a particular fondness for heirloom vegetable varieties (the kind with proper flavor), unruly cottage-style flower beds, and the stubborn houseplants that everyone else gave up on.
The Mission: Give readers the honest, experience-backed advice that helps them actually succeed in their gardens—not just the ideal version, but the real one; weeds, failures, and all.
Education & Credentials
-
B.Sc. in Horticulture Science
-
Greenfield Agricultural University
-
Focus: Plant Physiology, Soil Ecology, and Sustainable Crop Production
-
-
Master Gardener Certification
-
Cooperative Extension Service
-
Focus: 200+ hours of hands-on practical training and community garden work
-
Continuing Education
-
Organic Pest Management
-
Native Plant Landscaping
-
Sustainable Crop Production