

A thriving garden is a source of immense pride, but it can quickly turn to frustration when unwanted animal visitors decide to feast on your hard work. From nimble rabbits to curious deer, a variety of creatures can wreak havoc on your vegetables, flowers, and herbs. Protecting your garden is essential for a successful harvest and peace of mind. While there are many methods to deter pests, one of the most effective and permanent solutions is a physical barrier.
This comprehensive guide will walk you through exactly how to build a garden fence to keep animals out, ensuring your plants stay safe and you can enjoy the fruits of your labor. It’s a rewarding project that empowers you to protect your green space for seasons to come.
Why Build a Garden Fence?
Building a fence is the most reliable way to create a definitive boundary between your cultivated garden and the local wildlife. While repellents and scare tactics can be temporarily effective, they often wash away in the rain or animals become accustomed to them over time. A well-constructed fence provides a constant, 24/7 defense system that doesn’t require reapplication.
It physically blocks access for a wide range of animals, from small ground-dwellers like rabbits and groundhogs to larger intruders like deer. Beyond protection, a fence can also add structure and aesthetic appeal to your garden, defining its space and creating a beautiful, enclosed sanctuary. It’s a one-time investment that pays dividends in saved plants and reduced stress.
8 Step-by-Step Guide on How to Build a Garden Fence to Keep Animals Out
Step 1: Plan Your Fence and Choose Materials
Before you dig your first post hole, a solid plan is crucial. Start by measuring the perimeter of the area you want to enclose to determine the total length of fencing required. Next, identify the specific animals you need to keep out. For small animals like rabbits, a 2-3 foot high fence made of chicken wire or hardware cloth is effective.
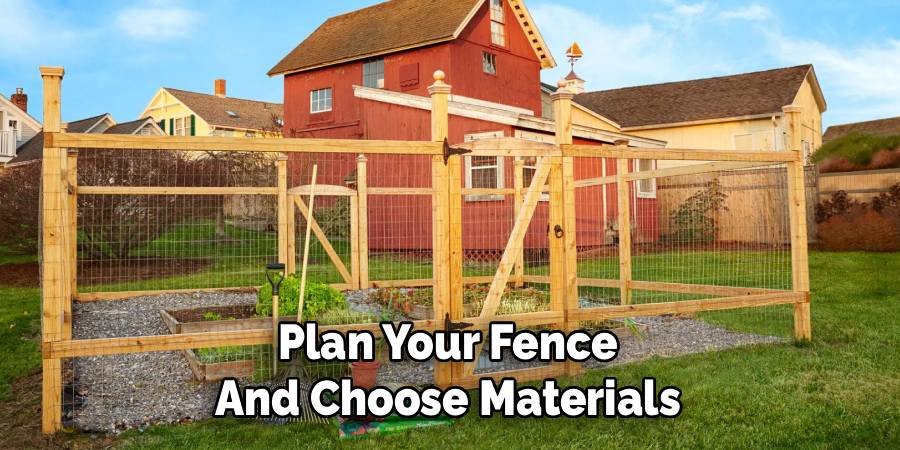
For larger animals like deer, you will need a fence that is at least 6-8 feet tall. Consider the material for your posts—wood offers a classic look, while metal T-posts are durable and easy to install. Your choice of fencing material, whether it’s welded wire, plastic mesh, or hardware cloth, will depend on your budget and the type of pests you are targeting.
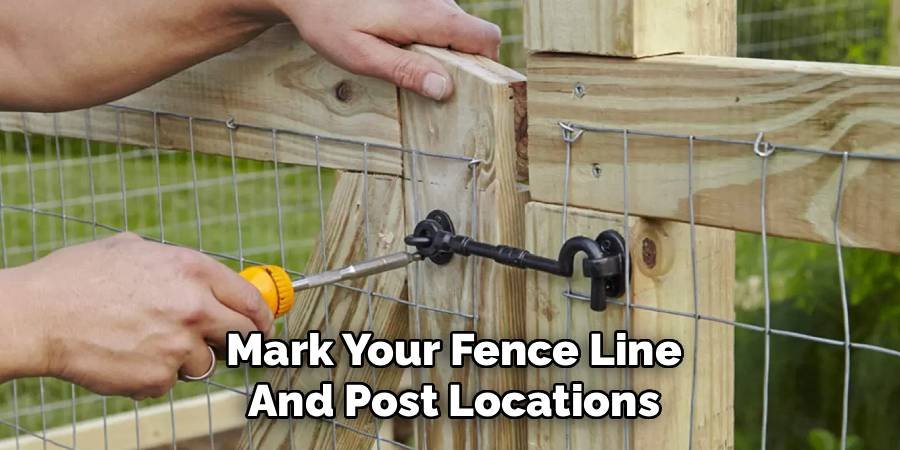
Step 2: Mark Your Fence Line and Post Locations
With your plan in hand, it’s time to mark the layout in your yard. Use stakes and string to create a clear outline of your fence line. This visual guide ensures your fence will be straight and properly positioned. Walk the perimeter to check for any obstacles like large rocks or tree roots that may need to be addressed.
Once your main line is set, measure and mark the specific locations for each fence post. A good rule of thumb is to space posts 6 to 8 feet apart. This spacing provides adequate support for the fencing material without leaving large gaps that could sag over time. Use small flags or a dab of spray paint to clearly identify each spot where a post will be installed.
Step 3: Dig Post Holes and Set Your Posts
This step is the foundation of your fence. Using a post-hole digger or an auger, dig holes at each marked location. The depth of the holes should be about one-third the total length of the post. For example, a 6-foot post should be set in a 2-foot deep hole. This ensures stability against wind and pressure.
Place a few inches of gravel at the bottom of each hole for drainage, which helps prevent wood posts from rotting. Set a corner post first, use a level to ensure it is perfectly vertical, and backfill the hole with soil, tamping it down firmly every few inches. You can also add concrete for maximum stability, especially for corner and gate posts that bear more tension.
Step 4: Install the Remaining Fence Posts
After setting your first corner post, continue installing the rest of the posts along your marked line. It’s helpful to run a string line between two corner posts to ensure all the intermediate posts are aligned perfectly. As you did with the first post, place each subsequent post into its hole, check for vertical alignment with a level, and backfill with soil or concrete.
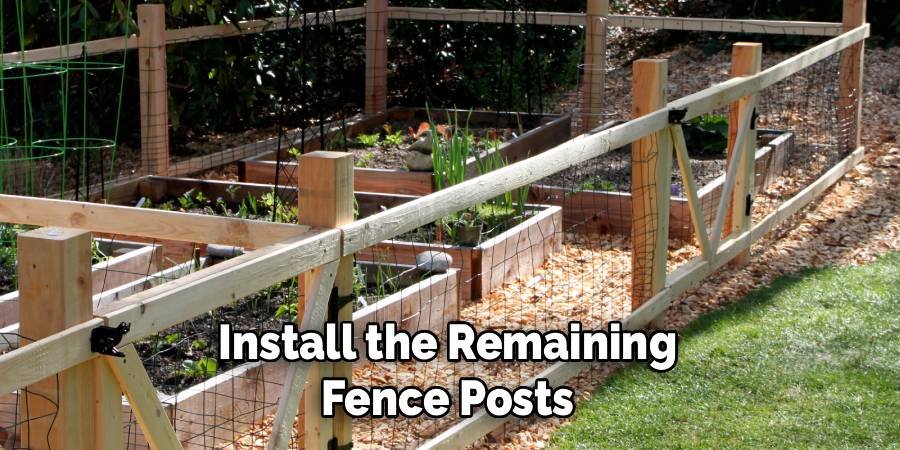
Take your time with this process, as straight, sturdy posts are essential for a professional-looking and effective fence. Double-check the spacing between posts as you go to maintain the 6-to-8-foot distance you planned for earlier. This consistent spacing is key for attaching the fencing material evenly.
Step 5: How to Attach the Fencing Material to Keep Animals Out
Once your posts are securely in place, you can begin attaching your chosen fencing material. Start at a corner post. Unroll a section of the wire or mesh fencing and secure it tightly to the post using fence staples, zip ties, or wire, depending on your post material. Keep the fencing taut as you move from one post to the next, securing it at the top, middle, and bottom of each post to prevent sagging. Overlap sections of fencing by a few inches where they meet to eliminate any potential gaps for animals to squeeze through. Maintaining tension is the most important part of this step to create a strong, durable barrier.
Step 6: Bury the Bottom of the Fence
Many animals, especially rabbits and groundhogs, are persistent diggers. To prevent them from simply burrowing under your new fence, you must create an underground barrier. Dig a trench about 6 to 12 inches deep along the entire base of the fence line. Extend the bottom of your fencing material down into this trench. For added protection, you can bend the bottom of the wire mesh into an “L” shape, extending it outward away from the garden by about a foot before burying it. When a digging animal encounters this horizontal barrier, it will be deterred from continuing. Backfill the trench with soil and pack it down firmly to secure the underground portion of your fence.
Step 7: Build and Install a Gate
A garden isn’t very useful if you can’t get into it. The final construction step is building and installing a gate. The gate should be built from a sturdy frame, often using wood, and covered with the same fencing material as the rest of your fence to ensure there are no weak points. The frame should be sized to fit snugly within the opening you left between two fence posts. Attach the gate to one post using strong hinges and add a secure latch to the other. Ensure the gate swings freely without dragging on the ground and that the latch is easy for you to operate but difficult for an animal to nudge open.
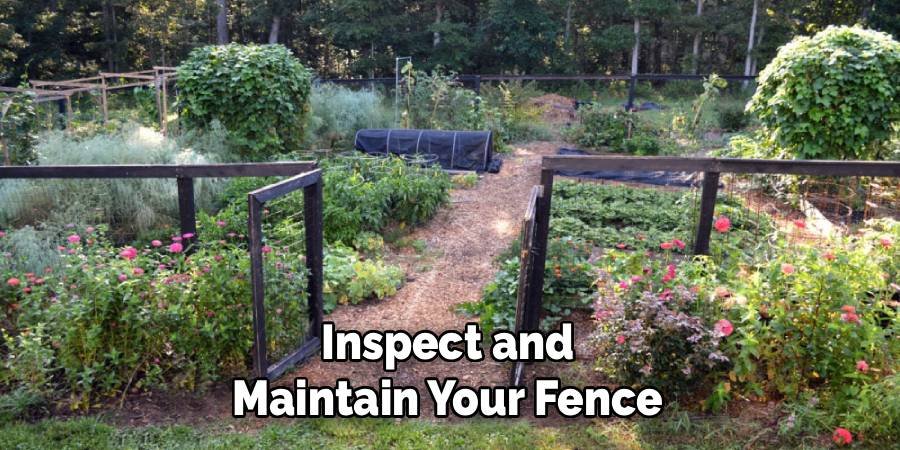
Step 8: Inspect and Maintain Your Fence
Your fence is built, but the job isn’t quite done. This final step is crucial for long-term success when considering how to build a garden fence to keep animals out. Walk the entire perimeter of your new fence and perform a thorough inspection. Look for any loose staples, gaps between fencing sections, or areas at the base that might not be fully secure. Address any issues you find immediately. Regular maintenance is key to keeping your fence effective. Periodically check for damage from weather or animals attempting to break through, ensure the gate latch remains secure, and trim back any vegetation that could provide cover for pests or weigh down the fence.
Frequently Asked Questions
What Is the Best Height for a Garden Fence to Keep Out Deer?
For deer, fence height is the most critical factor. A standard fence of 4-5 feet is not enough, as deer can easily jump it. To effectively keep deer out of your garden, you should aim for a fence that is at least 8 feet tall. Some gardeners have success with two parallel fences that are about 4 feet tall and spaced 4-5 feet apart, as deer have poor depth perception and are hesitant to jump into a small, enclosed space.
How Can I Stop Rabbits and Groundhogs From Digging Under My Fence?
Rabbits and groundhogs are determined diggers. The most effective way to stop them is to create an underground barrier. You should bury the bottom of your fence at least 6-12 inches deep. For even better results:
- Use a sturdy, small-gauge mesh like hardware cloth for the bottom portion of your fence.
- Bend the bottom foot of the fencing into an “L” shape, extending outward from the garden, and bury it in a trench. This creates a horizontal shelf that stops them when they try to dig down.
What Is the Most Cost-Effective Fencing Material for a Large Garden?
For large gardens, cost is a major consideration. Welded wire or woven wire fencing often provides the best balance of durability and affordability. Metal T-posts are also a budget-friendly and easy-to-install option compared to traditional wood posts. While plastic mesh fencing can be cheaper, it is less durable and can be chewed through by some animals. Chicken wire is inexpensive but may rust quickly and is only effective against smaller pests.
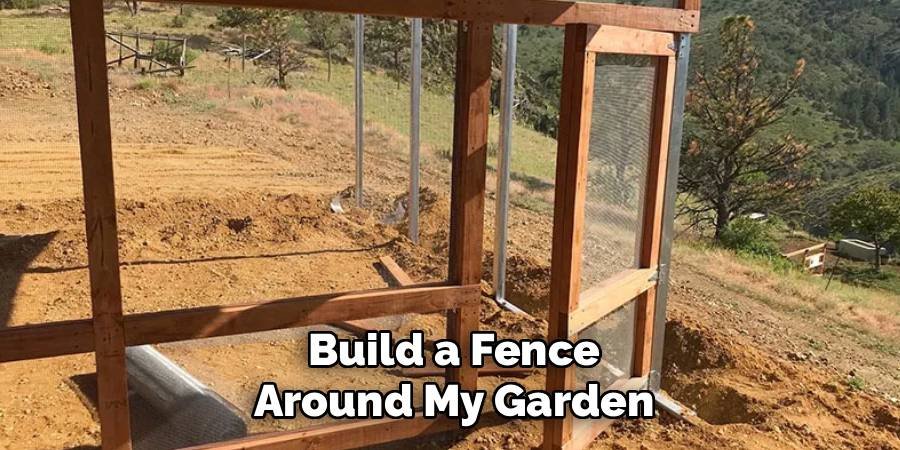
Do I Need a Permit to Build a Fence Around My Garden?
This depends entirely on your local municipality. Many towns and cities have regulations regarding fence height, materials, and placement (especially for front yards or property lines). Before you start building, it is essential to contact your local planning or zoning office to inquire about any necessary permits or specific codes you must follow. This simple step can save you from potential fines or having to tear down your work.
Can I Use an Electric Fence for a Vegetable Garden?
Yes, an electric fence can be a highly effective deterrent, particularly for animals like raccoons, deer, and even bears. However, they require more maintenance and safety considerations. You’ll need a fence charger, insulators, and poly wire or tape. It’s crucial to post clear warning signs. An electric fence works by delivering a short, safe, but unpleasant shock, training animals to stay away. It can be a great option but may not be ideal for households with small children or pets.
Conclusion
You’ve invested time, effort, and care into your garden, and protecting it is a top priority. By following these steps, you have a clear roadmap for creating a strong and effective barrier against unwanted wildlife. From planning your layout and setting sturdy posts to burying the base and installing a secure gate, each stage is vital for success.
The sense of security and satisfaction that comes from seeing your plants thrive, safe from nibbling pests, is well worth the effort. Now that you understand how to build a garden fence to keep animals out, you are equipped with the knowledge to tackle this project and safeguard your beautiful garden for many harvests to come.
About Ravuk Barg
B.Sc. Horticulture Science | Certified Master Gardener
Ravuk Barg has spent more than a decade with his hands in the soil and his head full of questions about why some gardens thrive while others struggle. What started as a single raised bed of tomatoes and basil in a modest backyard has grown into a deep, working knowledge of everything from seed germination and soil amendment to companion planting and seasonal pruning.
Over the years, Ravuk has gardened through drought summers, waterlogged springs, and pest invasions that would make most gardeners hang up their trowels for good. Those hard seasons, he’ll tell you, taught him more than any perfect growing year ever could. He writes from that earned experience—covering vegetable growing, ornamental planting, houseplant care, composting, and garden design with equal confidence and curiosity.
Philosophy & Approach
Ravuk’s approach to gardening is rooted in practicality. He favors organic methods not out of dogma, but because they work long-term—resulting in healthier soil, fewer inputs, and stronger plants. He has a particular fondness for heirloom vegetable varieties (the kind with proper flavor), unruly cottage-style flower beds, and the stubborn houseplants that everyone else gave up on.
The Mission: Give readers the honest, experience-backed advice that helps them actually succeed in their gardens—not just the ideal version, but the real one; weeds, failures, and all.
Education & Credentials
-
B.Sc. in Horticulture Science
-
Greenfield Agricultural University
-
Focus: Plant Physiology, Soil Ecology, and Sustainable Crop Production
-
-
Master Gardener Certification
-
Cooperative Extension Service
-
Focus: 200+ hours of hands-on practical training and community garden work
-
Continuing Education
-
Organic Pest Management
-
Native Plant Landscaping
-
Sustainable Crop Production