

Welcome, fellow plant enthusiasts! If you’ve ever admired the hardy and beautiful aloe vera plant, you might be wondering how to give it the best possible care. A huge part of that care comes down to the soil. Unlike many common houseplants, aloes are succulents, meaning they have specific needs for their growing medium.
They thrive in conditions that mimic their native arid environments. Using standard potting mix can lead to waterlogged roots and an unhappy plant. This guide will walk you through everything you need to know, showing you exactly how to make soil for aloe vera that will help your plant flourish for years to come. Get ready to create the perfect foundation for a healthy, thriving succulent.
Why Your Aloe Vera Needs a Special Soil Mix
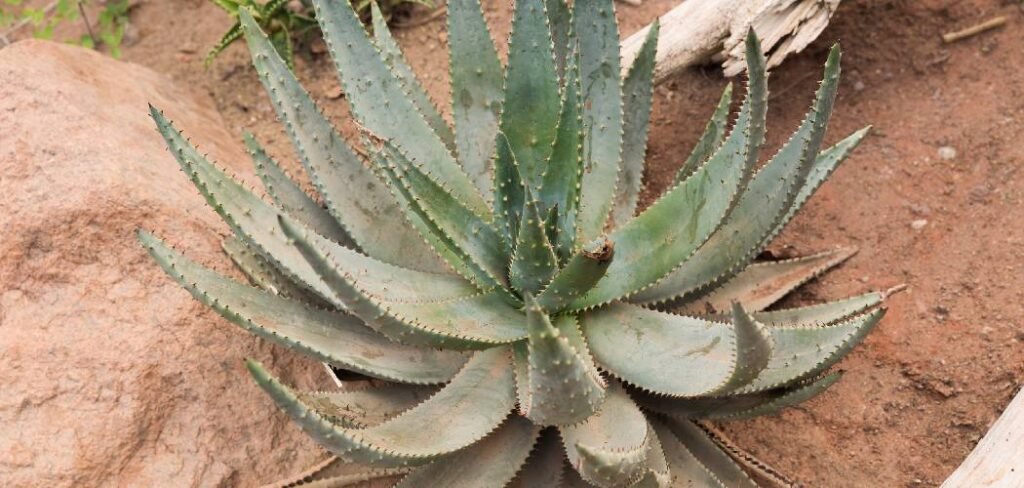
Aloe vera plants are native to arid, desert-like regions where the soil is sandy, rocky, and drains exceptionally fast. Their root systems are adapted to these conditions, absorbing water quickly after rare rainfall events and then drying out to prevent rot. When you bring an aloe vera into your home, replicating this environment is key to its survival and growth.
Standard potting soil is designed to retain moisture for plants that need consistent hydration. For an aloe, this constant dampness is a death sentence. It suffocates the roots, preventing them from accessing oxygen and creating a perfect breeding ground for fungal diseases that lead to root rot. A custom soil blend ensures that water drains away freely, allowing the roots to breathe and stay healthy, just as they would in their natural habitat.
8 Step Method Guide on How to Make Soil for Aloe Vera
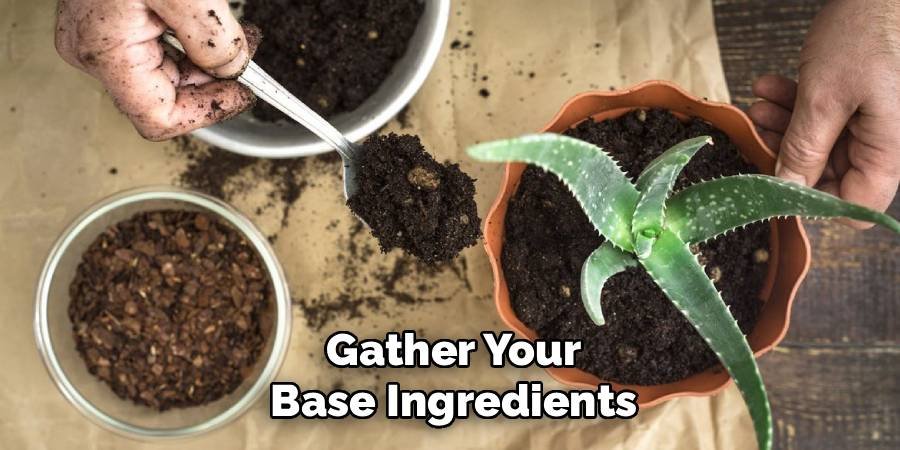
Step 1: Gather Your Base Ingredients
Before you can start mixing, you need to gather the fundamental components. The primary goal is to create a mixture that is light and drains quickly. You will need a standard, all-purpose potting mix as your base. This will provide some organic matter and a stable structure. It is important to choose a mix that does not contain added moisture-retaining crystals or heavy fertilizers, as these can be detrimental to your aloe. Think of this potting soil as the foundation upon which you will build the perfect succulent-friendly environment. It will make up about one-third of your final blend.
Step 2: Select Your Drainage Amendments
The most critical part of an aloe vera soil mix is excellent drainage. To achieve this, you need to add inorganic materials that create air pockets and allow water to flow through easily. The two best options are coarse sand and perlite. Coarse sand, often sold as horticultural sand, mimics the natural gritty texture of desert soil. Avoid using fine play sand, as it can compact and worsen drainage. Perlite, the small white volcanic glass pebbles, is incredibly lightweight and porous, making it perfect for improving aeration and preventing soil compaction. You will use these amendments in equal parts with your potting soil.
Step 3: Consider Adding a Porous Material like Pumice
For an even better mix, consider adding pumice. Pumice is a type of volcanic rock that is highly porous and lightweight. While similar to perlite in function, it has a slight advantage. Pumice is heavier than perlite, so it doesn’t float to the top of the soil over time with watering. It also holds a small amount of water and nutrients within its pores, releasing them slowly to the plant’s roots without making the soil soggy. This can be beneficial in preventing the soil from drying out too quickly while still ensuring excellent drainage. Adding a small amount of pumice can elevate your soil blend from good to great.
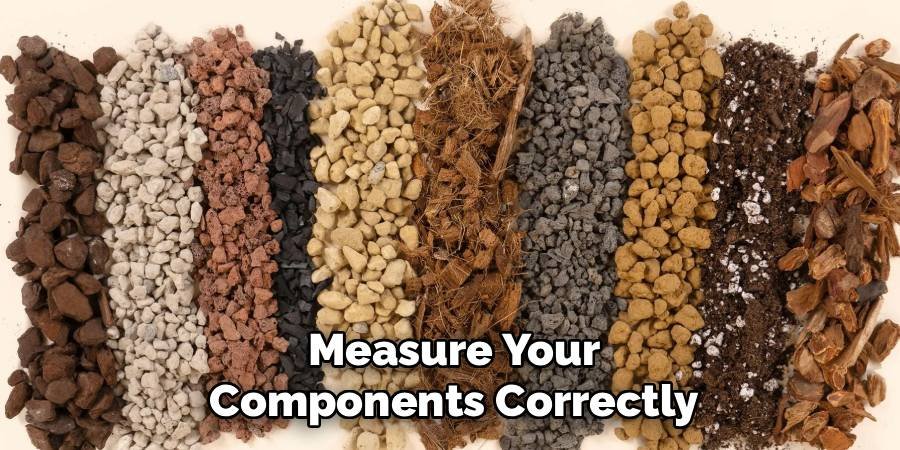
Step 4: Measure Your Components Correctly
Precision is helpful when creating your soil mix. The most widely recommended and effective recipe follows a simple 1:1:1 ratio. This means you will use one part potting soil, one part coarse sand, and one part perlite (or a mix of perlite and pumice). For example, if you use two cups of potting soil, you will add two cups of coarse sand and two cups of perlite. This balance ensures that you have enough organic matter to provide structure while prioritizing the drainage and aeration that are vital for preventing root rot in your aloe vera plant.
Step 5: Mix Everything Thoroughly
Once you have all your ingredients measured, it’s time to combine them. Use a large bucket, tub, or a tarp to give yourself plenty of room to work without making a mess. Pour in the potting soil, coarse sand, and perlite. Using your hands (gardening gloves are recommended) or a small trowel, mix the components together thoroughly. Your goal is to create a uniform blend where all the ingredients are evenly distributed. Continue mixing until you can no longer see distinct clumps of any single ingredient. The final texture should be light, gritty, and crumbly.
Step 6: Test the Drainage of Your Mix
Before you pot your aloe, it’s a good idea to perform a quick drainage test. Take a small handful of your new soil mix and moisten it. It should feel damp but not muddy, and it shouldn’t clump together tightly when you squeeze it. Next, fill a small pot (with drainage holes) with the soil and pour some water over it. The water should start to drain from the bottom almost immediately. If it pools on top or takes a long time to seep through, your mix may still be too dense. You can easily fix this by adding more perlite or coarse sand until the drainage is perfect.
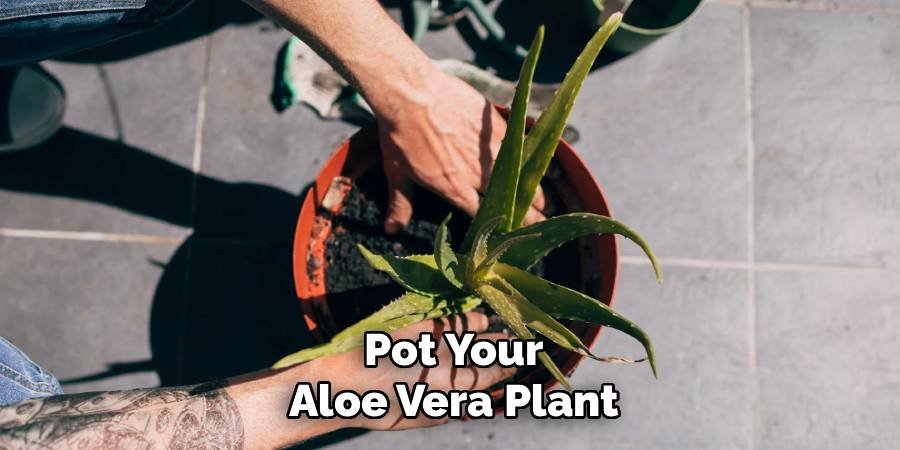
Step 7: Pot Your Aloe Vera Plant
Now for the exciting part! Select a pot with at least one drainage hole. Terracotta pots are an excellent choice as their porous nature helps the soil dry out faster. Gently remove your aloe vera from its current pot, carefully dusting off any old, compacted soil from its roots. Fill the new pot partway with your custom soil mix, place the aloe inside, and backfill around the roots until the plant is secure. Make sure not to bury it deeper than it was in its original pot. This completes the process of how to make soil for aloe vera and use it effectively.
Step 8: Post-Potting Care
After repotting your aloe in its new custom soil, resist the urge to water it immediately. Give the plant about a week to settle into its new home. This waiting period allows any roots that may have been damaged during the process to heal and callous over, reducing the risk of rot when you do water it. After a week, give it a thorough watering, allowing the excess to drain completely from the bottom of the pot. Then, place your plant in a spot where it will receive plenty of bright, indirect sunlight.
Frequently Asked Questions (FAQ)
Can I Use Cactus Soil for My Aloe Vera Plant?
Yes, you absolutely can use a pre-packaged cactus or succulent soil for your aloe vera. These commercial mixes are specifically formulated to provide the excellent drainage that succulents require. They typically contain a blend of peat moss, sand, perlite, and other aggregates. For many beginners, this is a convenient and reliable option. However, to further improve drainage, many gardeners still recommend adding extra perlite or pumice to the commercial mix, often at a ratio of two parts cactus soil to one part perlite.
How Often Should I Repot My Aloe Vera?
Aloe vera plants are slow growers and prefer to be slightly root-bound, so they do not need frequent repotting. As a general rule, you should plan to repot your aloe every two to three years, or when you notice the following signs:
- Roots are growing out of the drainage holes.
- The plant has become top-heavy and unstable in its pot.
- The soil is drying out extremely quickly, requiring more frequent watering.
- The plant is producing numerous pups (offsets) that are crowding the pot.
Is It Okay to Add Fertilizer to My Aloe Vera Soil?
Aloe vera plants are not heavy feeders and get most of what they need from their soil. However, you can give them a light feeding during their growing season (spring and summer) to encourage healthy growth. Use a balanced liquid fertilizer formulated for succulents or cacti, diluted to half-strength. Only fertilize once a month at most during the growing season. Avoid fertilizing in the fall and winter when the plant is dormant, as this can lead to weak, leggy growth and potential root burn.
What’s the Difference Between Perlite and Vermiculite?
While both are soil amendments, perlite and vermiculite serve different purposes. Perlite is a hard, porous volcanic glass that improves drainage and aeration; it does not retain water. Vermiculite is a silicate mineral that expands and acts like a sponge, retaining water and nutrients. For aloe vera and other succulents, perlite is the superior choice because the primary goal is to create a fast-draining soil. Using vermiculite would hold too much moisture against the roots, increasing the risk of rot.
Can I Use Sand From My Yard or the Beach?
It is strongly advised not to use sand from your yard or a beach in your aloe vera soil mix. Beach sand contains high levels of salt, which can be toxic to your plant and dehydrate its roots. Yard or play sand is typically very fine and dense. Instead of improving drainage, it will compact within the potting mix, clog air spaces, and lead to waterlogged soil. Always use coarse horticultural sand, which is specifically washed and graded to ensure proper particle size for optimal drainage in potting mixes.
Conclusion
Creating the ideal growing environment for your aloe vera is one of the most rewarding steps you can take as a plant owner. By understanding its needs and taking the time to create a custom soil blend, you set your succulent up for a long, healthy life. This guide has shown you that learning how to make soil for aloe vera is a simple, straightforward process that any gardener, from beginner to expert, can master. With just a few basic ingredients, you can craft a gritty, fast-draining mix that prevents root rot and mimics the plant’s natural habitat. Now you have the knowledge and confidence to give your aloe the perfect foundation to thrive.
About Ravuk Barg
B.Sc. Horticulture Science | Certified Master Gardener
Ravuk Barg has spent more than a decade with his hands in the soil and his head full of questions about why some gardens thrive while others struggle. What started as a single raised bed of tomatoes and basil in a modest backyard has grown into a deep, working knowledge of everything from seed germination and soil amendment to companion planting and seasonal pruning.
Over the years, Ravuk has gardened through drought summers, waterlogged springs, and pest invasions that would make most gardeners hang up their trowels for good. Those hard seasons, he’ll tell you, taught him more than any perfect growing year ever could. He writes from that earned experience—covering vegetable growing, ornamental planting, houseplant care, composting, and garden design with equal confidence and curiosity.
Philosophy & Approach
Ravuk’s approach to gardening is rooted in practicality. He favors organic methods not out of dogma, but because they work long-term—resulting in healthier soil, fewer inputs, and stronger plants. He has a particular fondness for heirloom vegetable varieties (the kind with proper flavor), unruly cottage-style flower beds, and the stubborn houseplants that everyone else gave up on.
The Mission: Give readers the honest, experience-backed advice that helps them actually succeed in their gardens—not just the ideal version, but the real one; weeds, failures, and all.
Education & Credentials
-
B.Sc. in Horticulture Science
-
Greenfield Agricultural University
-
Focus: Plant Physiology, Soil Ecology, and Sustainable Crop Production
-
-
Master Gardener Certification
-
Cooperative Extension Service
-
Focus: 200+ hours of hands-on practical training and community garden work
-
Continuing Education
-
Organic Pest Management
-
Native Plant Landscaping
-
Sustainable Crop Production