

A soaker hose is a fantastic tool for any gardener, delivering water directly to the base of your plants for deep, efficient watering. However, over time, these porous hoses can become clogged with mineral deposits, sediment, and algae, reducing water flow and leaving your plants thirsty.
When you notice dry spots in your garden beds or uneven watering patterns, it’s a clear sign that your hose needs attention. Learning how to unclog soaker hose systems is a simple yet essential skill that saves you money and ensures your garden remains lush and healthy. This guide will walk you through the process, making it easy for even beginner gardeners to restore their hoses to perfect working condition.
Why Keeping Your Soaker Hose Clear is Crucial
A clean soaker hose is the backbone of an effective and water-wise irrigation system. When functioning correctly, it provides a slow, steady release of water directly into the soil, minimizing evaporation and runoff. This targeted approach ensures that water reaches the plant’s root zone where it’s needed most, promoting stronger, healthier growth. A clogged hose disrupts this delicate balance. The blockage prevents water from being distributed evenly, leading to some plants being overwatered while others are left to wilt. This inefficiency not only stresses your plants but also wastes water, a precious resource. Regularly maintaining your soaker hose prevents these issues, extends the life of your equipment, and supports a thriving, resilient garden ecosystem.
8 Step-by-Step Guide on How to Unclog Soaker Hose Systems
Step 1: Gather Your Supplies
Before you begin, gather all the necessary tools to make the process smooth and efficient. You won’t need anything too specialized, and you likely have most items already. Find a bucket large enough to submerge the hose, a garden hose with a spray nozzle, a bottle of white vinegar, and an old toothbrush or small scrub brush. It’s also helpful to have a pair of garden gloves to protect your hands from dirt and grime. Having everything ready will prevent you from having to stop midway through the cleaning process and will help you stay organized from start to finish.
Step 2: Disconnect and Inspect the Hose
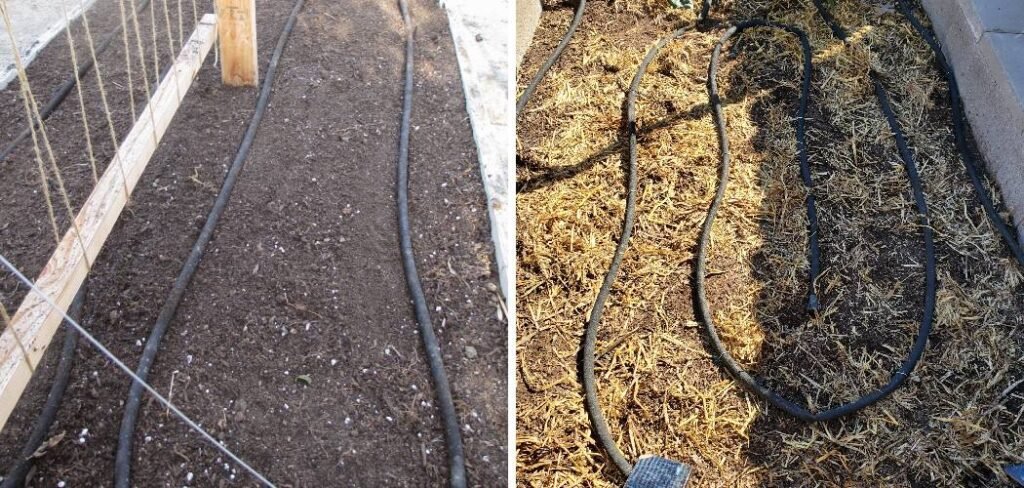
Carefully disconnect the soaker hose from its water source. If it’s buried under mulch, gently lift it out and lay it on a flat surface like a driveway or lawn. Take this opportunity to perform a visual inspection. Look for any obvious signs of damage, such as cracks, splits, or holes that are larger than the standard pores. Also, check the hose fittings for any buildup or damage. Identifying these issues early can save you from trying to clean a hose that is beyond repair and needs to be replaced. A thorough inspection helps you understand the extent of the clogging.
Step 3: Remove the End Cap and Flush with Water
Most soaker hoses come with a removable cap or plug at the end. Unscrew this cap to open the hose completely. Next, connect the soaker hose to your regular garden hose and turn on the water at full pressure. This initial, forceful flush will push out any loose debris, sediment, sand, or small particles that have accumulated inside. Let the water run through for several minutes until it appears clear. You might be surprised at how much gunk comes out during this step. This is a critical first cleaning action before moving on to a deeper clean.
Step 4: Prepare the Vinegar Soaking Solution
For more stubborn clogs caused by mineral deposits like calcium and lime, a vinegar soak is highly effective. White vinegar is a mild acid that works wonders at breaking down these hard water stains without damaging the hose material. In your large bucket, create a cleaning solution by mixing equal parts white vinegar and water. You will need enough of this solution to completely submerge the entire soaker hose. For a standard 50-foot hose, a 5-gallon bucket should work well, likely requiring about 2 to 2.5 gallons of both vinegar and water to fill it sufficiently.
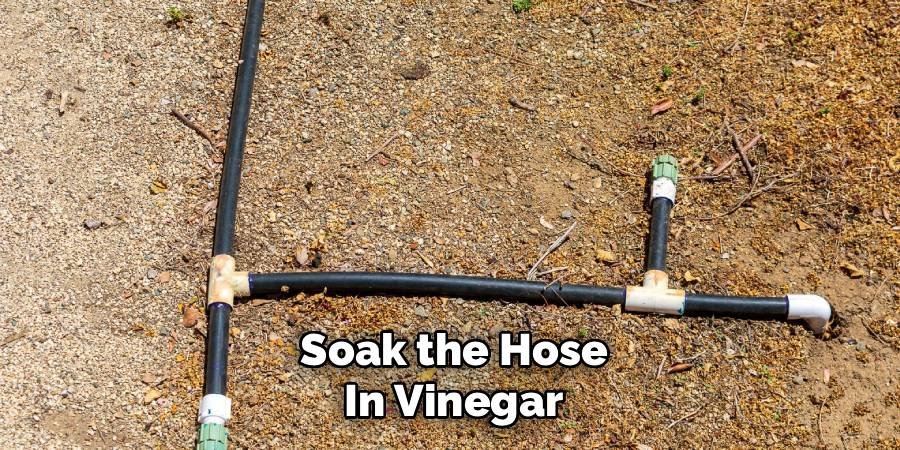
Step 5: Soak the Hose in Vinegar
Carefully coil the soaker hose and place it into the bucket with the vinegar solution. Make sure the entire length of the hose is fully submerged. If it tries to float, you can use a brick or a heavy, non-metallic object to weigh it down. Let the hose soak for at least one hour. For hoses with severe mineral buildup, you may want to extend the soaking time to several hours or even overnight. The acidic properties of the vinegar will work to dissolve the calcium and lime deposits that are blocking the pores from the inside out.
Step 6: Scrub the Exterior and Fittings
After the hose has finished soaking, take it out of the bucket. Use your old toothbrush or a small scrub brush to gently scrub the exterior of the hose. Pay special attention to the areas around the pores where you might see visible buildup of algae or grime. Don’t forget to scrub the threaded fittings on both ends of the hose, as mineral deposits can accumulate there and make it difficult to get a secure connection. This gentle scrubbing action helps to dislodge any remaining external debris that the vinegar soak loosened up, ensuring a thorough cleaning.
Step 7: Perform a Final Flush
Once you’ve finished scrubbing, it’s time for one last flush to clear out all the dissolved minerals and loosened debris. Reconnect the soaker hose to your regular garden hose, leaving the end cap off. Turn the water on at full blast once more. This final rinse will push out all the gunk that the vinegar soak and scrubbing dislodged. Let the water run for a few minutes until it is completely clear. This step is crucial to ensure that no vinegar solution or particulate matter is left inside the hose before you return it to your garden.
Step 8: Reinstall and Test the Hose
After the final flush, your soaker hose should be clean and clear. Before reinstalling the end cap, it’s a good idea to wrap the threads with a bit of plumber’s tape to ensure a tight, leak-free seal. Screw the end cap back on securely. Now, lay the hose back in its position in your garden bed, weaving it around the base of your plants. Turn on the water to a low pressure, just as you would for regular watering. Watch the hose to confirm that water is seeping evenly along its entire length, indicating your success.

Frequently Asked Questions (FAQ)
How Often Should I Clean My Soaker Hose?
The frequency of cleaning depends on your water quality. If you have hard water with high mineral content, you may need to clean your soaker hose two or three times per growing season. For those with softer water, a single cleaning at the end of the season before winter storage is often sufficient. A good rule of thumb is to inspect the hose monthly and clean it as soon as you notice uneven water distribution.
Can I Use Bleach to Clean My Soaker Hose?
It is generally not recommended to use bleach. While bleach is effective at killing algae and bacteria, it can be harsh on the recycled rubber or plastic materials used in many soaker hoses, potentially causing them to degrade and become brittle over time. A vinegar solution is a safer and more eco-friendly alternative that effectively breaks down the mineral deposits that are the most common cause of clogs.
What Is the Best Way to Store a Soaker Hose?

Proper storage can prevent future clogs and extend the life of your hose. Before storing it for the winter, perform a thorough cleaning and allow it to dry completely.
- Drain all water from the hose.
- Coil it loosely to avoid kinks.
- Store it in a dry, sheltered location like a garage, shed, or basement, away from direct sunlight and freezing temperatures.
Can I Prevent My Soaker Hose From Clogging in the First Place?
Prevention is always better than a cure. To minimize clogs, consider installing a fine mesh filter, known as a Y-filter, between your spigot and the soaker hose. This device will catch a significant amount of sediment and debris before it can enter the hose. Additionally, flushing the hose for a few minutes with the end cap off every month or so can help keep it clear of minor buildup.
Why Is My Soaker Hose Spraying Instead of Weeping?
If your soaker hose is spraying water instead of slowly weeping it, your water pressure is likely too high. Soaker hoses are designed to operate at very low pressures, typically around 10 PSI. High pressure forces water out of the pores too quickly, which can damage the hose and lead to inefficient watering. Install a pressure regulator at the spigot to reduce the pressure to the appropriate level for optimal performance.
Conclusion
A well-maintained soaker hose is an invaluable asset for any gardener, promoting water conservation and healthy plant growth. Clogs from minerals and sediment are a common issue, but they don’t have to mean the end of your hose’s life. By following the simple flushing and soaking steps outlined above, you can easily resolve blockages and restore your irrigation system to peak efficiency. Taking the time to learn how to unclog soaker hose setups will empower you to maintain a flourishing garden, save money on replacement equipment, and make your watering routine more effective.
About Ravuk Barg
B.Sc. Horticulture Science | Certified Master Gardener
Ravuk Barg has spent more than a decade with his hands in the soil and his head full of questions about why some gardens thrive while others struggle. What started as a single raised bed of tomatoes and basil in a modest backyard has grown into a deep, working knowledge of everything from seed germination and soil amendment to companion planting and seasonal pruning.
Over the years, Ravuk has gardened through drought summers, waterlogged springs, and pest invasions that would make most gardeners hang up their trowels for good. Those hard seasons, he’ll tell you, taught him more than any perfect growing year ever could. He writes from that earned experience—covering vegetable growing, ornamental planting, houseplant care, composting, and garden design with equal confidence and curiosity.
Philosophy & Approach
Ravuk’s approach to gardening is rooted in practicality. He favors organic methods not out of dogma, but because they work long-term—resulting in healthier soil, fewer inputs, and stronger plants. He has a particular fondness for heirloom vegetable varieties (the kind with proper flavor), unruly cottage-style flower beds, and the stubborn houseplants that everyone else gave up on.
The Mission: Give readers the honest, experience-backed advice that helps them actually succeed in their gardens—not just the ideal version, but the real one; weeds, failures, and all.
Education & Credentials
-
B.Sc. in Horticulture Science
-
Greenfield Agricultural University
-
Focus: Plant Physiology, Soil Ecology, and Sustainable Crop Production
-
-
Master Gardener Certification
-
Cooperative Extension Service
-
Focus: 200+ hours of hands-on practical training and community garden work
-
Continuing Education
-
Organic Pest Management
-
Native Plant Landscaping
-
Sustainable Crop Production