

Creating attractive landscape features doesn’t have to involve expensive hardscaping or complicated construction projects. Learning how to build a berm for landscaping opens up endless possibilities for transforming flat, boring yards into dynamic outdoor spaces with visual interest and practical benefits.
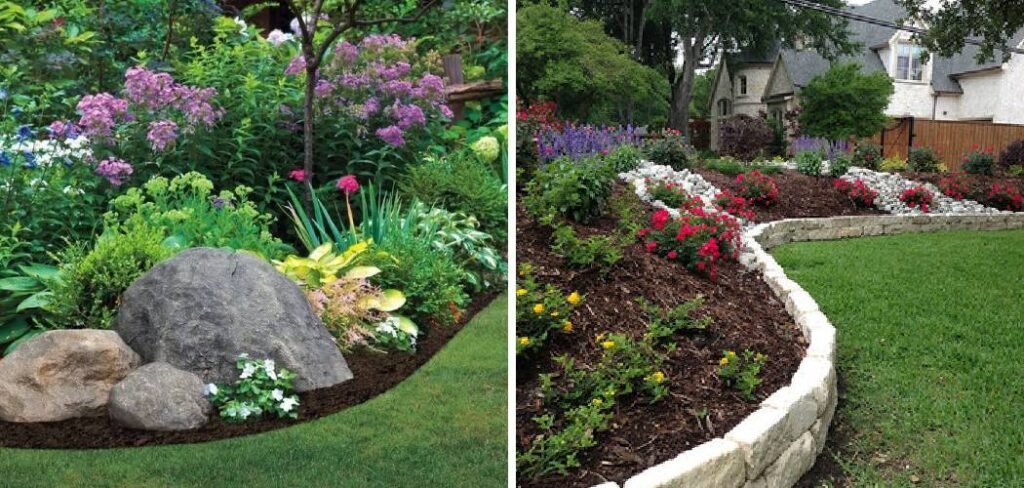
A berm is simply a raised mound of soil that can serve multiple purposes in your landscape design. These earthwork features add dimension to flat terrain, create natural privacy screens, improve drainage, and provide ideal growing conditions for plants that prefer elevated positions.
Whether you want to hide unsightly views, create windbreaks, or establish focal points in your garden, berms offer an affordable and versatile solution. The process requires basic tools, readily available materials, and a weekend’s worth of effort. Best of all, once established, these landscape features become permanent assets that increase your property’s curb appeal and functionality.
This comprehensive guide walks you through every step of berm construction, from initial planning to final planting, ensuring your project succeeds beautifully.
Why You Need to Build a Berm
Building a berm in your landscape offers numerous benefits that enhance both the aesthetic and functional aspects of your outdoor space. Berms help improve drainage by redirecting runoff water, preventing erosion, and protecting other areas of your yard from water accumulation. For those seeking privacy, berms can create natural barriers, reducing noise and visual distractions from nearby roads or neighbors. Additionally, they provide an opportunity to showcase plants, flowers, or decorative elements, adding depth and dimension to your garden design. Whether your goal is practicality, beauty, or a combination of both, berms are a valuable addition to any landscape.
8 Step-by-Step Guide: How to Build a Berm for Landscaping
Step 1: Plan Your Berm Location and Size
Choose your berm’s location based on your specific landscaping goals and site conditions. Consider drainage patterns, existing utilities, and how the finished feature will complement your home’s architecture and existing landscape elements.
Measure and mark the planned area using spray paint or stakes and string. Most effective berms measure between 3-8 feet wide at the base and 1-3 feet high, creating gentle slopes that prevent erosion. Avoid placing berms too close to foundations, as they can direct water toward your home’s structure.
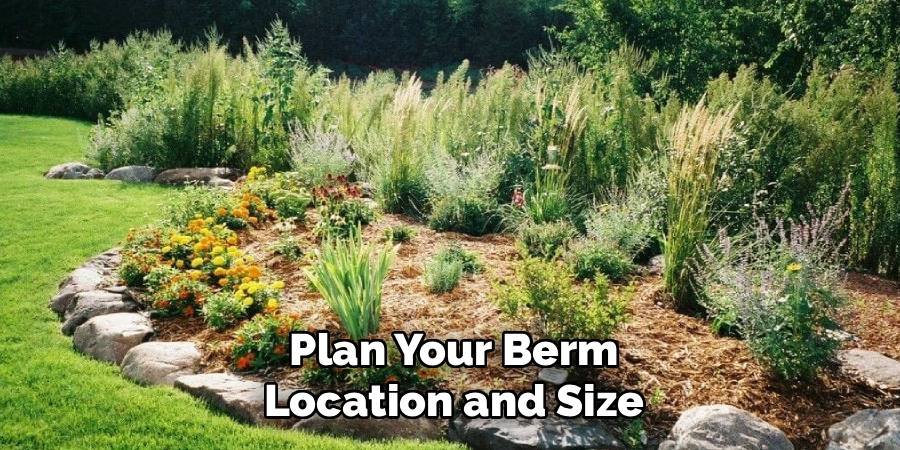
Consider sight lines from windows and outdoor living areas to ensure your berm enhances rather than blocks desirable views. Plan for mature plant sizes if you intend to add trees or large shrubs to prevent future overcrowding issues.
Step 2: Call Utility Companies for Line Marking
Contact your local utility marking service before breaking ground to identify underground lines. This free service prevents dangerous accidents and costly repairs to gas, electric, water, or telecommunications infrastructure.
Most areas require 48-72 hours notice for utility marking services. Use this waiting period to gather materials and tools. Mark the area clearly with spray paint or flags so utility technicians can easily identify your project boundaries.
Even shallow digging for berm construction can damage buried lines, so never skip this crucial safety step. Document the marked utilities with photos for reference during construction, as spray paint markings may fade during your project timeline.
Step 3: Remove Existing Vegetation
Clear grass, weeds, and unwanted plants from the marked berm area using a shovel or sod cutter. Save healthy sod sections for use elsewhere in your landscape or compost them for future soil amendments.
Remove all plant roots and debris to prevent future weed problems and ensure proper soil compaction. This clean foundation helps your berm materials settle evenly and reduces maintenance requirements after construction.
Consider renting a sod cutter for large areas, as hand removal becomes labor-intensive for berms longer than 20 feet. Dispose of vegetation properly according to local regulations, or add plant materials to your compost pile if you maintain one.
Step 4: Create the Base Layer
Establish your berm’s foundation using heavier materials like clay subsoil, sand, or clean fill dirt. This base layer provides stability and helps maintain the finished shape over time while supporting the weight of topsoil and plants above.
Spread base materials evenly across your marked area, creating the rough shape of your planned berm. Aim for slopes no steeper than 3:1 (horizontal to vertical) to prevent erosion and make maintenance easier once planted.
Water the base layer lightly and compact it using a hand tamper or your feet. Proper compaction prevents settling that could create low spots or unstable areas in your finished landscape feature.
Step 5: Add Quality Topsoil
Layer nutrient-rich topsoil over your compacted base to create ideal growing conditions for your planned plantings. Purchase topsoil from reputable suppliers or blend your own using existing garden soil mixed with compost and other organic amendments.
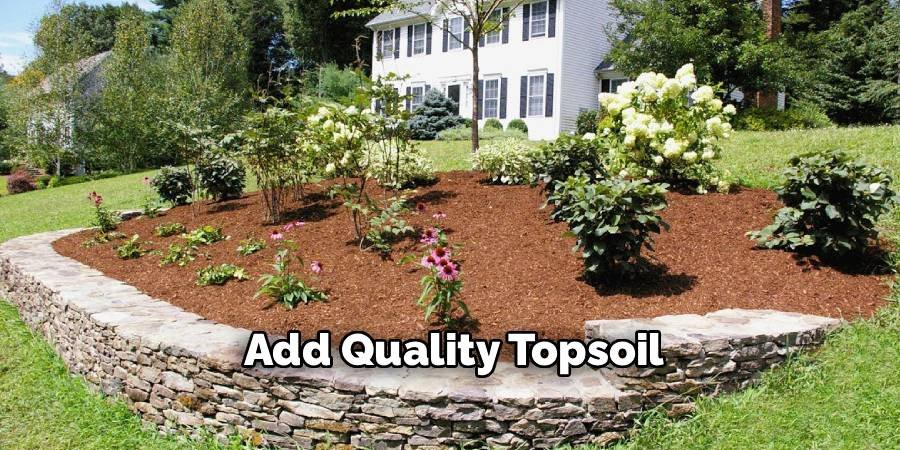
Apply topsoil in 6-8 inch layers, watering and lightly compacting each layer before adding the next. This gradual buildup prevents air pockets and ensures stable soil structure throughout your berm’s profile.
Plan for approximately 20% settling by building your berm slightly higher than your target finished height. Quality topsoil contains organic matter that will decompose and compact naturally over the first growing season.
Step 6: Shape and Grade the Slopes
Refine your berm’s shape using a rake and shovel, creating smooth transitions from the base to the peak and maintaining consistent slopes on all sides. Avoid sharp angles or steep drops that promote erosion during heavy rains.
Walk around your berm from multiple angles to check for visual balance and proper drainage flow. The finished feature should appear natural rather than obviously constructed, with gentle curves that complement your landscape’s existing contours.
Use a long board or rake handle to check slope consistency and identify any high or low spots that need adjustment. Proper grading at this stage prevents future problems with water pooling or soil erosion.
Step 7: Install Edging if Desired
Consider installing landscape edging around your berm’s perimeter to create clean lines and prevent grass encroachment. Choose materials that complement your home’s style, such as natural stone, brick, or metal edging strips.
Dig a narrow trench around the berm’s base to accommodate your chosen edging material. Install edging slightly above ground level to create a visible barrier while allowing water to flow naturally around the feature.
Edging isn’t essential for berm function but improves the finished appearance and reduces long-term maintenance by creating clear boundaries between your raised planting area and surrounding lawn or garden beds.
Step 8: Test Drainage and Make Adjustments
Water your completed berm thoroughly to test drainage patterns and identify areas where water pools or flows incorrectly. Proper drainage prevents plant root rot and soil erosion while maintaining the berm’s structural integrity.
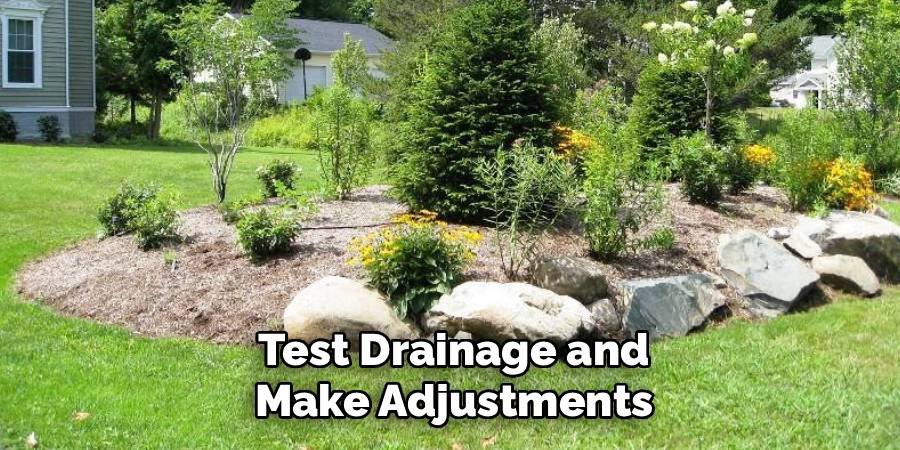
Adjust slopes and add drainage amendments like coarse sand or small gravel if water doesn’t drain within 24 hours. Some water retention is beneficial for plants, but standing water indicates drainage problems that require correction.
Consider installing drainage pipes or channels if your site has severe drainage challenges. These solutions prevent water damage to your home’s foundation while maintaining your berm’s effectiveness as a landscape feature.
Allow Settling Time
Let your completed berm settle for 2-4 weeks before planting, especially if constructed during wet weather or with high organic content soil. This settling period reveals areas that need additional soil or regrading.
Add more topsoil as needed to maintain your desired height and shape. Some settling is normal and expected, particularly during the first year after construction as soil particles compact and organic matter decomposes.
Use this waiting period to research appropriate plants for your berm’s specific conditions, including sun exposure, soil type, and drainage characteristics. Planning your plantings carefully ensures long-term success and minimal maintenance requirements.
Plant and Mulch Your Berm
Select plants appropriate for your berm’s growing conditions, considering mature sizes, water requirements, and seasonal interest. Mix trees, shrubs, perennials, and groundcovers to create a layered, natural-looking planting scheme.
Plant during optimal weather conditions for your chosen species, typically spring or fall in most climates. Water new plantings thoroughly and apply 2-3 inches of organic mulch to retain moisture and suppress weeds.
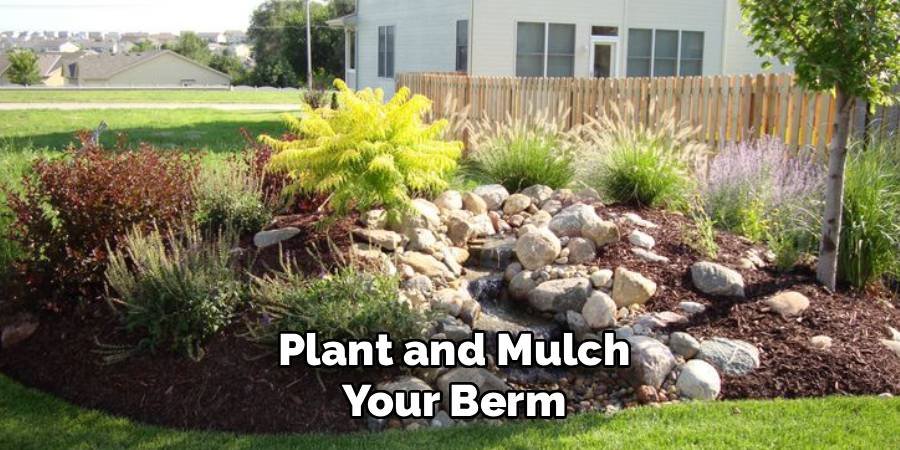
Choose mulch materials that complement your landscape design while providing practical benefits. Shredded bark, wood chips, or stone mulch all work well, depending on your aesthetic preferences and local availability.
Frequently Asked Questions ( FAQ )
How Much Does It Cost to Build a Landscaping Berm?
Basic berm construction costs $3-8 per square foot, depending on size, materials, and labor. DIY projects save significantly on labor costs while allowing complete design control.
What’s the Best Soil Mixture for Berm Construction?
Use 60% quality topsoil mixed with 30% compost and 10% coarse sand for optimal drainage and plant nutrition. Avoid heavy clay or pure sand for best results.
How Long Does a Berm Take to Establish?
Most berms achieve full establishment within 2-3 growing seasons as plants mature and soil settles naturally. Initial construction takes 1-3 days depending on size.
Can I Build a Berm on a Slope?
Yes, but additional drainage considerations and possibly retaining walls may be necessary to prevent erosion and maintain structural integrity over time.
What Plants Work Best on Berms?
Choose drought-tolerant species that handle good drainage, such as ornamental grasses, sedums, lavender, and native wildflowers suited to your climate zone.
Conclusion
Learning how to build a berm for landscaping transforms ordinary yards into dynamic outdoor spaces with improved drainage, privacy, and visual appeal. This weekend project delivers lasting benefits that increase property value while solving common landscape challenges.
Your successful berm construction depends on proper planning, quality materials, and patience during the establishment period. Following these detailed steps ensures professional-looking results that enhance your home’s outdoor environment for years to come.
The investment in time and materials pays dividends through reduced maintenance, improved plant growing conditions, and enhanced curb appeal. Your carefully constructed berm becomes a permanent landscape asset that adapts and improves with age.
About Ravuk Barg
B.Sc. Horticulture Science | Certified Master Gardener
Ravuk Barg has spent more than a decade with his hands in the soil and his head full of questions about why some gardens thrive while others struggle. What started as a single raised bed of tomatoes and basil in a modest backyard has grown into a deep, working knowledge of everything from seed germination and soil amendment to companion planting and seasonal pruning.
Over the years, Ravuk has gardened through drought summers, waterlogged springs, and pest invasions that would make most gardeners hang up their trowels for good. Those hard seasons, he’ll tell you, taught him more than any perfect growing year ever could. He writes from that earned experience—covering vegetable growing, ornamental planting, houseplant care, composting, and garden design with equal confidence and curiosity.
Philosophy & Approach
Ravuk’s approach to gardening is rooted in practicality. He favors organic methods not out of dogma, but because they work long-term—resulting in healthier soil, fewer inputs, and stronger plants. He has a particular fondness for heirloom vegetable varieties (the kind with proper flavor), unruly cottage-style flower beds, and the stubborn houseplants that everyone else gave up on.
The Mission: Give readers the honest, experience-backed advice that helps them actually succeed in their gardens—not just the ideal version, but the real one; weeds, failures, and all.
Education & Credentials
-
B.Sc. in Horticulture Science
-
Greenfield Agricultural University
-
Focus: Plant Physiology, Soil Ecology, and Sustainable Crop Production
-
-
Master Gardener Certification
-
Cooperative Extension Service
-
Focus: 200+ hours of hands-on practical training and community garden work
-
Continuing Education
-
Organic Pest Management
-
Native Plant Landscaping
-
Sustainable Crop Production