

Many gardeners focus on sunlight and water, but the secret to thriving container gardens often lies unseen in the soil. Soil pH, a measure of acidity or alkalinity, is crucial for plant health. It determines which nutrients are available for your plants to absorb. If the pH is too high (alkaline), even the best-fertilized plant can’t access essential nutrients and may show signs of stress, like yellowing leaves. Understanding how to lower soil pH in potted plants is a key skill for any indoor or patio gardener.
This allows you to create the perfect acidic environment that plants like blueberries, azaleas, and gardenias crave, unlocking their full potential for vibrant growth and beautiful blooms. It’s about giving your plants exactly what they need to flourish right where they are.
Why You Need to Lower Soil pH
Lowering soil pH is necessary when you want to grow acid-loving plants. These species evolved in soils that are naturally more acidic, and their entire nutrient uptake system is adapted to these conditions. When the soil is too alkaline (with a pH above 7.0), critical micronutrients like iron and manganese become chemically locked up and unavailable. This leads to deficiencies, most commonly seen as intervenal chlorosis—yellow leaves with green veins. By making the soil more acidic, you make these nutrients soluble again, allowing your plants to absorb them through their roots. This simple adjustment ensures your acid-loving plants don’t just survive but truly thrive, displaying deep green foliage and producing brilliant flowers or fruit.
10-Step-by-Step Guide: How to Lower Soil pH in Potted Plants
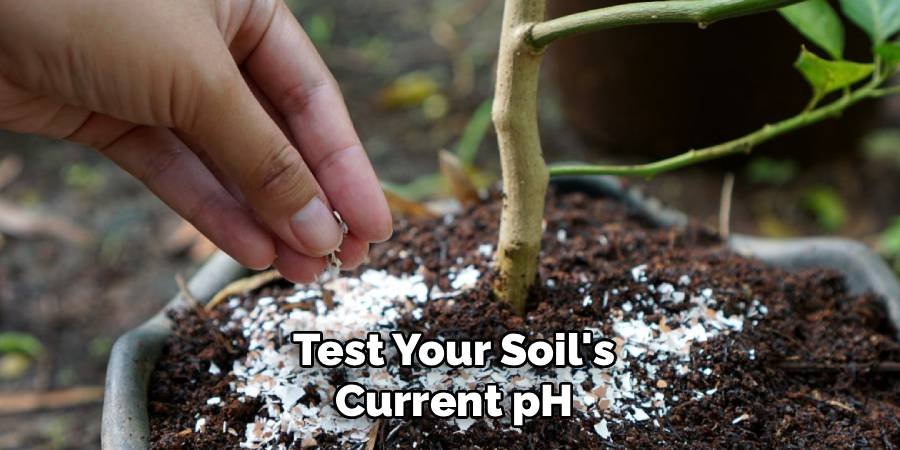
Step 1: Test Your Soil’s Current pH
Before making any changes, you must establish a baseline. Guessing your soil’s pH can lead to over-correction, which can be just as harmful as high alkalinity. Purchase a soil pH test kit, which is readily available at garden centers. These kits are simple to use, often requiring you to mix a small soil sample with water and a reagent powder. The resulting color is then matched to a chart to determine the pH level. For a more precise reading, you can also use a digital pH meter. Knowing your starting point is the most important step in creating the ideal acidic soil for your potted plants.
Step 2: Choose the Right Soil Acidifier
Once you know your soil’s pH, you can select an appropriate acidifier. Elemental sulfur is a popular, slow-acting, and organic choice. Soil bacteria gradually convert it into sulfuric acid, which safely lowers the pH over several weeks or months. For a faster-acting solution, aluminum sulfate or iron sulfate can be used, as they produce acidity more quickly through a chemical reaction. However, use these with caution, as over-application can lead to toxic buildups of aluminum or iron. For a gentler, more natural approach, organic materials like sphagnum peat moss or composted oak leaves can also be mixed into your potting soil.
Step 3: Calculate the Amount of Additive Needed
The amount of acidifier you need depends on your soil’s current pH, your target pH, and the volume of soil in your pot. Product packaging for amendments like elemental sulfur will typically provide application guidelines, often in tablespoons per gallon of soil. It is always better to start with a smaller amount than you think you need. You can always add more later, but removing excess is impossible and can severely damage your plant’s roots. A gradual approach ensures you don’t shock the plant’s system. For organic matter, a common ratio is to replace about one-third of the potting mix with the acidic material.
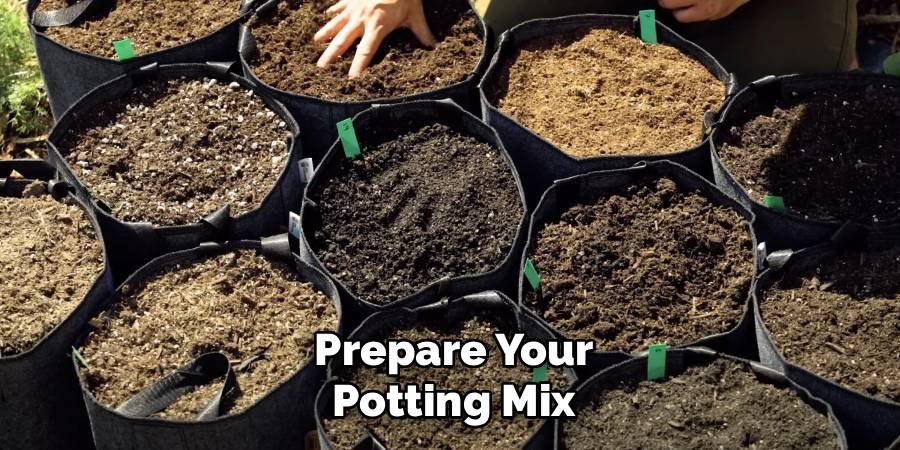
Step 4: Prepare Your Potting Mix
It is most effective to amend the soil before planting or during repotting. Empty your potting soil into a large bucket or wheelbarrow. This gives you plenty of room to work and ensures the acidifier is mixed in evenly. Breaking up any large clumps will help create a uniform consistency. If you are amending soil for an already potted plant, this process is more delicate. You will need to carefully work the amendment into the top few inches of soil without disturbing the root system too much, a process known as top-dressing.
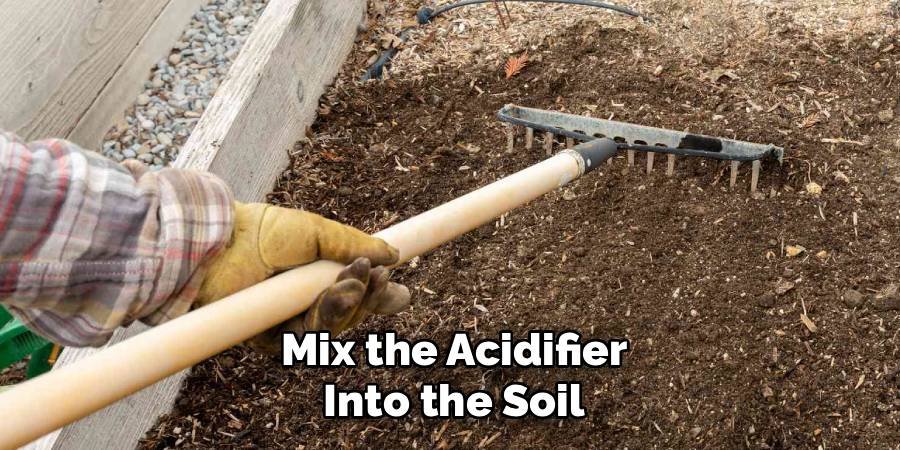
Step 5: Mix the Acidifier into the Soil
Thoroughly blend your chosen acidifier into the potting mix. Use a trowel or your hands (wearing gloves is a good idea) to distribute the amendment evenly throughout the soil. The goal is to avoid creating “hot spots” where the concentration of sulfur or other additives is too high, as this can burn the plant’s roots. Continue mixing until you can no longer see individual pockets of the additive. An even distribution ensures that the pH will lower uniformly across the entire pot, providing a consistent environment for the root system to grow.
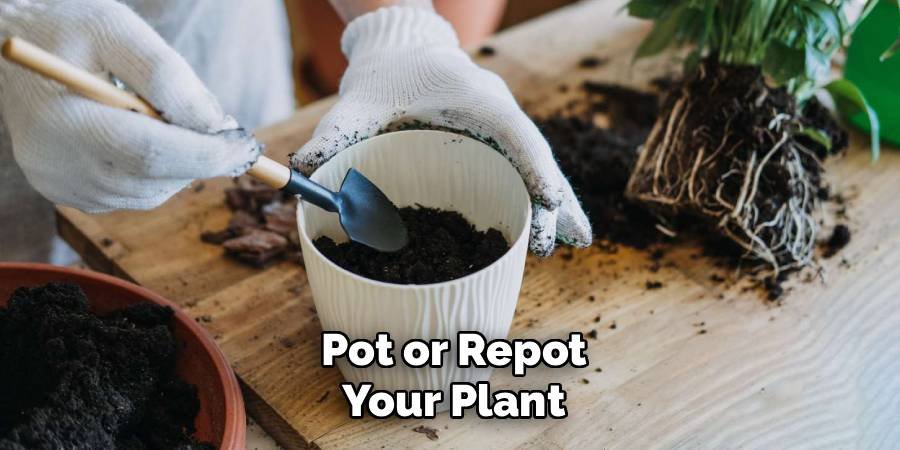
Step 6: Pot or Repot Your Plant
With your amended soil ready, you can now pot your plant. Place a layer of the acidic soil mix at the bottom of your container. Gently remove the plant from its current pot, taking care to inspect the roots and loosen any that are tightly bound. Position the plant in the center of the new pot and fill in the surrounding space with your prepared soil mix. Press down lightly to remove any large air pockets, but avoid compacting the soil too much. Ensure the top of the root ball is about an inch below the rim of the pot to allow space for watering.
Step 7: Water Thoroughly
After potting, water the plant deeply until you see water draining from the bottom of the container. This initial watering is critical for several reasons. It helps the soil settle around the roots, eliminating air pockets and ensuring good root-to-soil contact. It also helps to activate the soil acidifier, particularly amendments like elemental sulfur that rely on moisture and microbial activity to begin the process of lowering the soil pH. Let the pot drain completely, and do not let it sit in a saucer of standing water, which can lead to root rot.
Step 8: Use Acidifying Fertilizer
To maintain an acidic environment over the long term, switch to a fertilizer formulated for acid-loving plants. These fertilizers, often labeled for azaleas, rhododendrons, or camellias, contain ingredients like ammonium sulfate or urea, which contribute to soil acidity with each application. Using this type of plant food during the growing season provides your plants with the necessary nutrients while continually reinforcing the low-pH environment they need. Always follow the package directions for dilution and frequency to avoid over-fertilizing, which can harm your plant.
Step 9: Use Appropriate Water
The type of water you use can impact your soil’s pH over time. Many municipal water sources are treated to be slightly alkaline. Consistently watering your plants with this “hard” water can gradually raise the soil pH, undoing your efforts. If possible, use rainwater, which is naturally slightly acidic and free of added minerals. Alternatively, you can let tap water sit out for 24 hours to allow chlorine to dissipate, or add a very small amount of white vinegar (about one tablespoon per gallon) to your watering can occasionally to help counteract the alkalinity.
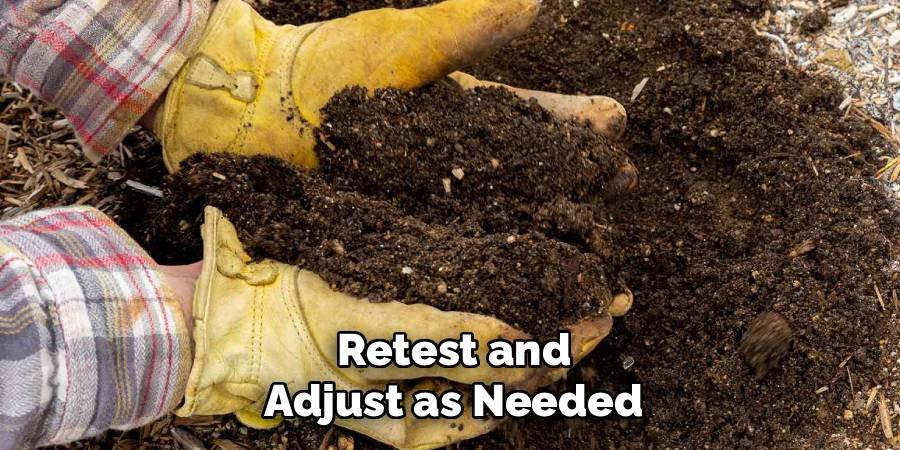
Step 10: Retest and Adjust as Needed
Soil pH is not static; it can change over time due to watering, fertilization, and the decomposition of organic matter. About four to six weeks after your initial application, retest your soil’s pH to see if you have reached your target level. If the pH is still too high, you can apply another small dose of your chosen acidifier as a top-dressing, carefully working it into the surface and watering it in. Regular testing, perhaps once or twice a year, will help you monitor the soil conditions and make small adjustments as needed, ensuring your potted plants remain healthy and vibrant.
Maintaining Your Acidic Soil
Keeping your soil at the right pH level is an ongoing process. Consistently use fertilizers designed for acid-loving plants, as they provide nutrients in a form plants can absorb in acidic conditions and help counteract the gradual rise in pH from tap water. Incorporating organic mulches like pine needles or composted oak leaves on the soil surface can also help maintain acidity as they break down. Periodically flushing the soil by watering heavily until it drains freely can help prevent the buildup of mineral salts from water and fertilizer, which can also affect pH levels.
Common Mistakes to Avoid
A common error is adding too much acidifier at once. This can cause a drastic drop in pH that shocks the plant and can burn its delicate roots. Always apply amendments gradually. Another mistake is failing to test the soil before and after treatment. Without testing, you are simply guessing, which can lead to creating an environment that is too acidic. Finally, forgetting that pH management is a continuous effort is a frequent oversight. A one-time fix is not enough; regular monitoring and maintenance are essential for long-term success with acid-loving potted plants.
FAQ Frequently Asked Questions
What Are the Signs of High Soil PH in Plants?
Signs include yellowing leaves with green veins (intervenal chlorosis), stunted growth, and poor flower or fruit production, especially in plants known to prefer acidic conditions.
Can I Use Coffee Grounds to Lower Soil PH?
Used coffee grounds have a near-neutral pH and offer minimal long-term acidifying effects. Fresh, unbrewed grounds are acidic but can harm plants if used improperly.
How Long Does It Take for Elemental Sulfur to Lower Soil PH?
Elemental sulfur is slow-acting. It can take several months for soil bacteria to convert it and produce a noticeable change in the soil’s pH level.
Is It Possible to Make the Soil Too Acidic?
Yes, over-application of acidifiers can lower the pH too much, which can cause nutrient toxicities and damage or kill the plant’s root system.
Which Common Houseplants Prefer Acidic Soil?
Many popular plants thrive in acidic soil, including ferns, gardenias, African violets, azaleas, and many types of tropical foliage plants like calatheas and prayer plants.
Conclusion
Mastering how to lower soil pH in potted plants is a transformative skill that empowers you to cultivate a wider variety of beautiful and productive plants. The process is not complex; it simply requires a methodical approach. By testing your soil, choosing the right amendment, applying it correctly, and performing regular maintenance, you can create the perfect acidic environment for your plants to flourish. This proactive care prevents nutrient deficiencies and ensures your acid-loving plants have access to everything they need. Your garden (and your happy, healthy plants!) will thank you for taking the time to get the soil just right.
About Ravuk Barg
B.Sc. Horticulture Science | Certified Master Gardener
Ravuk Barg has spent more than a decade with his hands in the soil and his head full of questions about why some gardens thrive while others struggle. What started as a single raised bed of tomatoes and basil in a modest backyard has grown into a deep, working knowledge of everything from seed germination and soil amendment to companion planting and seasonal pruning.
Over the years, Ravuk has gardened through drought summers, waterlogged springs, and pest invasions that would make most gardeners hang up their trowels for good. Those hard seasons, he’ll tell you, taught him more than any perfect growing year ever could. He writes from that earned experience—covering vegetable growing, ornamental planting, houseplant care, composting, and garden design with equal confidence and curiosity.
Philosophy & Approach
Ravuk’s approach to gardening is rooted in practicality. He favors organic methods not out of dogma, but because they work long-term—resulting in healthier soil, fewer inputs, and stronger plants. He has a particular fondness for heirloom vegetable varieties (the kind with proper flavor), unruly cottage-style flower beds, and the stubborn houseplants that everyone else gave up on.
The Mission: Give readers the honest, experience-backed advice that helps them actually succeed in their gardens—not just the ideal version, but the real one; weeds, failures, and all.
Education & Credentials
-
B.Sc. in Horticulture Science
-
Greenfield Agricultural University
-
Focus: Plant Physiology, Soil Ecology, and Sustainable Crop Production
-
-
Master Gardener Certification
-
Cooperative Extension Service
-
Focus: 200+ hours of hands-on practical training and community garden work
-
Continuing Education
-
Organic Pest Management
-
Native Plant Landscaping
-
Sustainable Crop Production