

Have you ever wanted to create nutrient-rich soil for your garden without the hassle of managing a hot compost pile? If so, you’re in the right place. Cold composting is a simple, low-effort method of breaking down organic waste into valuable garden humus. It requires minimal turning, monitoring, or precise ratios of materials. This guide will walk you through everything you need to know about how to cold compost, turning your kitchen scraps and yard trimmings into “black gold” for your plants. This approach is perfect for busy gardeners or anyone new to composting who wants a straightforward, set-it-and-forget-it system.
Why Cold Composting is Beneficial
Cold composting, often called passive composting, offers a wealth of benefits for both you and your garden. The most significant advantage is its simplicity. Unlike hot composting, which requires careful balancing of “green” and “brown” materials and regular turning to maintain high temperatures, cold composting is a hands-off process. You simply add materials to your pile or bin and let nature take its course. This low-maintenance approach saves you time and physical effort, making it accessible to gardeners of all ages and abilities.
This method also produces a high-quality, biologically diverse soil amendment. Because the pile doesn’t heat up, a wider range of beneficial microorganisms, fungi, and earthworms can thrive. These organisms are essential for creating healthy soil structure and making nutrients available to your plants. The slow decomposition process results in a stable, well-structured humus that improves soil’s water retention, aeration, and fertility over the long term. It’s a gentle, natural way to build a resilient garden ecosystem from the ground up.
7 Step Methods Guide on How to Cold Compost
Step 1: Choose Your Composting Location and Container
First, select a suitable spot for your compost pile. An ideal location is a shady, level area in your yard that has good drainage. Keeping the pile out of direct sunlight prevents it from drying out too quickly. You can create a simple, open pile or use a container. Options range from DIY bins made of wire mesh or wood pallets to commercial compost tumblers or enclosed plastic bins. An enclosed bin can help deter pests and keep the pile tidy, which is especially useful in smaller, more urban settings.

Step 2: Gather Your “Green” Materials
Next, start collecting your “green” or nitrogen-rich materials. These are typically moist items that decompose quickly. Common examples include fruit and vegetable scraps from your kitchen, coffee grounds, tea bags, grass clippings, and fresh plant trimmings. Keep a small container with a lid in your kitchen to easily collect food scraps. Adding a diverse mix of green materials provides a wide range of nutrients for the microorganisms that will break down your pile, creating a richer finished compost for your garden beds.
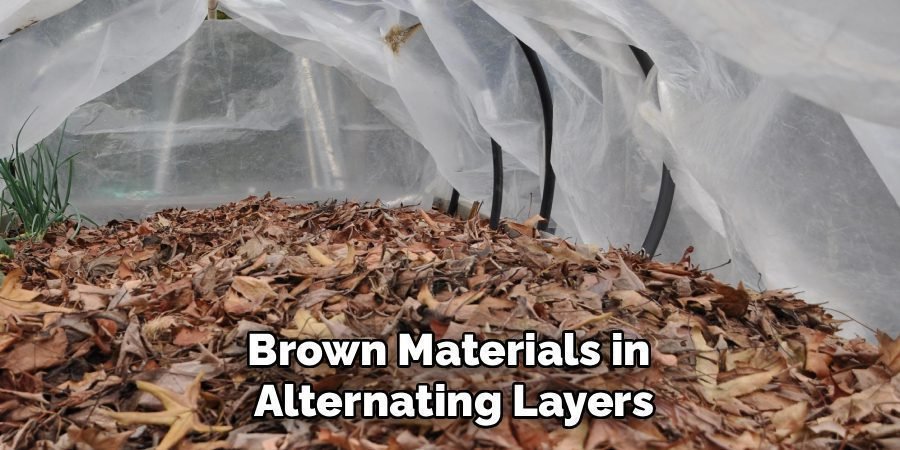
Step 3: Collect Your “Brown” Materials
Equally important are the “brown” or carbon-rich materials. These items are usually dry and provide the structure for your compost pile, ensuring air can circulate. Think of materials like dried leaves, shredded newspaper, cardboard, sawdust, wood chips, and straw. It’s a good idea to stockpile these materials, especially in the fall when leaves are abundant. Having a ready supply of browns makes it easy to layer them over your green additions, which helps control odors and maintain a balanced environment within the pile.
Step 4: Begin Building Your Pile
With your materials ready, you can start building your compost pile. Begin with a thick layer of coarse brown materials, such as small twigs or wood chips, at the bottom. This initial layer promotes aeration and drainage. After that, begin adding your green and brown materials in alternating layers. There’s no need for perfect ratios in cold composting, but a rough guideline is to add two or three parts brown material for every one part green material. This balance helps prevent the pile from becoming slimy or smelly.
Step 5: Add Materials as You Go
One of the best things about cold composting is its flexibility. You can add materials to your pile whenever you have them. Each time you add kitchen scraps or fresh grass clippings (greens), cover them with a layer of brown materials like dried leaves or shredded paper. This simple step is key to preventing unpleasant odors and discouraging pests like flies. Covering the fresh additions ensures that the decomposition process remains contained within the pile, working slowly and steadily without becoming a nuisance.
Step 6: Keep the Pile Moderately Moist
Your compost pile needs moisture to support the microorganisms doing the decomposition work. It should feel like a wrung-out sponge—damp but not waterlogged. In dry climates or during long periods without rain, you may need to water your pile occasionally. If you use an open pile, rainfall will likely provide enough moisture. If your pile becomes too wet and starts to smell sour, simply add more dry brown materials like shredded cardboard or leaves to absorb the excess moisture and restore balance.
Step 7: Practice Patience and Let Nature Work
This is the easiest but perhaps the most challenging step: be patient. Unlike hot composting, which can yield finished compost in a few months, cold composting is a slow process. It can take anywhere from six months to two years for the materials to fully break down. There is no need to turn the pile regularly. You can simply let it sit and allow the worms, fungi, and bacteria to do their job. This method perfectly illustrates how to cold compost with minimal intervention.
Harvest Your Finished Compost
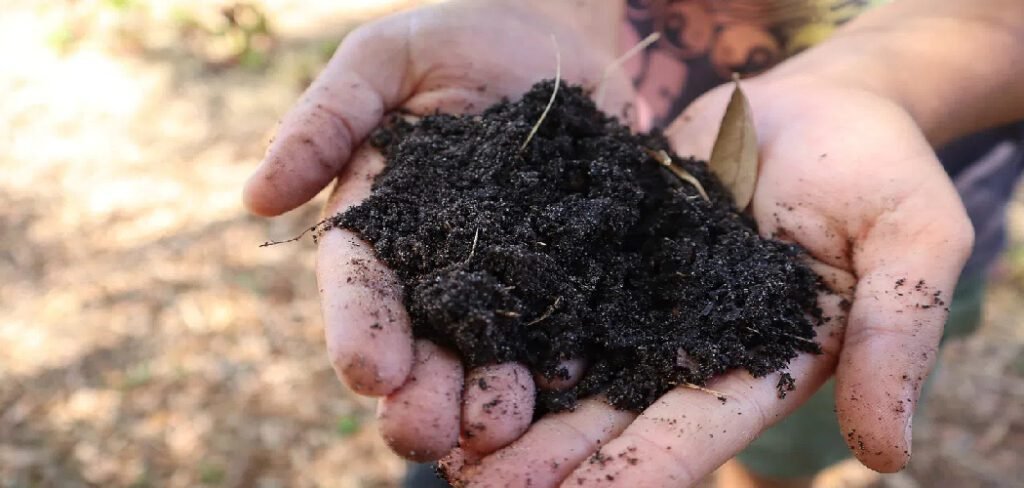
You’ll know the compost is ready when it looks like dark, crumbly soil and has a pleasant, earthy smell. The original materials will no longer be recognizable. To harvest, simply dig into the bottom of the pile, where the oldest, most decomposed material will be. Sift it through a screen with half-inch mesh to remove any larger, unfinished pieces. You can toss these larger chunks back into your active pile to continue breaking down. Use the finished compost to enrich your garden beds or potting soil.

Frequently Asked Questions (FAQ)
What Should I Not Put in a Cold Compost Pile?
You should avoid adding meat, fish, dairy products, and oily or greasy foods to your cold compost pile. These items can attract pests like rodents and raccoons and can also create strong, unpleasant odors as they decompose. It’s also wise to keep out pet waste (from cats and dogs) as it can contain harmful pathogens. Finally, avoid adding diseased plants or pernicious weeds that have gone to seed, as the low temperatures of a cold pile may not be sufficient to kill them off.
How Do I Know When My Cold Compost Is Ready to Use?
Your cold compost is ready when it is dark brown or black, has a crumbly texture similar to soil, and emits a rich, earthy aroma. You should not be able to identify the original organic materials you added, as they will have fully decomposed. If you can still see things like banana peels or leaves, the compost needs more time. The process typically takes six months to two years, and the finished material will be at the bottom of the pile.
Can I Speed Up the Cold Composting Process?
While cold composting is inherently a slow method, you can take a few steps to speed it up slightly. Chopping or shredding your materials into smaller pieces increases the surface area available for microorganisms to work on. Occasionally turning the pile with a pitchfork—perhaps once every month or two—can also introduce more oxygen and accelerate decomposition. Adding a bit of finished compost or garden soil to a new pile can also introduce beneficial microbes, giving the process a helpful kickstart.
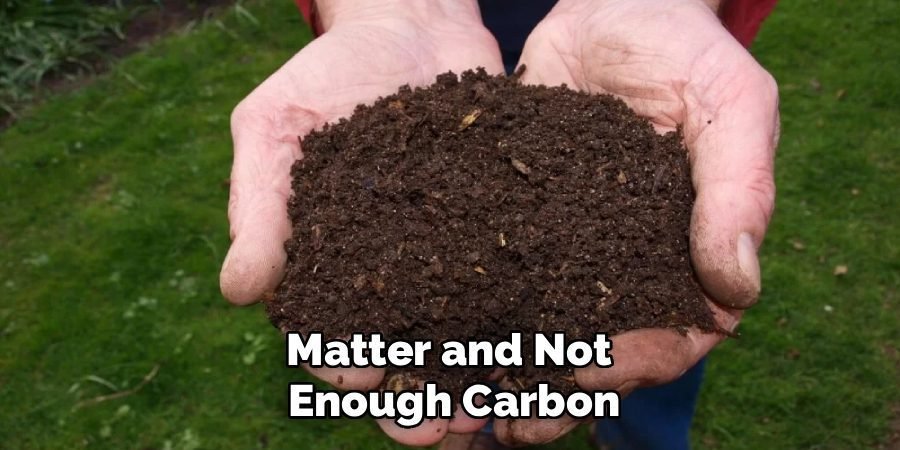
Will My Cold Compost Pile Smell Bad?
A properly managed cold compost pile should not smell bad; it should have a mild, earthy scent. Odor problems are usually caused by an imbalance of materials, typically too much nitrogen-rich “green” matter and not enough carbon-rich “brown” matter. If your pile starts to smell like ammonia or rotting garbage, the solution is to add a generous layer of brown materials like dried leaves, shredded cardboard, or sawdust. This will absorb excess moisture and restore a healthy carbon-to-nitrogen balance.
Is Cold Composting Better Than Hot Composting?
Neither method is inherently “better”; they simply suit different goals and lifestyles. Hot composting is faster and effectively kills weed seeds and pathogens, but it requires more active management, including regular turning and careful monitoring of material ratios. Cold composting is a slow, passive process that requires very little effort, making it ideal for busy individuals or beginner gardeners. The resulting compost from a cold pile is often more biologically diverse, though it may contain viable weed seeds. The best method depends on your available time and effort.
Conclusion
Getting started with composting doesn’t have to be complicated. Cold composting provides a simple, forgiving, and highly effective way to transform your organic waste into a valuable resource for your garden. By following the steps outlined above—from choosing a spot to patiently waiting for nature to work its magic—you can create rich, dark humus that will improve your soil health, reduce your environmental impact, and help your plants thrive. Now that you understand how to cold compost, you are ready to begin your journey toward a more sustainable and productive garden.
About Ravuk Barg
B.Sc. Horticulture Science | Certified Master Gardener
Ravuk Barg has spent more than a decade with his hands in the soil and his head full of questions about why some gardens thrive while others struggle. What started as a single raised bed of tomatoes and basil in a modest backyard has grown into a deep, working knowledge of everything from seed germination and soil amendment to companion planting and seasonal pruning.
Over the years, Ravuk has gardened through drought summers, waterlogged springs, and pest invasions that would make most gardeners hang up their trowels for good. Those hard seasons, he’ll tell you, taught him more than any perfect growing year ever could. He writes from that earned experience—covering vegetable growing, ornamental planting, houseplant care, composting, and garden design with equal confidence and curiosity.
Philosophy & Approach
Ravuk’s approach to gardening is rooted in practicality. He favors organic methods not out of dogma, but because they work long-term—resulting in healthier soil, fewer inputs, and stronger plants. He has a particular fondness for heirloom vegetable varieties (the kind with proper flavor), unruly cottage-style flower beds, and the stubborn houseplants that everyone else gave up on.
The Mission: Give readers the honest, experience-backed advice that helps them actually succeed in their gardens—not just the ideal version, but the real one; weeds, failures, and all.
Education & Credentials
-
B.Sc. in Horticulture Science
-
Greenfield Agricultural University
-
Focus: Plant Physiology, Soil Ecology, and Sustainable Crop Production
-
-
Master Gardener Certification
-
Cooperative Extension Service
-
Focus: 200+ hours of hands-on practical training and community garden work
-
Continuing Education
-
Organic Pest Management
-
Native Plant Landscaping
-
Sustainable Crop Production